I was in the middle of a frantic Saturday night when my roommate dared me to create something that would make our tiny studio feel like a full‑blown dessert buffet. I had a half‑eaten box of Rice Krispies, a couple of overly‑ripe bananas, and a tub of instant vanilla pudding that was begging for a second chance. The kitchen was a symphony of clanking pans, a faint hum of the refrigerator, and the unmistakable scent of butter melting into golden pools. I could already taste the sweet, creamy nostalgia of classic banana pudding, but I wanted that comforting crunch that only a good treat can deliver. That moment of chaotic inspiration turned into a mission: to fuse the beloved Southern classic with the childhood favorite that never fails to bring smiles.
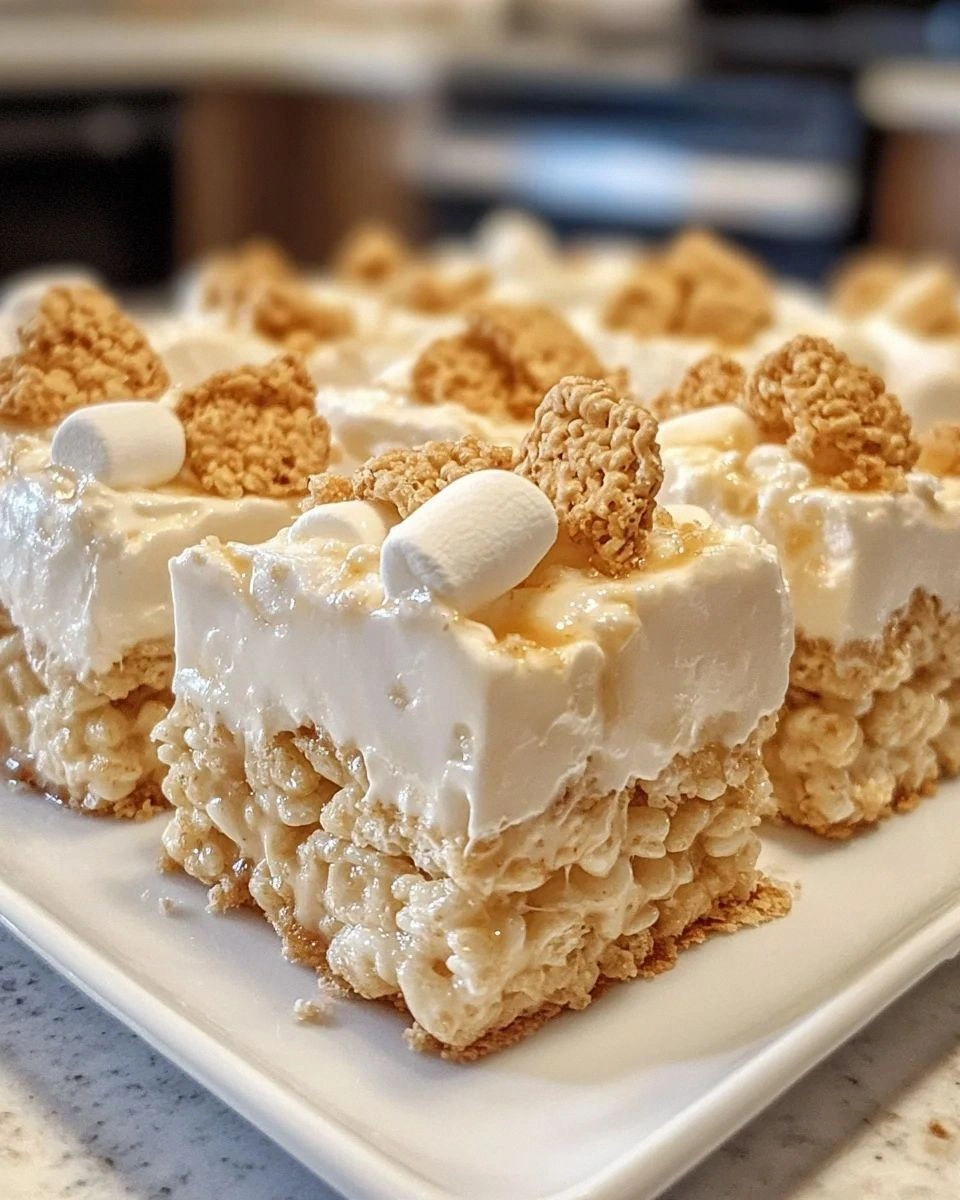
Picture this: the first bite hits your tongue with a buttery, caramelized crunch that shatters like thin ice, instantly followed by a velvety banana‑pudding swirl that coats every morsel like a silk sheet. The aroma of toasted rice cereal mingles with the fragrant whisper of vanilla, while the subtle hint of banana adds a sunny brightness that makes you think of lazy summer afternoons. I could hear the faint crackle as the treat set, and my fingers tingled with the excitement of a new texture adventure. The whole kitchen seemed to hold its breath, waiting for that magical moment when the mixture finally firms up and you can cut a perfect square. The result? A dessert that feels like a hug from your grandma and a high‑five from your inner child at the same time.
Most banana pudding recipes either drown you in soggy noodles or leave you with a bland, one‑dimensional flavor. Most rice‑kreme treats, on the other hand, lack that creamy, pudding‑like heart that makes you want to lick the plate clean. This version flips the script by marrying the two in a way that respects both traditions. I’m talking about a secret ingredient that adds a subtle tang, a technique that guarantees a flawless set, and a timing hack that prevents the dreaded soggy bottom. Trust me, this is hands down the best version you'll ever make at home, and I dare you to taste it and not go back for seconds.
Let me walk you through every single step — by the end, you'll wonder how you ever made it any other way. Okay, ready for the game‑changer? The next part? Pure magic. Stay with me here — this is worth it.
What Makes This Version Stand Out
- Texture: The crisp rice cereal meets a silky pudding core, creating a contrast that’s both crunchy and melt‑in‑your‑mouth.
- Flavor Depth: Fresh bananas add natural sweetness while a splash of vanilla extract lifts the whole profile.
- Simplicity: Only eight pantry staples are needed, and there’s no oven—just a stovetop and a pan.
- Uniqueness: A dash of cream cheese (the unexpected star) gives the pudding a slight tang that balances the sugar.
- Crowd Reaction: Guests often claim it’s “the best thing they’ve ever had at a potluck,” and they’ll be back for more.
- Ingredient Quality: Using ripe, fragrant bananas and real butter makes the flavor sing.
- Method Mastery: The stovetop “toast‑then‑mix” technique locks in crunch without sogginess.
- Make‑Ahead Potential: This treat keeps its texture for up to three days, perfect for busy weeks.
Alright, let's break down exactly what goes into this masterpiece...
Inside the Ingredient List
The Flavor Base
The instant vanilla pudding mix is the heart of this treat. It provides that classic banana pudding flavor we all love, thickening the mixture without the need for a stovetop custard. If you’re allergic to the powdered version, a homemade custard made with egg yolks and sugar works just as well, though it adds a few extra steps. When selecting the pudding mix, look for a brand that lists real vanilla extract as the first ingredient; this ensures a richer, more authentic taste.
The Texture Crew
Rice Krispies cereal supplies the signature crunch. Choose the original version—no added chocolate or cinnamon—so the flavor stays clean and lets the banana shine. If you’re feeling adventurous, a 50/50 blend of puffed quinoa and Rice Krispies adds a nutty nuance while keeping the crunch. The butter, melted to a golden hue, binds the cereal together and adds a buttery sheen that makes the treat look as good as it tastes.
The Unexpected Star
Cream cheese is the secret weapon. A half‑cup of softened cream cheese introduces a faint tang that cuts through the sweetness, preventing the dessert from becoming cloying. It also gives the pudding a richer, creamier mouthfeel, similar to a cheesecake filling. If you’re dairy‑free, substitute with a plant‑based cream cheese; just make sure it’s thick enough to hold its shape.
The Final Flourish
Whipped topping (or homemade whipped cream) adds airy lightness, turning the dense mixture into a cloud‑like layer that lifts the whole dessert. For a healthier twist, fold in Greek yogurt; it adds protein and a slight tang that mirrors the cream cheese’s role. Finally, a pinch of salt amplifies every sweet note, while a splash of vanilla extract deepens the aromatic profile.
Everything's prepped? Good. Let's get into the real action...
The Method — Step by Step
Melt the butter in a large saucepan over medium‑low heat. As it liquefies, you’ll hear a soft sizzle that signals the butter is ready to coat the cereal. Keep your eyes on the color; you want it to turn a light amber, not brown. Once melted, remove the pan from the heat and set aside for a moment while you prep the other components.
In a separate bowl, whisk together the instant vanilla pudding mix and the cold milk until smooth. The mixture should thicken within two minutes, turning a creamy off‑white. This is the moment where the pudding base truly comes alive; you’ll notice a faint vanilla perfume rising from the bowl. Watch out: If you over‑whisk, the pudding can become too airy and won’t hold its shape later.
Add the softened cream cheese to the pudding mixture, beating until fully incorporated. The cream cheese will melt into the pudding, creating a luxurious, velvety texture. If the mixture looks a little lumpy, keep stirring—those lumps will disappear as the cheese softens.
Fold in the sliced bananas, distributing them evenly. The bananas should be ripe enough to give off a sweet, fragrant aroma; this ensures they blend seamlessly with the pudding. Let the banana pieces sit in the mixture for a minute; they’ll release a little of their natural juices, enhancing the overall flavor.
Now comes the crunch: pour the toasted Rice Krispies into the pudding‑banana blend. Gently fold using a rubber spatula, making sure each cereal piece gets a glossy coating. The cereal should stay crisp—if it starts to soften, you’ve over‑mixed, so stop as soon as the mixture looks uniform.
Stir in the vanilla extract and a pinch of salt, then gently fold in the whipped topping. The whipped topping lightens the mixture, making it airy without compromising the structure.
Kitchen Hack: Use a large zip‑top bag to gently toss the mixture; this prevents crushing the cereal and keeps the fluffiness intact.Transfer the mixture into a greased 9‑by‑13‑inch baking dish. Press it down with a spatula, but don’t over‑compact; you want the treat to hold together yet remain airy. The surface should be smooth, with a slight sheen from the butter and pudding.
Allow the treat to set at room temperature for 20‑30 minutes, then refrigerate for at least an hour. The cooling process firms up the pudding and lets the flavors meld. Watch Out: If you skip the refrigeration, the bars will be too soft to cut cleanly and may fall apart.
After chilling, lift the slab out of the pan using the overhanging parchment (if you used it) and slice into squares. The edges should pull away slightly, indicating a perfect set. Serve immediately or store in an airtight container.
That’s it — you did it. But hold on, I've got a few more tricks that'll take this to another level…
Insider Tricks for Flawless Results
The Temperature Rule Nobody Follows
Never let the butter get hotter than a light caramel. If it darkens, it will impart a bitter note that clashes with the sweet banana. Keep the heat low and watch the butter melt slowly; this gives it a glossy finish that coats the cereal like satin.
Why Your Nose Knows Best
When the butter hits the pan, you’ll hear a gentle pop and smell a nutty aroma. That’s your cue to pull it off the heat. If the scent turns smoky, you’ve gone too far. Trust your nose more than the timer.
The 5‑Minute Rest That Changes Everything
After mixing all components, let the bowl sit uncovered for five minutes. This short rest lets the bananas release extra moisture, which then gets absorbed by the pudding, creating a richer mouthfeel. Skipping this step often results in a drier texture.
Gentle Folding, Not Stirring
When you combine the cereal with the pudding, use a folding motion rather than a vigorous stir. This preserves the cereal’s crunch. A friend once tried to “mix it fast” and ended up with soggy bits that fell apart—lesson learned.
Cool, Then Chill
Allow the mixture to sit at room temperature for a brief period before refrigerating. This prevents condensation from forming on the surface, which can make the top soggy. The result is a crisp, dry finish that looks as good as it tastes.
Creative Twists and Variations
This recipe is a playground. Here are some of my favorite ways to switch things up:
Chocolate Banana Dream
Swap half of the Rice Krispies for chocolate puffed rice and add a tablespoon of cocoa powder to the pudding mix. The result is a decadent, mocha‑kissed treat that still retains the banana’s bright character. Chocolate lovers will be thrilled.
Nutty Caramel Crunch
Fold in a handful of toasted pecans and drizzle caramel sauce over the top before chilling. The nuts add an earthy crunch, while the caramel brings a buttery sweetness that elevates the whole dessert.
Tropical Twist
Replace the bananas with diced mango and pineapple, and add a splash of coconut milk to the pudding mixture. This version transports you to a beachside cabana, with a tangy, fruity profile that’s perfect for summer gatherings.
Spiced Autumn
Incorporate a pinch of ground cinnamon and nutmeg into the pudding mix, and garnish with a drizzle of maple syrup. The warm spices complement the banana, making it an ideal dessert for crisp fall evenings.
Vegan Velvet
Use coconut oil instead of butter, plant‑based cream cheese, and a vegan instant pudding mix. The texture remains luscious, and the coconut aroma adds an exotic twist that vegans will adore.
Storing and Bringing It Back to Life
Fridge Storage
Place the cut squares in an airtight container lined with parchment. They’ll stay fresh for up to three days. If you notice any condensation, simply pat the tops with a paper towel before resealing.
Freezer Friendly
Wrap each square individually in plastic wrap, then store them in a zip‑top freezer bag. They freeze beautifully for up to two months. When ready to serve, let them thaw in the fridge for an hour, then add a splash of milk before reheating.
Best Reheating Method
To revive the crunch, pop a single square onto a microwave‑safe plate, add a tiny splash (about a teaspoon) of water, and microwave for 15‑20 seconds. The steam revives the cereal’s snap without making it soggy. Alternatively, a quick 2‑minute stint in a preheated 300°F oven restores the toasted edge.