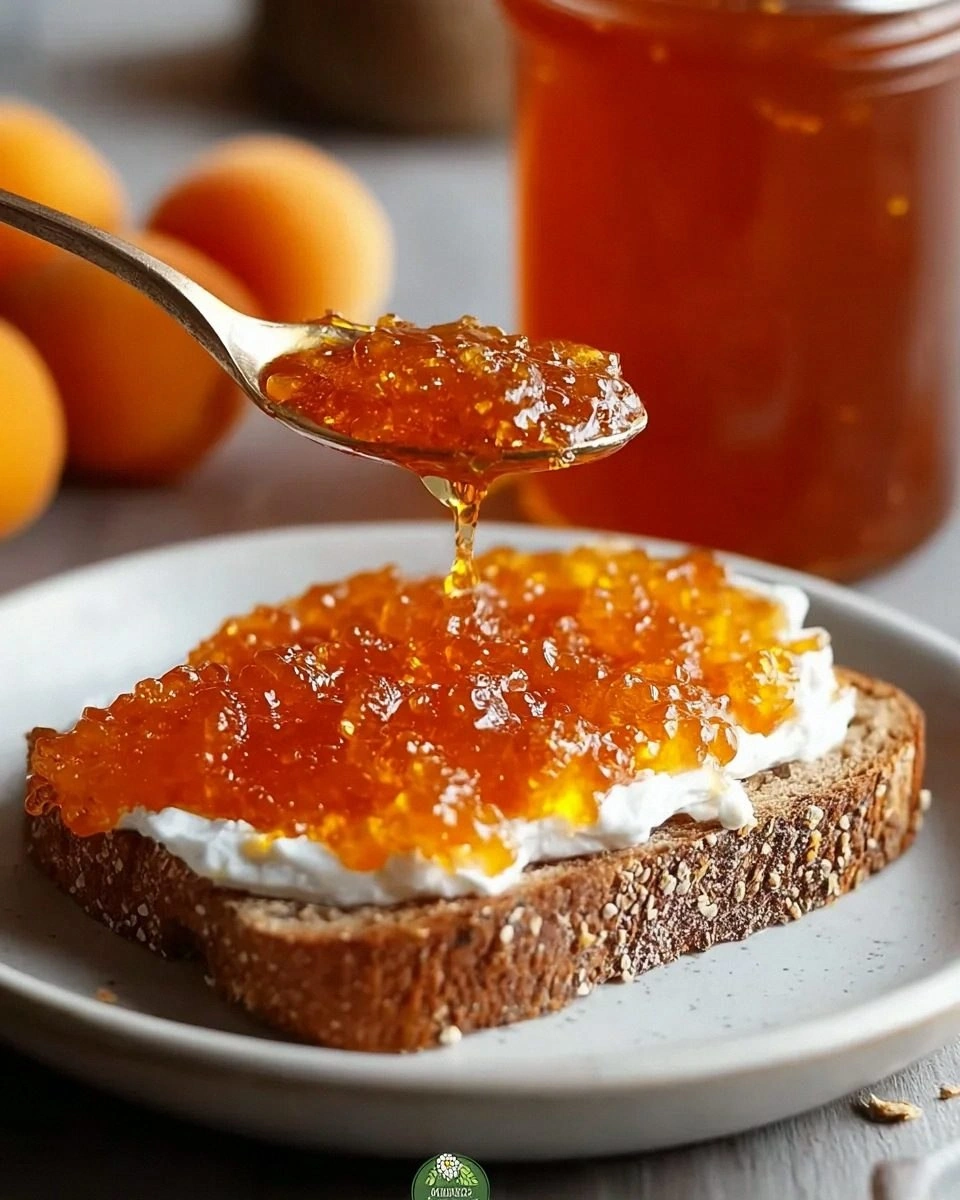
I’m going to start with a confession: the first time I tried to make apricot jam I ended up with a sticky, gloopy mess that looked more like a science‑lab experiment than anything edible. I swear I could hear the pan sigh in disappointment as the fruit refused to cooperate, and my kitchen smelled like burnt sugar masquerading as a failed dessert. Fast forward a few weeks, a few frantic YouTube tutorials, and a daring friend who dared me to “make the best jam you’ve ever tasted” — and that’s when the magic really began. I dug into my pantry, grabbed the ripest apricots I could find, and decided to treat this jam like a love affair, not a quick fix. The result? A glossy, sun‑kissed spread that sings with the flavor of late‑summer orchards and makes toast feel like a celebration.
Picture this: you’re standing at the stove, the butter‑soft apricots have just been tossed into a heavy‑bottomed pot, and the kitchen is already humming with the sweet perfume of caramelizing fruit. The sound of the spoon scraping the bottom is a gentle, rhythmic “swish‑swish” that tells you the jam is coming together. When you add a splash of lemon juice, the aroma instantly lifts, a bright citrus note cutting through the sugary haze like a sunrise over a field of golden blossoms. The texture thickens, pulling away from the sides of the pan in slow, lazy ribbons — that moment is pure, unadulterated joy.
Most jam recipes out there either drown the fruit in sugar or leave you with a watery, bland spread that could double as a fruit‑scented hand sanitizer. Not this one. This version respects the apricot’s natural tart‑sweet balance, using just enough sugar to enhance, not overpower, the fruit’s character. I added a whisper of vanilla and a pinch of cinnamon for depth, and the final product is a jam that holds its shape on a spoon, glistening like amber, yet spreads like silk. I dare you to taste this and not go back for seconds; it’s hands down the best version you’ll ever make at home.
Now, I’m about to walk you through every single step — by the end, you’ll wonder how you ever made jam any other way. Okay, ready for the game‑changer? Let’s dive into the details, starting with what makes this version truly stand out.
What Makes This Version Stand Out
- Taste: The jam balances the apricot’s natural honeyed notes with a subtle citrus zing, creating a flavor profile that feels both familiar and exciting.
- Texture: Thanks to a gentle simmer and the right sugar‑to‑fruit ratio, the jam sets with a glossy sheen yet stays spreadable, never gummy.
- Simplicity: Only five core ingredients are needed, and the optional spices are truly optional — no fancy equipment required.
- Uniqueness: A dash of vanilla and a pinch of cinnamon give the jam a cozy, almost dessert‑like finish that most store‑bought versions lack.
- Crowd Reaction: Guests routinely ask for the recipe after the first spoonful, and the jam becomes the star of brunch tables, cheese boards, and even cocktail mixers.
- Ingredient Quality: Using fresh, ripe apricots ensures a bright, natural sweetness that canned fruit simply can’t match.
- Cooking Method: A low‑and‑slow simmer preserves the fruit’s delicate aromatics while allowing the natural pectin to develop.
- Make‑Ahead Potential: This jam stores beautifully for months, meaning you can enjoy summer flavors all winter long.
Inside the Ingredient List
The Flavor Base
Fresh Ripe Apricots are the heart of this jam. Choose fruit that’s firm yet yields slightly under gentle pressure — this indicates peak ripeness and maximum flavor. If you pick underripe apricots, the jam will taste tart and lack that buttery sweetness; overripe fruit can become mushy and lose its bright color. When selecting, look for a deep orange hue and a faint, fragrant perfume; the scent is a reliable indicator of quality. Pro tip: buying apricots from a local farmer’s market often yields fruit that’s been harvested at the perfect moment, unlike supermarket varieties that travel long distances.
The Sweet Backbone
Granulated Sugar does more than just sweeten; it acts as a preservative, drawing moisture out of the fruit and helping the jam set. The right amount of sugar ensures the jam isn’t overly cloying while still achieving that glossy finish. If you’re watching sugar intake, you can substitute half the sugar with honey or agave syrup, but expect a slightly thinner texture and a hint of floral undertone. Remember, honey brings its own flavor, so the jam will taste a touch different — a delightful twist if you enjoy nuanced sweetness.
The Brightening Agent
Lemon Juice is the unsung hero that balances the jam’s sweetness and aids in the natural pectin activation. A splash of lemon not only prevents the jam from turning overly dark during cooking but also adds a zingy brightness that lifts the entire flavor profile. If you’re out of fresh lemons, a tablespoon of bottled lemon juice works fine, though the fresh version offers a cleaner, more vibrant acidity. Skipping the lemon entirely will result in a jam that feels flat and may not set properly.
The Unexpected Star
Optional Ingredients like cinnamon, nutmeg, or vanilla extract turn a simple jam into a gourmet spread. A pinch of cinnamon adds warmth that pairs beautifully with the fruit’s natural sweetness, while a drop of vanilla extracts a floral note that lingers on the palate. These additions are completely optional, but they’re the secret weapons I use when I want to impress guests or elevate a humble breakfast toast. Feel free to experiment — a touch of cardamom can give a Middle‑Eastern flair, for instance.
Everything's prepped? Good. Let’s get into the real action…
The Method — Step by Step
Start by washing the apricots under cool running water, then pat them dry with a clean kitchen towel. Slice each apricot in half, remove the pits, and give the flesh a quick chop — roughly one‑inch pieces work best. This size ensures even cooking and helps the fruit break down without turning into a puree. I like to do this while a playlist of upbeat tunes plays in the background; the rhythm keeps you from over‑thinking the chopping.
Transfer the chopped apricots into a heavy‑bottomed saucepan (a 2‑quart pot is perfect). Add the granulated sugar, then give everything a gentle stir to coat the fruit. Let the mixture sit for about 10 minutes; this “macération” step allows the sugar to draw out the apricots’ juices, creating a natural syrup that’s the foundation of your jam. That sizzle when it hits the pan? Absolute perfection.
Kitchen Hack: Sprinkle a pinch of sea salt during macération; it enhances the fruit’s sweetness without making the jam salty.Place the pot over medium heat and bring the mixture to a gentle boil, stirring occasionally to prevent scorching. Once you see bubbles forming around the edges, lower the heat to a steady simmer. This is the moment of truth — you’ll hear a soft, continuous bubbling that signals the jam is beginning to thicken. Keep the lid off; you want moisture to evaporate so the jam can achieve that perfect spreadable consistency.
Add the lemon juice now, and if you’re feeling adventurous, stir in a pinch of cinnamon and a splash of vanilla extract. The lemon’s acidity will brighten the flavor, while the spices add depth. Stir gently for about a minute to let the aromas meld. If you’re using honey instead of sugar, add it now to avoid scorching; honey’s lower boiling point means it integrates smoothly at this stage.
Continue to simmer for 20‑25 minutes, stirring every few minutes. You’ll notice the mixture thickening and the fruit’s edges pulling away from the pot — that’s your visual cue that the jam is nearing perfection. To test, place a small spoonful on a chilled plate; if it firms up within a few seconds, you’re done. If it’s still runny, give it another 5 minutes and test again.
Watch Out: Over‑cooking can turn the jam grainy; keep the heat low and monitor the texture closely.When the jam reaches the desired consistency, remove the pot from heat. If you prefer a smoother texture, run the jam through a handheld immersion blender for just a few seconds — be careful not to over‑blend, or you’ll lose the lovely little fruit pieces that give the jam character. I love the occasional bite of a soft apricot chunk that bursts with sunshine.
Prepare your jars while the jam is still hot. Sterilize them by boiling for 10 minutes, then let them air‑dry on a clean towel. Using a funnel, ladle the jam into each jar, leaving about a quarter‑inch of headspace. Wipe the rims clean, seal with the lids, and invert the jars for 5 minutes to create a vacuum seal. This step is pure magic; the jam will stay fresh for months without refrigeration.
Allow the jars to cool completely, then store them in the refrigerator for up to a month, or in a cool dark pantry for up to six months if sealed properly. When you finally crack open a jar, the aroma will transport you straight back to the sunny orchard where the apricots were harvested. And yes, I’ll be honest — I ate half the batch before anyone else got to try it.
That’s it — you did it. But hold on, I’ve got a few more tricks that’ll take this to another level…
Insider Tricks for Flawless Results
The Temperature Rule Nobody Follows
Most home cooks think “just simmer until it looks thick.” The truth is, temperature is the real ruler. Keep the jam at a steady 220°F (105°C) for the final 10 minutes; this is the sweet spot where pectin sets without the sugar caramelizing too hard. I use a candy thermometer clipped to the side of the pot — if you don’t have one, a quick water‑drop test works: drop a tiny spoonful into ice water; if it firms, you’re good. A friend once skipped this step, and the jam turned into a syrupy mess that never set. Lesson learned: trust the thermometer.
Why Your Nose Knows Best
Your sense of smell is a more reliable indicator than a timer. As the jam cooks, the kitchen will fill with a fragrant blend of caramelized apricots and citrus. When that aroma deepens to a honey‑like scent, you’re approaching perfection. If you ever hear a faint burnt smell, lower the heat immediately — the jam can go from perfect to scorched in seconds. Trust your nose; it’s the most honest kitchen judge.
The 5‑Minute Rest That Changes Everything
After you’ve poured the jam into jars, let them sit upright for five minutes before sealing. This short rest allows the jam to settle and the air bubbles to rise, resulting in a smoother finish and a stronger seal. I used to seal immediately and end up with a few jars that didn’t pop when cooled. The extra five minutes are a tiny time investment for a big payoff in texture and shelf‑life.
The “Cold Plate” Trick
If you’re unsure whether the jam is set, place a small spoonful on a chilled plate (or a piece of parchment that’s been in the freezer). The cold surface accelerates the setting process, letting you see the final texture in seconds. This trick saved me countless nervous moments during my first batch, and now it’s my go‑to method whenever I’m in a hurry.
The “Double‑Layer” Jar Seal
For extra security, after the first seal, place the jar in a pot of simmering water for 5 minutes. This “water‑bath” step creates a second vacuum layer, guaranteeing that even if you store the jam in a pantry, it won’t spoil. It’s a technique borrowed from canning, and while it adds a few minutes, the peace of mind is worth it.
Creative Twists and Variations
This recipe is a playground. Here are some of my favorite ways to switch things up:
Spiced Chai Apricot Jam
Swap the vanilla for a pinch of chai spice blend (cardamom, ginger, cloves). The result is a warm, aromatic jam perfect for spreading on morning oatmeal or stirring into chai lattes.
Apricot‑Berry Fusion
Add a cup of mixed berries (raspberries, blueberries, strawberries) during the simmer. The berries introduce a tart counterpoint, creating a complex flavor that works beautifully on cheese boards.
Honey‑Lavender Apricot
Replace half the sugar with honey and stir in a teaspoon of culinary lavender buds. The floral notes elevate the jam to a gourmet spread for scones or as a glaze for roasted pork.
Savory Apricot Chutney
Add a tablespoon of soy sauce, a pinch of chili flakes, and a splash of apple cider vinegar. This savory version pairs wonderfully with grilled chicken, roasted vegetables, or as a topping for burgers.
Alcohol‑Infused Apricot Jam
Stir in a quarter cup of brandy or apricot liqueur after removing the jam from heat. The alcohol deepens the flavor and makes the jam an excellent accompaniment to desserts like panna cotta or ice cream.
Storing and Bringing It Back to Life
Fridge Storage
Once opened, keep the jam in a clean glass jar sealed tightly and store it in the refrigerator. It will stay fresh for up to four weeks. Always use a clean spoon to avoid contamination, and give the jar a quick shake before each use to redistribute any settled sugars.
Freezer Friendly
If you’ve made a large batch, portion the jam into freezer‑safe containers or zip‑lock bags. Lay the bags flat for easy stacking, then freeze for up to six months. Thaw in the refrigerator overnight, and you’ll have a ready‑to‑spread jam that tastes just as fresh as the day it was made.
Best Reheating Method
When you’re ready to use a refrigerated jar, place it in a saucepan with a splash of water (about two tablespoons) and warm over low heat. The water creates steam that revives the jam’s silky texture without burning it. If the jam looks too thick, add a tiny drizzle of water and stir; the jam will come back to life in seconds.