Picture this: you’ve just rescued a bag of dark chocolate from the back of the pantry, the aroma already promising a midnight rendezvous, and you’re staring at a blank baking sheet wondering why every brownie you’ve ever made feels like a soggy, over‑cooked disappointment. I was in the same spot last week, battling a stubborn craving that refused to be satisfied by store‑bought bars or even that “quick‑mix” brownie mug I keep in the freezer. I threw a dare at my roommate – “I bet I can whip up a brownie that’s richer than a double‑espresso and still holds its shape without a single grain of flour” – and that’s exactly what sparked this obsession.
Fast forward to Saturday afternoon, the kitchen turned into a chocolate‑scented laboratory. The butter hissed as it melted into the chocolate, creating a glossy river that reminded me of a midnight lava flow. The sound of the whisk against the bowl was a rhythmic chant, like a drum solo that promised something epic. My hands felt the buttery heft, the sugar’s granular kiss, and the almond meal’s subtle grit that would later give the brownies their signature crumble‑like texture. The oven’s warm glow was the stage lighting for what was about to become the star of any dessert table.
What makes this version stand out? It’s the perfect marriage of decadence and structure. By ditching traditional wheat flour and swapping in almond meal and rice flour, we get a brownie that’s dense, fudgy, and yet surprisingly light on the palate – a texture that most “flourless” attempts completely miss. The secret? A precise balance of butter‑to‑chocolate ratio that creates a glossy, crack‑topped crust while keeping the interior gooey enough to melt in your mouth. And let’s not forget the pinch of kosher salt that awakens every chocolate note, turning a simple treat into a symphony of flavors.
And here’s the kicker: I’ll be honest — I ate half the batch before anyone else got a chance to try it. That’s how good it is. I dare you to taste this and not go back for seconds. This isn’t just a brownie; it’s a challenge to every other dessert you’ve ever made. Okay, ready for the game‑changer? Let me walk you through every single step — by the end, you’ll wonder how you ever made it any other way.
What Makes This Version Stand Out
- Fudgy Core: The high butter‑to‑chocolate ratio guarantees a melt‑in‑your‑mouth center that stays moist for days.
- Crackly Crown: A thin, glossy crust forms as the edges pull away, delivering that satisfying “snap” you crave.
- Gluten‑Free Glory: Using almond meal and rice flour eliminates gluten without sacrificing structure, making it safe for most sensitivities.
- Simple Ingredient List: Only eight ingredients, all pantry‑friendly, meaning less shopping and fewer chances to mess up.
- Instant Crowd‑Pleaser: Even the toughest chocolate skeptics admit this is hands down the best version you’ll ever make at home.
- Make‑Ahead Magic: These brownies keep their texture for up to a week, so you can bake ahead for parties or surprise guests.
- Versatile Base: The neutral almond‑rice blend welcomes endless flavor twists – think orange zest, espresso, or sea salt.
- Low‑Mess Cleanup: One bowl, one pan, and a handful of utensils – perfect for when you’re short on time but big on flavor.
Inside the Ingredient List
The Flavor Base
The dark chocolate chips or melts are the heart of this brownie. Choose a high‑quality semi‑sweet chocolate with at least 60% cacao for depth; lower percentages will taste dull, while higher percentages can become bitter. If you’re craving a sweeter profile, a blend of dark and milk chocolate works, but expect a softer texture. Skipping this or substituting with cheap chocolate will result in a flat, bland bite that fails to deliver the promised richness.
The Texture Crew
Unsalted butter, melted into the chocolate, creates a glossy sheen and contributes to that melt‑in‑your‑mouth feel. The 85 g (or 6 tbsp) amount is calibrated to keep the brownies tender without turning them greasy. Too much butter makes the crumb too soft, while too little causes a dry, crumbly mess. For a dairy‑free twist, substitute with coconut oil, but expect a faint coconut flavor that can be delightful for some.
The Unexpected Star
Almond meal (ground almonds) brings a subtle nutty undertone and a delicate crumb structure that replaces wheat flour. It also adds healthy fats and a slight crunch. If you’re allergic to nuts, try sunflower seed meal as a one‑to‑one swap. Rice flour, on the other hand, provides the lightness that keeps the brownies from feeling dense, acting like a fine dusting of snow on a chocolate mountain.
The Final Flourish
Brown sugar isn’t just for sweetness; its molasses content deepens the chocolate flavor and adds a hint of caramel. The ¾ cup measurement ensures the brownies are sweet enough to balance the bitterness of dark chocolate without becoming cloying. Vanilla extract, though a small addition, lifts the overall aroma, turning the kitchen into a bakery wonderland. Skipping the salt is a rookie mistake – the ¼ tsp of kosher salt is the secret whisper that makes each bite sing.
Everything’s prepped? Good. Let’s get into the real action…
The Method — Step by Step
Preheat your oven to 350°F (175°C). While the oven heats, line an 8‑inch square pan with parchment paper, allowing the edges to overhang for easy lift‑out later. This is the foundation – a well‑lined pan prevents sticking and gives you that perfect, clean edge that shatters like thin ice when you break a piece.
Kitchen Hack: Cut the parchment a few inches longer than the pan; use the excess as a handy “handle” to lift the brownies out without breaking them.Combine the chocolate chips and butter in a heat‑proof bowl. Set the bowl over a pot of simmering water (double boiler) and stir until completely melted and smooth. You’ll hear a gentle hiss as the butter meets chocolate – that sizzle when it hits the pan? Absolute perfection. Once melted, remove from heat and let it sit for a minute to thicken slightly; this cooling step prevents the eggs from scrambling later.
In a separate large mixing bowl, whisk together the brown sugar, vanilla extract, and the pinch of kosher salt. The sugar crystals should dissolve a bit, creating a glossy, slightly sticky mixture that feels like wet sand. This is where the flavor starts to build, and the aroma will already be making your mouth water.
Add the eggs one at a time, whisking vigorously after each addition. The batter should become thick and glossy, almost like a luxurious chocolate glaze. If the mixture looks too runny, that’s a sign the butter‑chocolate blend was too hot – let it cool a touch longer. This is the moment of truth; don’t skip the whisk, or you’ll end up with pockets of uncooked egg.
Watch Out: Adding the eggs while the chocolate is still scorching hot will cause them to curdle, ruining the texture. Ensure the chocolate‑butter mixture is warm, not hot.Fold in the almond meal and rice flour using a rubber spatula. The batter will look slightly grainy – that’s the almond meal’s texture doing its job. Scrape the sides of the bowl to ensure everything is evenly incorporated; you want a uniform chocolate‑brown color with no white streaks of flour.
Now, gently pour the batter into the prepared pan, smoothing the top with the spatula. The surface should be glossy and slightly thick. Tap the pan on the counter a few times to release any trapped air bubbles – you’ll hear a soft “pop” as the batter settles.
Slide the pan into the preheated oven and bake for 25‑30 minutes. Around the 20‑minute mark, check the edges; they should start pulling away from the sides, and a thin crust will form. The center should still be a bit soft – a toothpick inserted should come out with a few moist crumbs, not wet batter. This is the sweet spot that guarantees a fudgy interior.
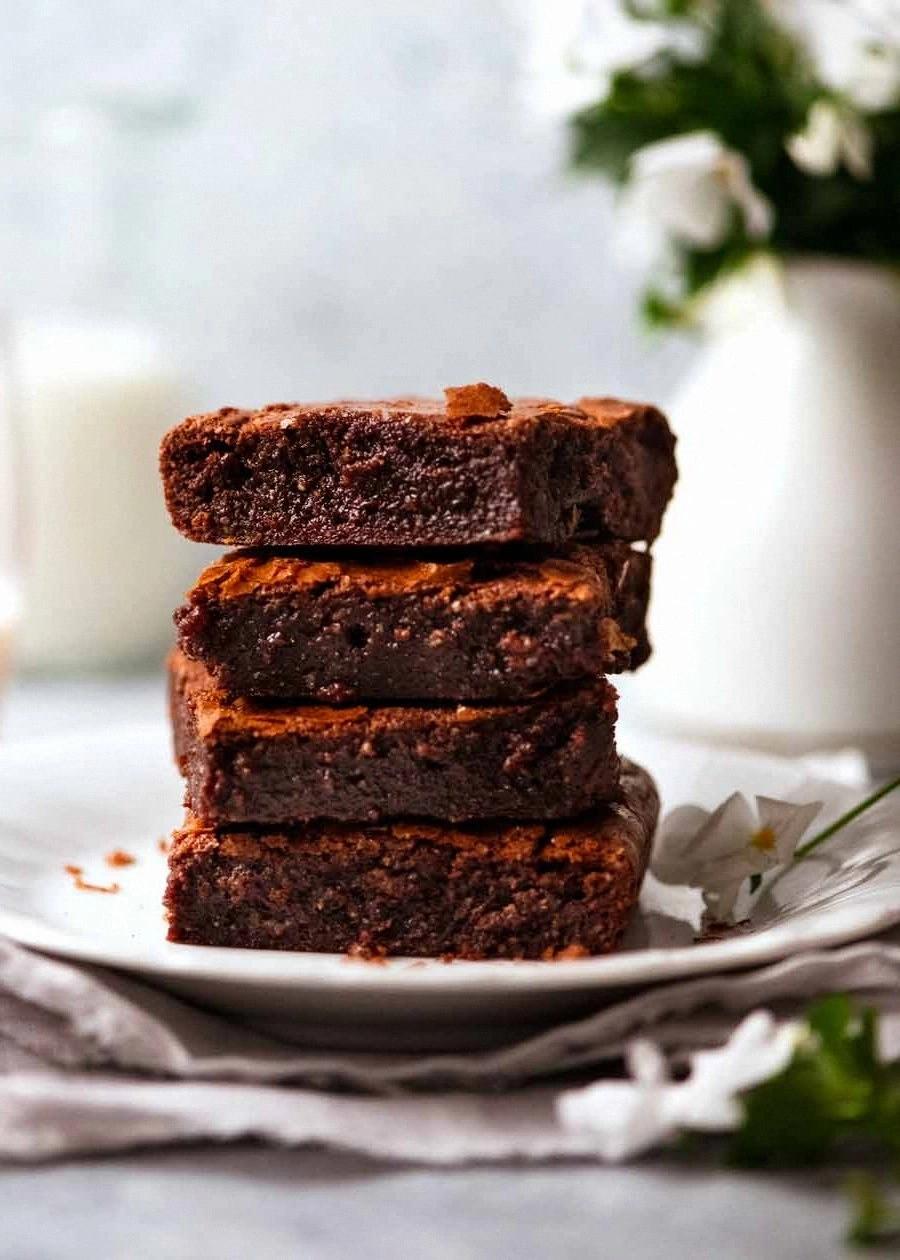
Kitchen Hack: If you prefer a shinier top, place a piece of foil over the brownies for the last 5 minutes; it reflects heat and creates a glossy finish.Remove the pan from the oven and let the brownies cool in the pan for at least 15 minutes. This resting period allows the crumb to set, making cutting easier. Then, using the parchment overhang, lift the whole slab onto a cutting board and slice into squares. The edges should crack slightly, revealing the fudgy interior – a visual cue that you’ve nailed the texture.
That’s it — you did it. But hold on, I’ve got a few more tricks that’ll take this to another level…
Insider Tricks for Flawless Results
The Temperature Rule Nobody Follows
Always let the melted chocolate and butter sit for at least one minute before mixing with the eggs. This tiny cooling window brings the temperature down to a safe range (around 120°F), ensuring the eggs don’t scramble and the batter stays smooth. I once tried to rush this step and ended up with a grainy mess that resembled a chocolate mousse gone wrong. Trust the pause; your brownies will thank you.
Why Your Nose Knows Best
When the brownies are baking, the kitchen should fill with a deep, roasted chocolate aroma that makes you want to hover over the oven door. If you’re not smelling that sweet, nutty perfume, the oven may be too low, and the brownies will be under‑cooked. On the flip side, a burnt scent means you’ve overcooked – pull them out early and they’ll stay fudgy.
The 5‑Minute Rest That Changes Everything
After you pull the brownies from the oven, let them sit in the pan for exactly five minutes before transferring to a wire rack. This short rest lets the steam redistribute, solidifying the crust while keeping the center luscious. Skipping this step often results in a crumbly edge that breaks apart when you cut.
Don’t Over‑Mix the Dry Ingredients
When folding in almond meal and rice flour, stop as soon as you see no streaks of flour. Over‑mixing develops the gluten in the rice flour (yes, it has a tiny amount) and can make the brownies tough. A gentle fold keeps the crumb tender and airy.
Chocolate Quality is Non‑Negotiable
Invest in good chocolate. I once used a bargain brand that claimed “70% cacao” but tasted more like cocoa powder with added sugar. The result? A bitter, dry brownie that could have been a coffee substitute. Premium chocolate not only tastes better but also melts more evenly, giving you that glossy, professional‑look crust.
Creative Twists and Variations
This recipe is a playground. Here are some of my favorite ways to switch things up:
Espresso Edge
Replace 1 tablespoon of the almond meal with finely ground espresso beans. The coffee notes amplify the chocolate, giving the brownies a sophisticated, slightly bitter edge that pairs beautifully with a splash of milk.
Orange Zest Zing
Add the zest of one large orange to the batter before folding in the dry ingredients. The citrus brightens the deep chocolate, creating a burst of flavor that’s perfect for a spring brunch.
Sea Salt Sprinkle
Just before baking, sprinkle flaky sea salt over the top. The salt crystals pop against the sweet crust, delivering that classic sweet‑and‑salty sensation that makes every bite unforgettable.
Nutty Crunch
Fold in ¼ cup of toasted chopped hazelnuts or walnuts for an added crunch. The nuts add texture contrast and a buttery flavor that complements the almond meal.
Gluten‑Free Berry Swirl
Gently swirl in a tablespoon of raspberry puree after the batter is in the pan. The tartness of the berries cuts through the richness, offering a beautiful pink marbled look.
Spiced Holiday
For a winter twist, add ½ teaspoon of ground cinnamon and a pinch of ground cloves to the dry mix. The warm spices turn these brownies into a cozy, festive treat.
Storing and Bringing It Back to Life
Fridge Storage
Place the cooled brownies in an airtight container and store them in the refrigerator for up to five days. The cool environment preserves the fudgy texture and keeps the chocolate from blooming.
Freezer Friendly
Wrap the entire slab tightly in plastic wrap, then foil, and freeze for up to three months. When you’re ready to enjoy, thaw overnight in the fridge and then let sit at room temperature for 30 minutes before serving.
Best Reheating Method
To revive that fresh‑out‑of‑the‑oven feel, place a slice on a microwave‑safe plate, add a tiny splash (about a teaspoon) of water, and microwave on low for 10‑15 seconds. The steam generated will bring back the soft interior without making it soggy.