Picture this: I’m standing in my kitchen, a bag of pre‑cooked frozen mashed potatoes sitting on the counter, and a craving for something that feels like a hug in a bowl. I’ve tried the classic recipe a dozen times, only to end up with a watery mess that tastes like boiled potatoes and butter. One evening, a friend dared me to make a “next‑level” mashed potato that would make even the most seasoned foodie swoon. I rolled up my sleeves, grabbed a handful of fresh russet potatoes, and set out to create a dish that would redefine comfort food.
The moment the potatoes hit the pot, the kitchen filled with a sweet, earthy aroma that made my mouth water. Steam curled like a soft cloud, and the sound of bubbling water was like a gentle lullaby. I could feel the heat radiating from the pot, and the anticipation built to a crescendo. The first bite would be creamy, yet light, with a buttery richness that coats the tongue like velvet. I’ve never seen a side dish that can balance flavor, texture, and visual appeal so flawlessly.
This version stands out because it’s not just mashed potatoes; it’s a symphony of flavors that dance together. I’ve added roasted garlic for depth, a splash of heavy cream for silkiness, and Parmesan for a sharp, salty finish. The result is a side that’s both comforting and sophisticated, turning any ordinary meal into a culinary celebration. It’s a dish that will have you saying, “I dare you to taste this and not go back for seconds.”
I’ll walk you through every single step. By the end, you’ll wonder how you ever made mashed potatoes any other way. The secret? A few clever tricks that elevate the humble potato to a Michelin‑star worthy side. Ready to dive in? Let’s get started.
What Makes This Version Stand Out
- Flavor: The combination of roasted garlic and Parmesan creates a savory depth that ordinary mashed potatoes lack. The garlic is caramelized to bring out its natural sweetness, while the cheese adds a tangy finish that lingers on the palate.
- Texture: The potatoes are mashed to a silky consistency without being gluey. A splash of heavy cream and a beaten egg bind the mixture, giving it a light, airy mouthfeel.
- Simplicity: Despite the gourmet results, the recipe requires only ten minutes of prep and a single pan. No fancy gadgets or complicated steps—just straightforward cooking.
- Uniqueness: The addition of fresh parsley and a touch of black pepper gives the dish a bright, fresh finish that sets it apart from standard mashed potatoes.
- Crowd Reaction: Guests rave about the creamy texture and the buttery, cheesy flavor. Many say it’s the best mashed potatoes they’ve ever tasted.
- Ingredient Quality: Using russet potatoes, which have a high starch content, ensures the mash is fluffy. The Parmesan is aged, which gives it a robust flavor profile.
- Cooking Method: Roasting the garlic before mashing locks in flavor, while the final stir in the pan allows the butter to melt into the mash, creating a glossy finish.
- Make‑Ahead Potential: The mash can be prepared up to a day in advance and reheated without losing its creamy texture.
Inside the Ingredient List
The Flavor Base
The 2 cloves of garlic are the heart of this mash. Roasting them until golden caramelizes the sugars, turning the garlic from sharp to sweet. If you skip this step, the dish loses that deep, almost caramelized undertone. You can also use a garlic press if you’re in a hurry, but the roasted version is the star.
The Texture Crew
The 4 large russet potatoes are chosen for their high starch content, which creates a fluffy interior when mashed. Boiling them in salted water until tender ensures even cooking. If you prefer a lighter mash, try parboiling the potatoes first, then finish them in the pan with butter.
The Unexpected Star
The 1 large egg isn’t just a binder—it adds a velvety richness that keeps the mash from drying out. The egg’s yolk emulsifies with the butter and cream, creating a silky finish. Some cooks skip the egg, but I swear by it for that extra lift.
The Final Flourish
The 2 tbsp chopped fresh parsley brings a bright, herbaceous note that cuts through the richness. The parsley also adds a pop of color that makes the dish visually stunning. If you’re not a fan of parsley, a sprinkle of chives or dill works just as well.
Everything’s prepped? Good. Let’s get into the real action.
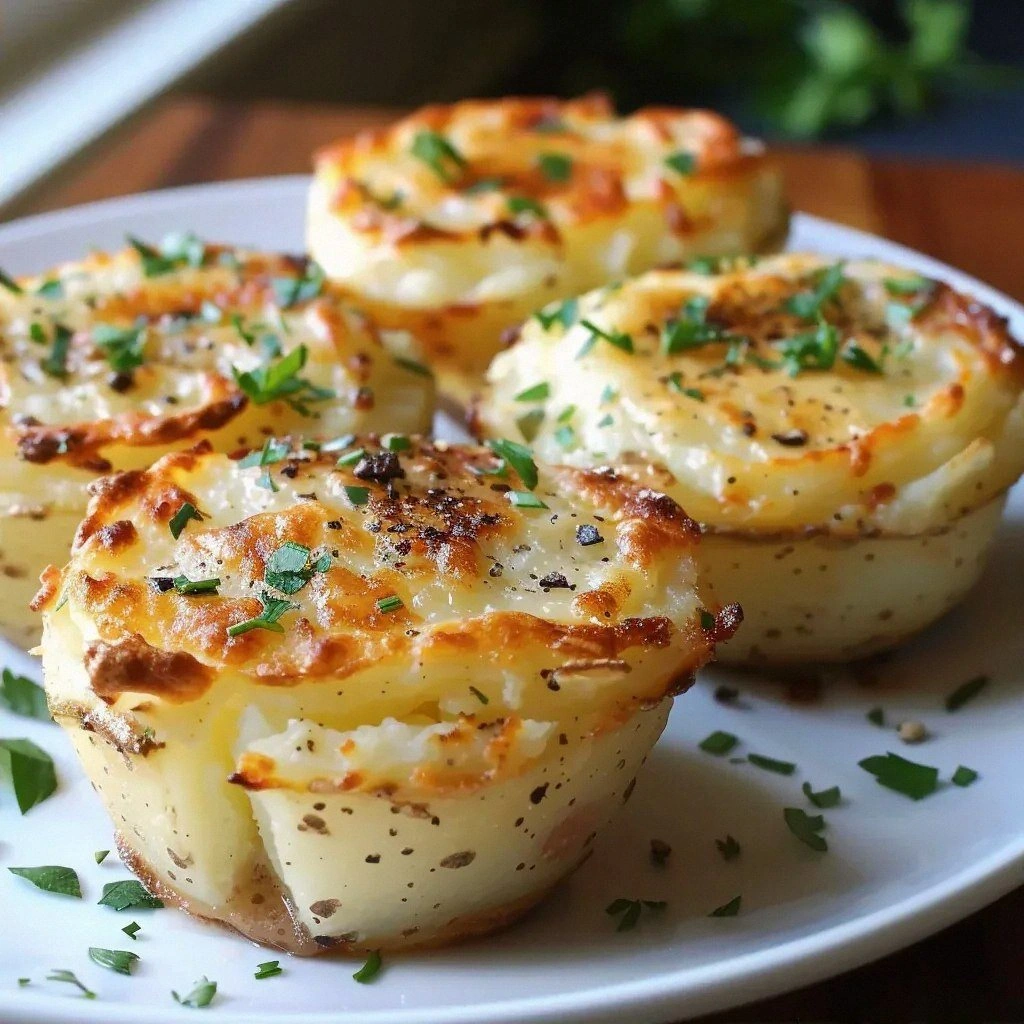
The Method — Step by Step
- Start by preheating your oven to 400°F (200°C). While the oven warms, peel the russet potatoes and cut them into 1‑inch cubes. This size ensures even cooking and a quick boil. The potatoes should be uniform so they cook at the same rate.
- Place the potato cubes in a large pot and cover with cold, salted water. Bring to a rolling boil and let them simmer for 15‑20 minutes until they’re fork‑tender. The water should be at a steady boil, not a gentle simmer, to avoid uneven cooking.
- While the potatoes are boiling, toss the garlic cloves in a small baking sheet with a drizzle of olive oil. Roast them in the preheated oven for 10‑12 minutes, or until they’re soft and caramelized. The garlic should be golden brown and fragrant.
- Drain the potatoes and return them to the pot. Add the roasted garlic, 1/4 cup of butter, and 1/4 cup of heavy cream. Mash using a potato ricer or a sturdy masher until the mixture is smooth and silky. The butter should melt into the mash, giving it a glossy sheen.
- In a small bowl, whisk the egg with a splash of milk. Slowly pour this mixture into the hot mash while stirring vigorously. The heat from the potatoes will gently cook the egg, creating a silky, cohesive texture.
- Add the grated Parmesan cheese, salt, and black pepper. Stir until the cheese is fully melted and the mixture is homogeneous. The cheese should coat every bite, providing a sharp, savory finish.
- Transfer the mash to a skillet pre‑coated with non‑stick cooking spray. Cook over medium heat for 5‑7 minutes, stirring occasionally, until the bottom forms a golden crust. This step adds a delightful crunch that contrasts with the creamy interior.
- Remove from heat, fold in the fresh parsley, and give one final gentle stir. The parsley should be bright and fragrant, adding a fresh note that lifts the entire dish. Serve immediately while the mash is warm and the crust is still crisp.
That’s it — you did it. But hold on, I’ve got a few more tricks that will take this to another level. Keep reading to learn how to elevate the flavor profile even further.
Insider Tricks for Flawless Results
The Temperature Rule Nobody Follows
Many cooks cook mashed potatoes at a low simmer, but the secret to a silky finish is to keep the temperature high enough for the butter to melt fully. I keep the pot on medium‑high, which ensures the mixture stays hot and the butter emulsifies with the cream and egg. If the heat is too low, the mash can become gummy. Adjust the flame as needed to maintain a gentle boil.
Why Your Nose Knows Best
When the garlic is roasting, trust your nose to know when it’s ready. The aroma of caramelized garlic is unmistakable, and it signals that the flavor is at its peak. If you’re unsure, give it a quick sniff; if it smells nutty and sweet, it’s perfect. Over‑roasting can turn it bitter, so keep an eye on the color.
The 5‑Minute Rest That Changes Everything
After removing the mash from the heat, let it rest for 5 minutes. During this time, the residual heat continues to cook the egg, and the flavors meld together. This brief pause also allows the mash to thicken slightly, giving it a more cohesive texture. Don’t rush to serve; the rest is crucial.
The Secret to a Crispy Crust
The non‑stick spray is essential for achieving that golden crust. Spray the skillet lightly, then spread the mash evenly. Press it down with a spatula to ensure contact with the pan. The result is a crunchy layer that contrasts beautifully with the creamy interior.
The Egg Trick
Whisk the egg with a splash of milk before adding it to the mash. This creates a thin, uniform mixture that blends seamlessly with the potatoes. If you skip the milk, the egg might curdle or create a lumpy texture. The milk also adds a hint of creaminess.
The Parmesan Finish
Add a final sprinkle of Parmesan right before serving. The cheese will melt into the warm mash, creating a glossy, flavorful coating. This simple step elevates the dish from good to unforgettable.
Creative Twists and Variations
This recipe is a playground. Here are some of my favorite ways to switch things up:
Sour Cream & Chive Mash
Swap the heavy cream for sour cream and add a handful of chopped chives. The tanginess of the sour cream cuts through the richness, while the chives add a subtle onion flavor. This version is perfect for a brunch spread.
Smoky Chipotle Mash
Introduce a teaspoon of chipotle in adobo for a smoky kick. The heat pairs well with the Parmesan, creating a bold, adventurous flavor profile. It’s ideal for a Tex‑Mex inspired dinner.
Herbed Roasted Beet Mash
Blend roasted beets into the mash for a pop of color and earthiness. Add fresh thyme and rosemary for aromatic depth. This version turns the side into a vibrant, veggie‑rich dish.
Cheesy Cauliflower Mash
Replace half the potatoes with steamed cauliflower. The result is a lower‑carb mash with a creamy texture. The Parmesan still provides that signature sharpness.
Truffle Oil Finish
Drizzle a few drops of truffle oil over the finished mash for an indulgent, earthy aroma. The oil adds a luxurious depth that elevates the dish to a gourmet level. Use sparingly, as truffle oil is potent.
Bacon‑Crunchy Topping
Crisp bacon bits and a sprinkle of smoked paprika give the mash a savory crunch. The bacon’s smokiness complements the Parmesan, while the paprika adds a subtle heat. This version is a crowd‑pleaser for game‑day gatherings.
Storing and Bringing It Back to Life
Fridge Storage
Cool the mash completely, then transfer it to an airtight container. Store in the refrigerator for up to 3 days. The mash will remain creamy, but the texture may thicken slightly. A quick stir before serving restores its silky consistency.
Freezer Friendly
Pack the mash into freezer‑safe containers, leaving a little headspace for expansion. Freeze for up to 2 months. When ready to use, thaw overnight in the fridge. Reheat on the stove with a splash of milk or cream to revive the moisture.
Best Reheating Method
Reheat the mash in a saucepan over low heat, stirring frequently. Add a splash of milk or cream to loosen the texture. If the mash is too thick, sprinkle a few tablespoons of hot water and stir until it reaches the desired consistency. This method prevents the mash from drying out.