I was standing in my kitchen, staring down a half‑baked, soggy mess that looked more like a science experiment than a dessert. The timer had gone off, the peanut butter was clumping, and the cream cheese was doing a nervous jig on the counter. I swear I heard my neighbor’s dog bark in protest at the smell of burnt sugar, and I thought, “If I can’t fix this, at least I can make something unforgettable.” That moment of culinary panic sparked a dare: I would create a peanut butter pie so decadent, so creamy, that even the most skeptical Amish aunt would beg for seconds. I’m not exaggerating when I say this turned into the most irresistible version of an Amish Peanut Butter Cream Pie you’ll ever taste.
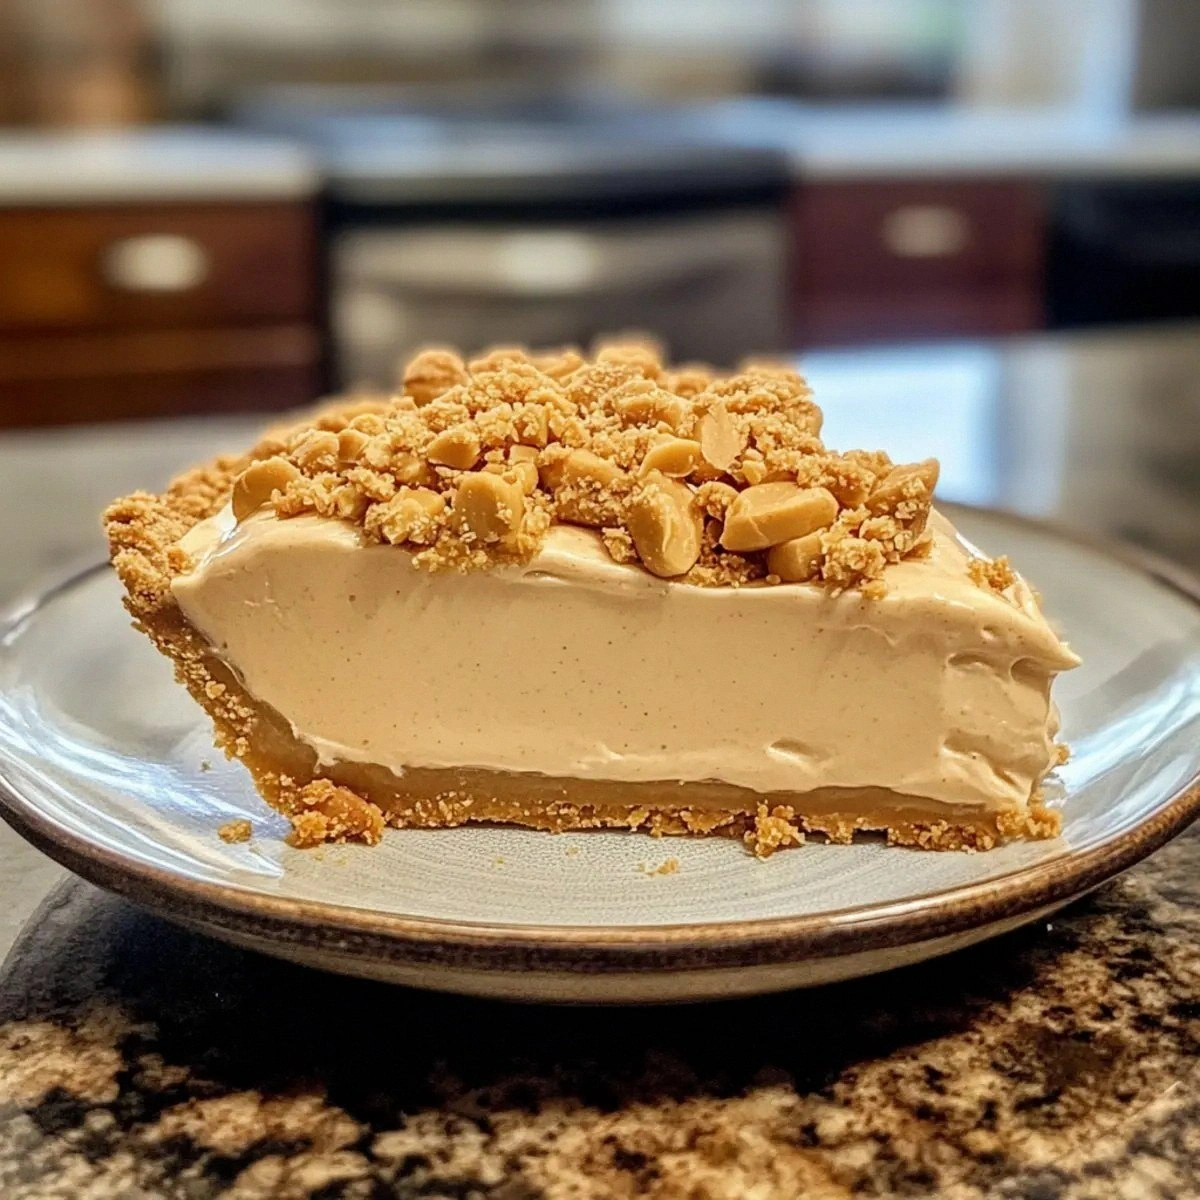
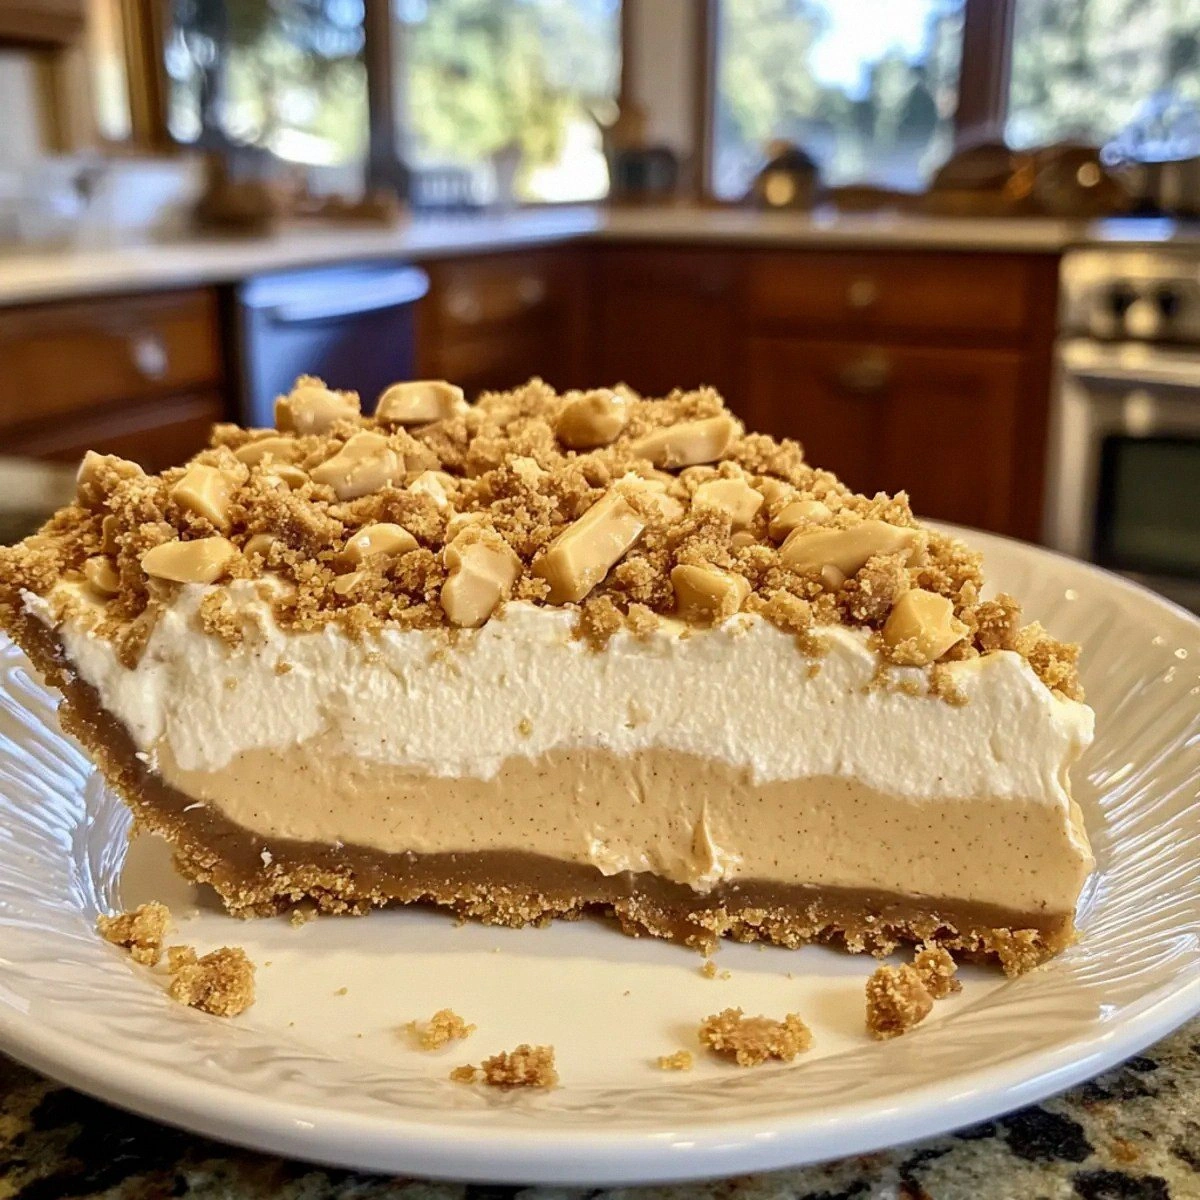
Picture this: a golden‑brown graham cracker crust that crunches like fresh autumn leaves under your fork, a silky peanut butter‑infused filling that spreads across your palate like a velvet blanket, and a cloud of whipped cream that crowns the whole thing with a whisper of sweetness. The aroma alone is a love letter to nostalgia—sweet vanilla mingling with roasted peanuts, a hint of buttery graham, and a faint, comforting scent of cooked pudding that makes you feel like you’re back in a farmhouse kitchen on a lazy Sunday. You’ll hear the faint sigh of the pie as it cools, see the glossy sheen of the topping, and feel the cool, creamy texture melt against your tongue. It’s a symphony of senses that makes you want to hug the pie (and maybe the baker, too).
What makes this version stand out isn’t just the ingredients; it’s the technique. Most recipes either skip the pudding base or over‑whip the cream, resulting in a texture that’s either too dense or too airy. I discovered that whisking the vanilla pudding mix with cold milk until it thickens, then folding it into a peanut butter‑cream cheese blend, creates a balance that’s both sturdy enough to slice cleanly and soft enough to melt in your mouth. The secret weapon? A splash of heavy cream that lifts the filling to cloud‑nine level fluffiness without making it soggy. I dare you to taste this and not go back for seconds—trust me, you’ll be counting the minutes until the next slice appears.
Let me walk you through every single step — by the end, you’ll wonder how you ever made it any other way. I’ll share the exact ratios, the crucial sensory checkpoints, and a handful of hacks that will turn your kitchen into a pie‑making powerhouse. Ready? Okay, ready for the game‑changer? This next part? Pure magic.
What Makes This Version Stand Out
- Flavor Explosion: The combination of creamy peanut butter with a vanilla pudding base creates a depth of flavor that feels both familiar and novel, like your favorite childhood sandwich upgraded to gourmet status.
- Texture Harmony: A crisp graham cracker crust meets a silky, mousse‑like filling, delivering that satisfying crunch‑to‑cream contrast that most pies lack.
- Simplicity Meets Sophistication: Only nine ingredients, all pantry‑friendly, yet the technique elevates it to a restaurant‑quality dessert.
- Ingredient Quality: Using real creamy peanut butter (not the oily kind) and full‑fat cream cheese ensures richness without any artificial aftertaste.
- Crowd‑Pleaser: Whether you’re feeding a family, a potluck, or a group of friends, this pie consistently earns rave reviews and empty plates.
- Make‑Ahead Magic: The pie can be assembled a day ahead, allowing flavors to meld and the crust to stay perfectly crisp.
- Versatile Base: The pre‑made graham cracker crust saves time, but you can easily swap in an Oreo or chocolate cookie crust for a different vibe.
- Low‑Effort Cleanup: One bowl for the filling, one for the crust, and a whisk—no heavy-duty mixers required.
Inside the Ingredient List
The Flavor Base
The star of this pie is the creamy peanut butter. It brings that unmistakable roasted, slightly salty taste that pairs perfectly with sweet vanilla. If you skimp on the quality, the whole pie can taste flat, so I recommend a natural, no‑added‑sugar brand that’s still smooth enough to blend without clumps. Skipping the peanut butter isn’t an option—without it, you lose the signature depth that makes this pie unforgettable.
The Texture Crew
Cream cheese is the backbone, providing tang and structure. Its fat content ensures the filling stays stable when sliced. If you replace it with a low‑fat version, expect a watery, less creamy result. Heavy cream, folded in at the end, lightens the mixture, creating that airy mousse feel. Whip it just until soft peaks form; over‑whipping will make the filling grainy.
The Unexpected Star
Vanilla pudding mix might seem like a filler, but it’s the secret glue that binds everything together. The powdered sugar in the mix sweetens subtly while the starch thickens the filling without a gelatinous texture. If you’re allergic to corn‑based starches, swap the mix for a gluten‑free, cornstarch‑free vanilla custard powder. The result will be just as silky, though you may need an extra minute of whisking.
The Final Flourish
A pre‑made graham cracker crust saves time and guarantees a uniform base. If you prefer a homemade crust, blend 1½ cups of crushed graham crackers with ¼ cup melted butter and 2 tbsp sugar, then press into a 9‑inch pan and bake for 8 minutes. The crust’s buttery sweetness is the perfect counterpoint to the rich filling, and it holds up well even after chilling. Skipping the crust altogether would turn this into a mousse, which is delicious but not the pie experience we’re after.
Everything's prepped? Good. Let's get into the real action...
The Method — Step by Step
Start by setting your pre‑made graham cracker crust on a wire rack. If you’re using a homemade crust, bake it at 350°F (175°C) for 8‑10 minutes until lightly golden. Once baked, let it cool completely; you’ll hear a faint “snap” as the edges firm up—this is the sound of a perfect base forming. Watch out: Do not let the crust sit in a humid kitchen, or it will absorb moisture and become soggy.
In a medium bowl, whisk together the vanilla pudding mix and 2 cups cold milk. Stir vigorously for about 2 minutes until the mixture thickens and becomes glossy. You’ll know it’s ready when it pulls away from the sides of the bowl, forming a soft ribbon.
Kitchen Hack: Place the bowl over a larger bowl of ice water while whisking; the extra chill speeds up the thickening process.While the pudding sets, soften the cream cheese. Cut the 8‑oz block into cubes and let it sit at room temperature for 10 minutes, then beat with an electric mixer on medium speed until smooth and free of lumps. The texture should be as silky as satin; any graininess will carry over to the final pie.
Add 1 cup creamy peanut butter and 1 cup powdered sugar to the softened cream cheese. Beat on low, then increase to medium until fully incorporated. The mixture will turn a beautiful, glossy mahogany color, and you’ll smell that unmistakable roasted peanut aroma—this is the moment of truth.
Watch Out: Over‑mixing can cause the peanut butter to separate; stop as soon as the mixture looks uniform.Fold the thickened vanilla pudding into the peanut butter‑cream cheese blend. Use a rubber spatula and a gentle folding motion to keep the airy texture intact. The pudding should swirl through the mixture, creating faint ribbons that hint at the vanilla undertones.
In a separate chilled bowl, whip 1 cup heavy cream with 1 tsp vanilla extract and ½ cup granulated sugar until soft peaks form. The cream should hold its shape but still be smooth enough to spread. This step adds that cloud‑like lift to the filling, making each bite feel like a whisper.
Gently fold the whipped cream into the peanut‑pudding mixture. Take your time—this is where the magic happens. The final filling should be light, fluffy, and have a slight sheen that catches the light.
Kitchen Hack: If the mixture looks too loose, chill it for 5 minutes before folding in the whipped cream; this stabilizes the texture.Pour the finished filling into the cooled graham cracker crust, smoothing the top with an offset spatula. The surface should be level and slightly domed—think of a gentle hill rather than a flat plain. Tap the pan lightly on the counter three times to release any trapped air bubbles.
Refrigerate the pie for at least 2 hours, preferably overnight. As it chills, the flavors meld, and the filling firms up enough to slice cleanly. When you pull it out, you’ll notice a faint perfume of vanilla and peanuts rising from the chilled surface—pure anticipation.
Before serving, optionally garnish with a drizzle of melted chocolate, a sprinkle of crushed peanuts, or a dollop of whipped cream. This final touch adds visual contrast and an extra bite of texture. And now the fun part: slice, serve, and watch your guests’ eyes widen with delight.
That's it — you did it. But hold on, I've got a few more tricks that'll take this to another level. Trust me, these insider tips will make your pie the talk of the town for weeks to come.
Insider Tricks for Flawless Results
The Temperature Rule Nobody Follows
Never, ever use room‑temperature milk for the pudding mix. Cold milk slows the starch activation, giving you a smoother, more stable base. I once tried using warm milk and ended up with a grainy texture that never recovered, even after chilling. Keep everything chilled until the very last moment—this ensures the filling sets perfectly without weeping.
Why Your Nose Knows Best
When the pudding thickens, you’ll smell a faint vanilla perfume. That scent is your cue that the mixture is ready to be folded. If you rely solely on timing, you risk under‑ or over‑mixing. Trust your nose; it’s a far more reliable indicator than a stopwatch.
The 5‑Minute Rest That Changes Everything
After folding the whipped cream into the filling, let the mixture rest for five minutes before pouring it into the crust. This short pause lets air bubbles rise to the surface, preventing tiny pockets that could cause the pie to collapse later. A friend tried to skip this rest once—let's just say the pie looked like a deflated balloon.
Crust Shield Technique
If you’re making the crust from scratch, line it with a single sheet of parchment before adding the graham mixture. This creates a barrier that keeps the crust crisp, even after several hours of chilling. It also makes lifting the pie out of the pan a breeze—no more broken edges.
The “Taste‑Before‑Serve” Moment
Before plating, take a tiny spoonful and let it sit on your tongue for a few seconds. This allows the flavors to fully develop. If you notice a hint of bitterness, a quick drizzle of honey or a pinch of sea salt can balance it out. It’s a pro tip that turns a good pie into a legendary one.
Creative Twists and Variations
This recipe is a playground. Here are some of my favorite ways to switch things up:
Chocolate‑Swirl Delight
Melt 2 tbsp dark chocolate and swirl it into the filling before pouring it into the crust. The bitter chocolate cuts through the sweetness, creating a sophisticated flavor contrast that will wow chocolate lovers.
Banana‑Boosted Bliss
Fold in ½ cup finely mashed ripe banana into the filling for a subtle fruitiness. The banana adds natural sweetness and a creamy texture that pairs perfectly with peanut butter.
Spicy Kick
Add a pinch of cayenne pepper or a drizzle of honey‑chili sauce on top just before serving. The heat amplifies the peanut flavor, turning the pie into a bold, adventurous dessert.
Nutty Crunch
Sprinkle toasted chopped peanuts or almond slivers on the surface before chilling. The added crunch provides a delightful contrast to the smooth filling.
Coffee Infusion
Replace 1 tsp vanilla extract with 1 tsp instant espresso powder dissolved in a tablespoon of hot water. The coffee notes deepen the flavor profile, making it a perfect pairing with an after‑dinner espresso.
Storing and Bringing It Back to Life
Fridge Storage
Cover the pie loosely with plastic wrap and store in the refrigerator for up to 4 days. The filling remains creamy, and the crust stays crisp thanks to the graham barrier. If you notice any condensation, gently pat the surface with a paper towel before serving.
Freezer Friendly
Wrap the entire pie tightly in foil, then place it in a freezer‑safe bag. It freezes well for up to 2 months. When you’re ready to enjoy, thaw it in the fridge overnight, then give it a quick 5‑minute room‑temperature rest before slicing.
Best Reheating Method
While this pie is best served cold, if you prefer a warm slice, preheat your oven to 300°F (150°C), place a slice on a parchment‑lined tray, and warm for 5‑7 minutes. Add a tiny splash of milk (about a teaspoon) before reheating; the steam revives the creamy texture without drying it out.