The kitchen had been a battlefield that night. I’d been chasing the perfect holiday dessert, but every attempt—cheesecake, torte, even a humble sugar cookie—had ended up either too dry or too sweet. The fridge was a mess of leftover ingredients, and my friends were hovering, ready to taste my latest creation. I stared at the pile of crushed sugar cookies, the butter, and the cream cheese, and suddenly the idea struck me like a Christmas light flicker: why not combine the crunch of a cookie crust with the creamy decadence of a cheesecake, then top it with sprinkles that look like tiny fireworks?
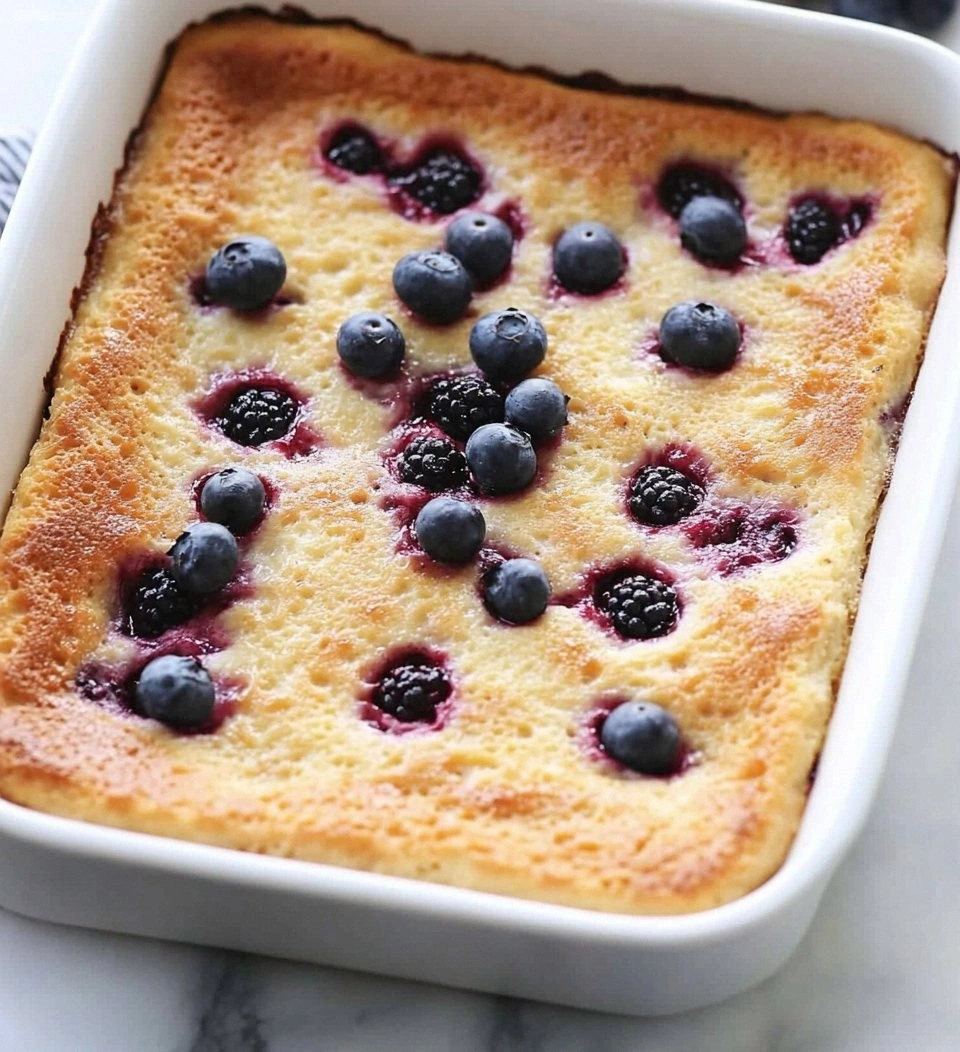
Picture this: a golden, buttery base that gives way to a velvety, tangy filling, and then a burst of color from the sprinkles that dance on the tongue. The aroma alone—warm vanilla, sweet butter, and the faint hint of chocolate from the cookies—makes the whole kitchen feel like a holiday wonderland. I could already hear the laughter as everyone gathered around the table, their eyes widening as the first bite melts into a silky dream. I’d never seen a dessert that could be both comforting and celebratory, and I knew this would be the centerpiece for any gathering.
Most recipes get this completely wrong, but here’s what actually works. The secret is in the balance: the cookie crust must be crunchy yet buttery, the filling must be airy and not too dense, and the sprinkles need to be just the right amount of sweetness to tie everything together. I dare you to taste this and not go back for seconds. I’ll be honest— I ate half the batch before anyone else got to try it. The result was a dessert that felt like a holiday hug in every bite, and I knew I had stumbled upon something truly special.
Imagine pulling this out of the oven, the whole kitchen smelling incredible, and the lights reflecting off the glimmering sprinkles. The first bite is a symphony: a crackle of crunch, a splash of tang, and a whisper of vanilla that lingers. Most people think a cheesecake is just a cheesecake, but this one is a layered experience that keeps you guessing until the very end. And now the fun part: the final touch that makes it unforgettable—tiny, bright sprinkles that sparkle like snowflakes on a winter night.
Let me walk you through every single step—by the end, you’ll wonder how you ever made it any other way. This recipe isn’t just about following directions; it’s about embracing the process, feeling the dough, and watching the magic happen in the oven. The method is straightforward, but each step is a chance to add your own flair, to tweak the texture, to experiment with flavors. And trust me, the payoff is worth every ounce of effort.
What Makes This Version Stand Out
- Texture: The crust is a buttery crunch that snaps like fresh snow, while the filling is a silky, airy cloud that melts in your mouth.
- Flavor: The subtle vanilla undertone lifts the sweet, buttery base, and the tang of cream cheese balances the sugar for a well-rounded taste.
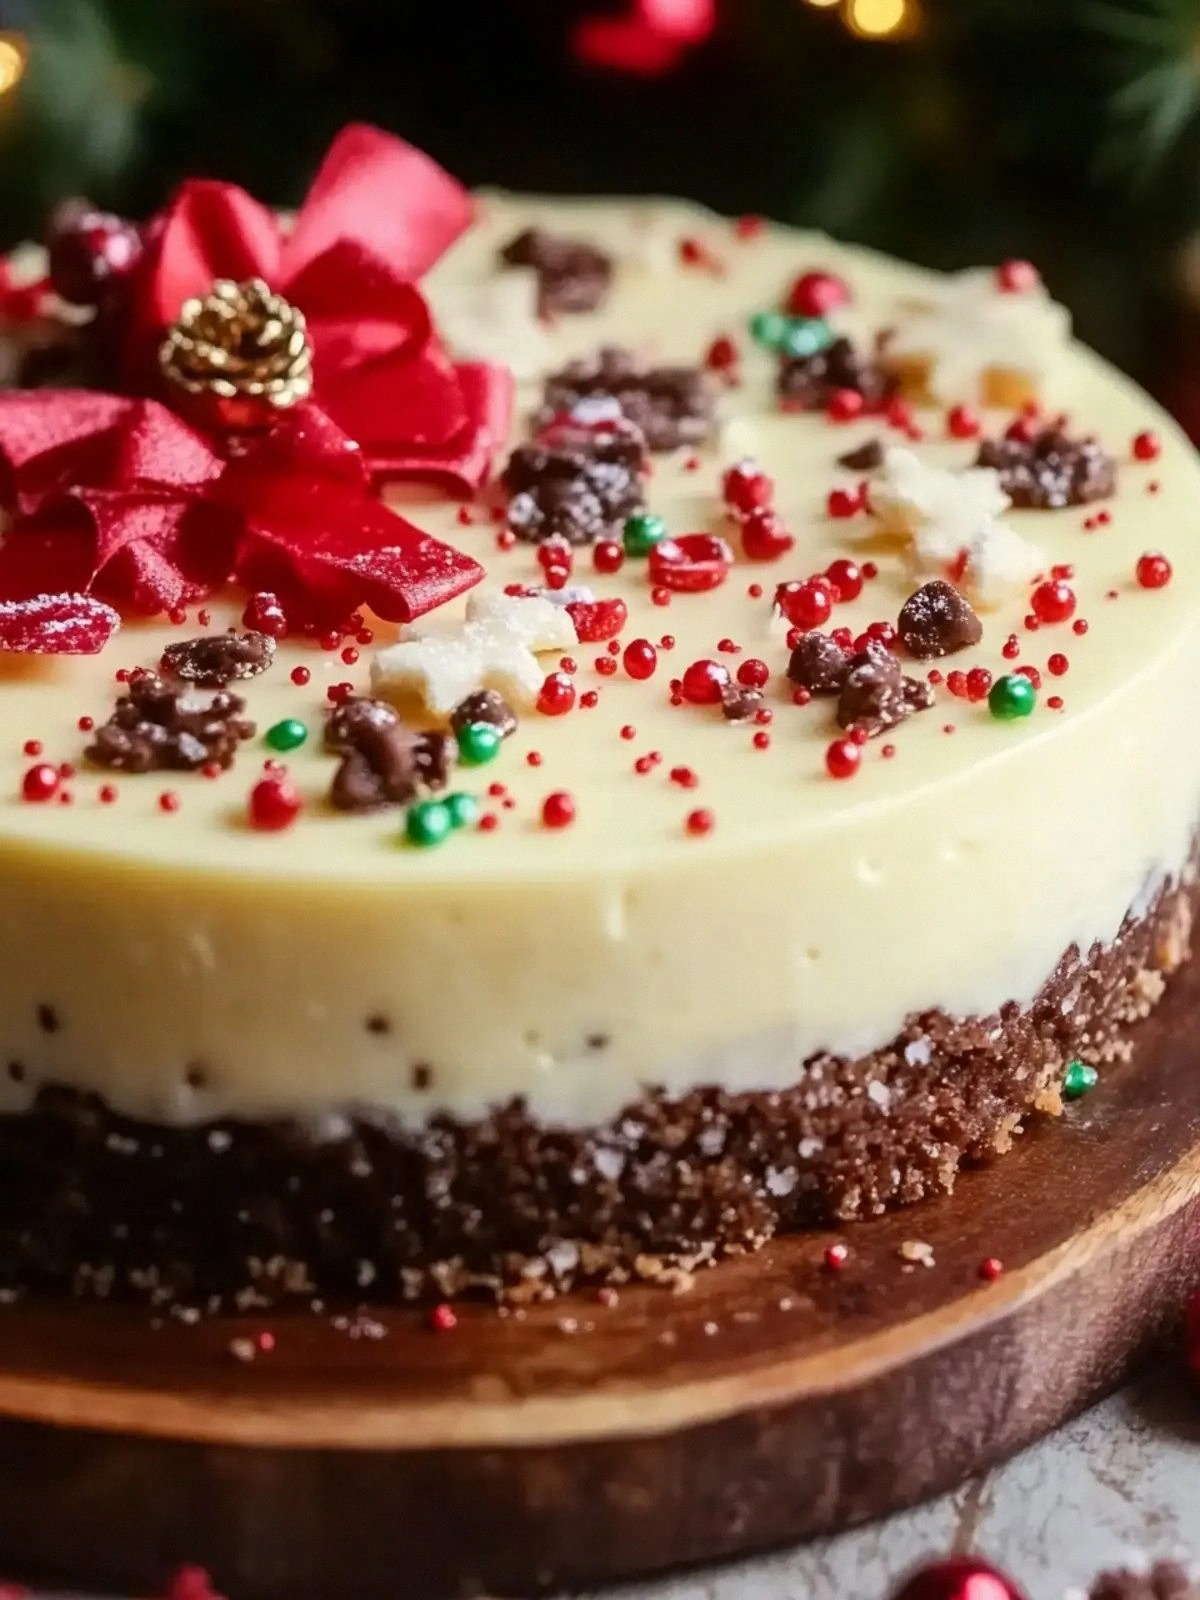
- Visual Appeal: The rainbow sprinkles create a festive, eye-catching finish that feels like a holiday celebration on a plate.
- Ease: Every step uses pantry staples—no obscure ingredients or complicated techniques needed.
- Make‑Ahead: The cheesecake can be prepared up to 24 hours in advance, allowing you to focus on other holiday tasks.
- Make‑It‑Yourself: Swap the sugar cookie base for gingerbread or snickerdoodle crumbs for a seasonal twist.
- Crowd Reaction: Guests often ask for the recipe after the first bite, making it a conversation starter at any gathering.
- Ingredient Quality: Using high‑quality cream cheese and fresh butter elevates the entire dessert, turning it from simple to sensational.
Alright, let’s break down exactly what goes into this masterpiece…
Inside the Ingredient List
The Flavor Base
The first pillar of this dessert is the buttery, crunchy crust. Crushed sugar cookies provide a sweet, caramelized foundation that contrasts beautifully with the tangy filling. If you skip the butter, the crust will crumble and taste dry, so keep that 6 tablespoons of melted butter on hand. For an extra layer of flavor, you can add a splash of vanilla extract to the cookie crumbs before pressing them into the pan.
The Texture Crew
Cream cheese is the star of the show. It gives the filling its rich, creamy texture and a slight tang that cuts through the sweetness. The 3 packages should be softened at room temperature—this prevents lumps and ensures a smooth consistency. If you’re short on time, let the cream cheese sit in a bowl at room temperature for 20 minutes; it will soften faster than waiting for the whole day.
The Unexpected Star
The ⅓ cup of Christmas‑colored sprinkles is more than just decoration. They add a playful crunch and a burst of color that makes the dessert feel festive. If you’re allergic to artificial dyes, you can use real fruit pieces like candied orange peel or dried cranberries for a natural pop.
The Final Flourish
Sour cream brings a subtle tang that balances the richness of the cream cheese and butter. It also lightens the texture, preventing the cheesecake from becoming too dense. If you can’t find sour cream, Greek yogurt works as a 1:1 substitute, but be sure to strain it first to avoid excess moisture.
Everything’s prepped? Good. Let’s get into the real action…
The Method — Step by Step
- Step 1: Preheat and Prepare – Preheat your oven to 325°F (163°C). While the oven warms, line a 9‑inch springform pan with parchment paper and lightly grease the edges with butter. This will prevent sticking and give you a clean release.
- Step 2: Make the Crust – In a medium bowl, combine the crushed sugar cookies and melted butter until the mixture resembles wet sand. Press the crumb mixture firmly into the bottom of the prepared pan, then use a flat glass to level it. The crust should be about ½ inch thick.
- Step 3: Chill the Base – Place the crust in the refrigerator for 10 minutes to set. This helps the crust hold its shape during the filling process.
- Step 4: Blend the Filling – In a stand mixer, beat the softened cream cheese on medium speed until smooth. Gradually add the granulated sugar, 1 tablespoon at a time, ensuring each addition is fully incorporated before the next. The mixture should be creamy and free of lumps.
- Step 5: Add Eggs and Vanilla – Crack the eggs one at a time, mixing well after each addition. This prevents curdling. Stir in the vanilla extract; it will elevate the overall flavor profile.
- Step 6: Fold in Sour Cream – Gently fold the sour cream into the batter with a spatula. Keep the motion light; you don’t want to deflate the batter. The result should be silky and airy.
- Step 7: Assemble – Pour the filling over the chilled crust, smoothing the top with a spatula. Tap the pan lightly on the counter to release any air pockets.
- Step 8: Bake – Place the pan in the preheated oven. Bake for 35 minutes, or until the edges are set but the center still has a slight wobble. This is the moment of truth; the cake should emit a buttery, slightly caramelized aroma.
- Step 9: Cool and Decorate – Remove the cheesecake from the oven and let it cool at room temperature for 30 minutes. Then refrigerate for at least 4 hours, preferably overnight. Once chilled, sprinkle the Christmas‑colored sprinkles evenly over the top.
- Step 10: Serve – Release the cheesecake from the springform pan, slice with a hot knife, and serve chilled. The texture should be firm yet creamy, with a delightful crunch from the crust and a burst of color from the sprinkles.
That’s it — you did it. But hold on, I’ve got a few more tricks that will take this to another level. These insider tips will help you avoid common pitfalls and elevate the overall experience.
Insider Tricks for Flawless Results
The Temperature Rule Nobody Follows
Many bakers bake at 350°F, but this recipe thrives at 325°F. The lower temperature allows the cheesecake to set slowly, preventing a rubbery texture and ensuring a silky finish. If you’re using a convection oven, reduce the temperature by 25°F to avoid over‑baking.
Why Your Nose Knows Best
Trust the aroma: when the cake starts to emit a buttery, caramelized scent, that’s the cue that the edges are set. Your nose is the ultimate judge—don’t rely solely on the timer. If you’re unsure, perform the gentle poke test: insert a toothpick into the center; if it comes out with a few crumbs but no wet batter, you’re good.
The 5‑Minute Rest That Changes Everything
After removing the cheesecake from the oven, let it rest on the counter for 5 minutes before chilling. This brief pause allows the heat to redistribute, reducing the risk of cracks when it cools. It also gives you a chance to finish your sprinkles without the cake shrinking.
The Sprinkles Trick
Instead of sprinkling the entire batch at once, sprinkle a small amount, bake, then add the rest. This technique prevents the sprinkles from sinking into the filling and keeps them bright and crisp. It also adds a fun, interactive element to the baking process.
The Cream Cheese Whisper
If you’re using a brand of cream cheese that’s high in moisture, whisk it vigorously before mixing. This ensures the batter remains airy and prevents the cheesecake from becoming soggy. A quick 30‑second whisk will do the trick.
Creative Twists and Variations
This recipe is a playground. Here are some of my favorite ways to switch things up:
Gingerbread Crunch
Swap the sugar cookies for crushed gingerbread for a spiced, seasonal twist. The molasses flavor pairs beautifully with the creamy filling, and the crust becomes a cozy, holiday staple.
Chocolate Cookie Base
Use chocolate sandwich cookies instead of sugar cookies to create a decadent chocolate base. The dark crust contrasts with the sweet filling, delivering a sophisticated flavor profile.
Nutella Swirl
Fold a few spoonfuls of Nutella into the batter before baking. The hazelnut chocolate swirl adds depth and a luscious, indulgent twist.
Lemon Zest Surprise
Add a tablespoon of lemon zest to the batter for a bright, citrusy kick. The zesty note cuts through the richness and keeps the dessert feeling fresh.
Mini Cheesecake Bites
Instead of a full pan, bake the batter in a muffin tin to create individual bite‑size cheesecakes. They’re perfect for party platters and allow everyone to enjoy a personal portion.
Storing and Bringing It Back to Life
Fridge Storage
Store the cheesecake in an airtight container in the refrigerator for up to 5 days. The crumbly crust and creamy filling will stay fresh, and the sprinkles will retain their crunch.
Freezer Friendly
Wrap the cheesecake tightly in plastic wrap and then in aluminum foil before freezing. It can be stored for up to 3 months. Thaw overnight in the refrigerator before serving.
Best Reheating Method
If you prefer a slightly warmer bite, place a slice in the microwave for 10–15 seconds. For a crispier crust, place the whole cheesecake on a baking sheet and warm at 300°F for 8 minutes. Add a tiny splash of water before reheating to create steam and revive the moisture.