When the kitchen turned into a battlefield last night, I was left staring at a mound of browned ground beef that had somehow turned into a sad, soggy mess. I had promised myself that this would be the night I finally nailed the ultimate cheesy beef nacho experience, but the result was a disappointing, flavorless heap that left my taste buds questioning my life choices. That moment of culinary defeat was the spark that lit a fire in my head – a fire that would drive me to craft a version that would make every bite a triumph of taste, texture, and sheer delight. I swear, if you think you’ve seen cheesy beef that’s better than this, I dare you to taste it and not go back for seconds. The only thing that kept me from giving up was the memory of that first bite of a perfectly melted nacho that makes your mouth water just by looking at it.
Picture yourself pulling this out of the oven, the whole kitchen smelling incredible, and the sound of crunchy chips giving way to a molten cheese river. I can still hear the sizzle when the beef hits the pan – absolute perfection. The aroma of cumin, paprika, and garlic powder dancing in the air is enough to make anyone pause mid‑walk. The anticipation builds as the cheese begins to bubble, forming a golden crust that cracks like a thin ice sheet when you press it. That moment is the sweet spot where flavor meets texture, and every bite feels like a warm hug.
Most recipes get this completely wrong. They either undercook the beef, forget the spice blend, or use a weak cheese that melts into a sad puddle. The result? A bland, soggy mess that makes you wonder why you bother. I’m here to tell you that this is hands down the best version you’ll ever make at home. I’ve spent months tweaking the spice ratios, sourcing the freshest jalapeños, and testing different cheeses until the flavors sang in perfect harmony. The secret? It’s not just about the ingredients; it’s about the technique, the timing, and a few little hacks that make the difference.
I’ll be honest – I ate half the batch before anyone else got to try it. That was the first time I realized how addictive a well‑balanced nacho can be. The crunch of the chips, the gooeyness of the cheese, and the kick from the pickled jalapeños all come together in a single bite that’s hard to forget. And if you’ve ever struggled with this, you’re not alone – and I’ve got the fix. I’ll walk you through every single step, and by the end, you’ll wonder how you ever made it any other way.
Now, let’s talk flavor. The beef is the backbone, but it’s the aromatics that give it life. The onion and garlic sauté until caramelized, releasing a sweet, savory base that sets the stage. The cumin and oregano add depth, while the paprika gives a subtle smoky undertone. The chili powder and soy sauce bring a savory umami punch that makes the dish feel like a party in your mouth. The sugar balances the acidity of the jalapeños, ensuring every bite is a perfectly rounded experience.
I’ve also discovered that the right cheese blend can turn an ordinary nacho into a decadent masterpiece. Sharp cheddar provides the sharp bite that cuts through the richness, while mozzarella adds a silky, stretchy texture that pulls apart with each forkful. The combination is like a duet between a jazz soloist and a choir, each ingredient complementing the other. This isn’t just about taste; it’s about creating an edible experience that will have your friends begging for the recipe. And that’s what I’m about to share with you – the ultimate cheesy beef nacho that will dominate your snack game.
What Makes This Version Stand Out
- Flavor: The carefully balanced spice blend of cumin, oregano, paprika, and chili powder creates a complex, savory profile that lingers on the palate. The addition of light soy sauce adds a subtle umami depth, while a touch of sugar cuts through the heat of the jalapeños. This harmony of flavors elevates the dish beyond ordinary nachos.
- Texture: The chips are toasted just enough to stay crisp, yet they’re layered with a molten cheese blanket that melts into pockets of gooey delight. The jalapeños add a satisfying snap that contrasts the softness of the melted cheeses. The result is a multi‑sensory crunch that never feels heavy.
- Cheese Blend: Sharp cheddar offers a bold, tangy bite, while mozzarella provides a smooth, stretchy finish. Together they create a cheese wall that holds the flavors together, preventing the chips from becoming soggy. The melt is a silky ribbon that coats every chip.
- Heat Level: The pickled jalapeños bring a bright, tangy heat that’s balanced by the sweetness of sugar. The chili powder and cumin add a subtle warmth that doesn’t overwhelm the palate. You’ll feel the heat, but you won’t be burned out.
- Ingredient Quality: Using fresh, high‑quality ground beef ensures a juicy base, while fresh jalapeños deliver a bright flavor that canned varieties can’t match. The cheeses are chosen for their melt and flavor profile, not just for convenience. The result is a dish that tastes like a gourmet creation.
- Simple Prep: Every step can be done in under 30 minutes, and the assembly is a breeze. The recipe requires no fancy equipment—just a skillet, a baking sheet, and a handful of common pantry staples. It’s the perfect balance between indulgence and convenience.
- Make‑Ahead Friendly: Assemble the nachos ahead of time, refrigerate, and bake when ready. The flavors meld together, making the dish even more delicious the next day. It’s ideal for parties or when you need a quick, satisfying meal.
- Party‑Ready: The dish is a crowd‑pleaser, perfect for game day, movie nights, or casual gatherings. The presentation is eye‑catching, and the flavors will have your guests asking for the recipe. It’s the go‑to snack that turns any gathering into a celebration.
Inside the Ingredient List
The Flavor Base
Ground beef is the heart of this dish; it provides a savory, meaty foundation that absorbs every spice. A pound of beef ensures a generous, protein‑rich bite that satisfies. If you skip it, the nachos become a cheese‑only affair that lacks depth. For a leaner version, use 80/20 ground turkey, but keep the seasoning the same. The key is to let the beef brown fully so it releases its natural juices, which become the sauce that binds the chips and cheese.
The Texture Crew
Tortilla chips are the crunchy canvas that holds everything together. A bag of sturdy, lightly salted chips holds up to the weight of the beef and cheese without disintegrating. If you prefer a healthier option, try baked chips or a mix of corn and flour for a slightly different crunch. The texture is critical; too thin and they’ll sog, too thick and they’ll feel like a snack bar. A quick toast before assembly will add a subtle nutty flavor.
The Unexpected Star
Pickled jalapeños are the fiery, tangy surprise that elevates the dish. Their bright acidity cuts through the richness of the cheese, creating a balanced bite. If you’re not a fan of pickles, fresh sliced jalapeños or a dash of red pepper flakes can mimic the heat. The pickled version, however, offers a sweet‑sharp profile that no other ingredient can match. They also add a splash of color, making the nachos visually appealing.
The Final Flourish
Cilantro is the finishing touch that brings a fresh, herbal note to the dish. A quarter cup of chopped cilantro adds brightness that lifts the overall flavor. If you’re cilantro‑averse, a pinch of parsley or a splash of lime juice works as a substitute. The final drizzle of soy sauce and a sprinkle of sugar create a sweet‑savory glaze that glistens over the cheese. Together, these finishing touches transform a simple snack into a gourmet experience.
Everything's prepped? Good. Let's get into the real action...
The Method — Step by Step
- Heat a large skillet over medium heat and add the ground beef. Break it apart with a wooden spoon, letting it sizzle as it browns. This is the moment of truth—watch the color shift from pink to deep brown. If you see steam, it means the beef is releasing its juices, which will form the sauce. Let it cook until fully browned, then drain any excess fat.
- Add the diced onion and minced garlic to the pan. Sauté until the onion becomes translucent and the garlic releases its fragrance. The aroma should be inviting, a sweet prelude to the spices. Stir constantly to prevent burning. Once the onions soften, it’s time to bring in the heat.
- Stir in the cumin, oregano, paprika, chili powder, onion powder, and garlic powder. Toss everything together so the beef is coated in a fragrant, aromatic mist. Let the spices toast for about 30 seconds; this brings out their natural oils. The mixture should smell like a spice rack exploded in a pan. This step builds the foundation of flavor.
- Pour in the light soy sauce and sprinkle the sugar. The soy adds a subtle umami depth while the sugar balances the heat from the jalapeños. Stir until the sugar dissolves and the mixture thickens slightly. The sauce should coat the meat like a glossy glaze. This is a crucial balance that keeps the dish from tipping too salty or too sweet.
- Transfer the beef mixture onto a large baking sheet lined with parchment. Spread it out evenly, making sure the layer is not too thick. This ensures the cheese will melt uniformly across all chips. The even spread also helps the chips stay crisp. The baking sheet becomes a stage for the next act.
- Toss the tortilla chips in a separate bowl with a pinch of salt, then scatter them over the beef. The chips should be layered like a crunchy blanket. Avoid overcrowding; leave some space for the cheese to melt between them. The goal is a harmonious layering of crunch and goo.
- Sprinkle the shredded cheddar and mozzarella over the chips. The cheeses should form a thick, golden layer that covers the meat and chips. Let the mixture sit for a minute to allow the cheeses to settle. This is where the magic begins—watch the cheese start to bubble.
- Add the pickled jalapeños on top, distributing them evenly. Their bright green specks add a pop of color and a burst of heat. If you prefer a milder dish, reduce the amount by half. The jalapeños should mingle with the melted cheese, creating a vibrant tapestry.
- Bake in a preheated oven at 375°F (190°C) for 10–12 minutes, or until the cheese is bubbly and the edges are golden. The baking process fuses all the flavors together, creating a cohesive bite. The final aroma will be irresistible, drawing everyone to the table. This step is where the dish transforms from raw to divine.
- Remove from the oven and let rest for 2 minutes. Sprinkle the chopped cilantro over the top for a fresh finish. Serve immediately while the cheese is still molten. The first bite is a symphony of crunch, melt, spice, and freshness. Enjoy the applause from your taste buds.
That's it — you did it. But hold on, I've got a few more tricks that'll take this to another level...
Insider Tricks for Flawless Results
The Temperature Rule Nobody Follows
Many cooks think that a high oven temperature is the key to a crisp nacho. In reality, a moderate 375°F gives the cheese a chance to melt evenly while the chips stay crunchy. I once baked at 425°F, and the result was soggy chips and rubbery cheese. By lowering the heat, you allow the fats to render slowly, creating a golden, crisp edge. This simple tweak is a game‑changer for texture.
Why Your Nose Knows Best
Before you open the oven, let the nachos sit for a minute. The smell of melting cheese is a clear indicator that the dish is ready. If it’s still smelling raw, give it a few more minutes. Your nose is a reliable guide to avoid over‑cooking. Trust the scent, not the clock.
The 5-Minute Rest That Changes Everything
After baking, let the nachos rest for exactly five minutes. This pause allows the cheese to set into a stable, gooey consistency. Skipping this step often results in a runny mess that spills over the bowl. The rest also lets the spices settle, making the flavor more cohesive. I swear it’s the secret to a perfect bite.
Cheese Melting Magic
Using a mix of sharp cheddar and mozzarella isn’t just for flavor; it’s a strategic move. Cheddar provides a sharp, tangy bite, while mozzarella adds a smooth, stretchy texture that pulls apart with each forkful. The combination creates a cheese wall that holds the flavors together, preventing the chips from becoming soggy. If you’re a cheese purist, try adding a dash of pepper jack for a subtle kick.
Make‑Ahead Mastery
Assemble the nachos the night before and store them in an airtight container. When ready to serve, bake them for 10 minutes instead of 12, as the flavors are already infused. This prep time is perfect for parties, letting you focus on guests instead of the stove. The next day, the nachos taste even better because the spices have had time to mingle.
Heat Adjustment Hack
If you’re a heat lover, add fresh sliced jalapeños or a pinch of cayenne pepper to the mix. For a milder version, reduce the chili powder or omit the jalapeños altogether. The key is to taste the sauce before baking; you can always add more heat later. This flexibility ensures every palate is satisfied.
Creative Twists and Variations
This recipe is a playground. Here are some of my favorite ways to switch things up:
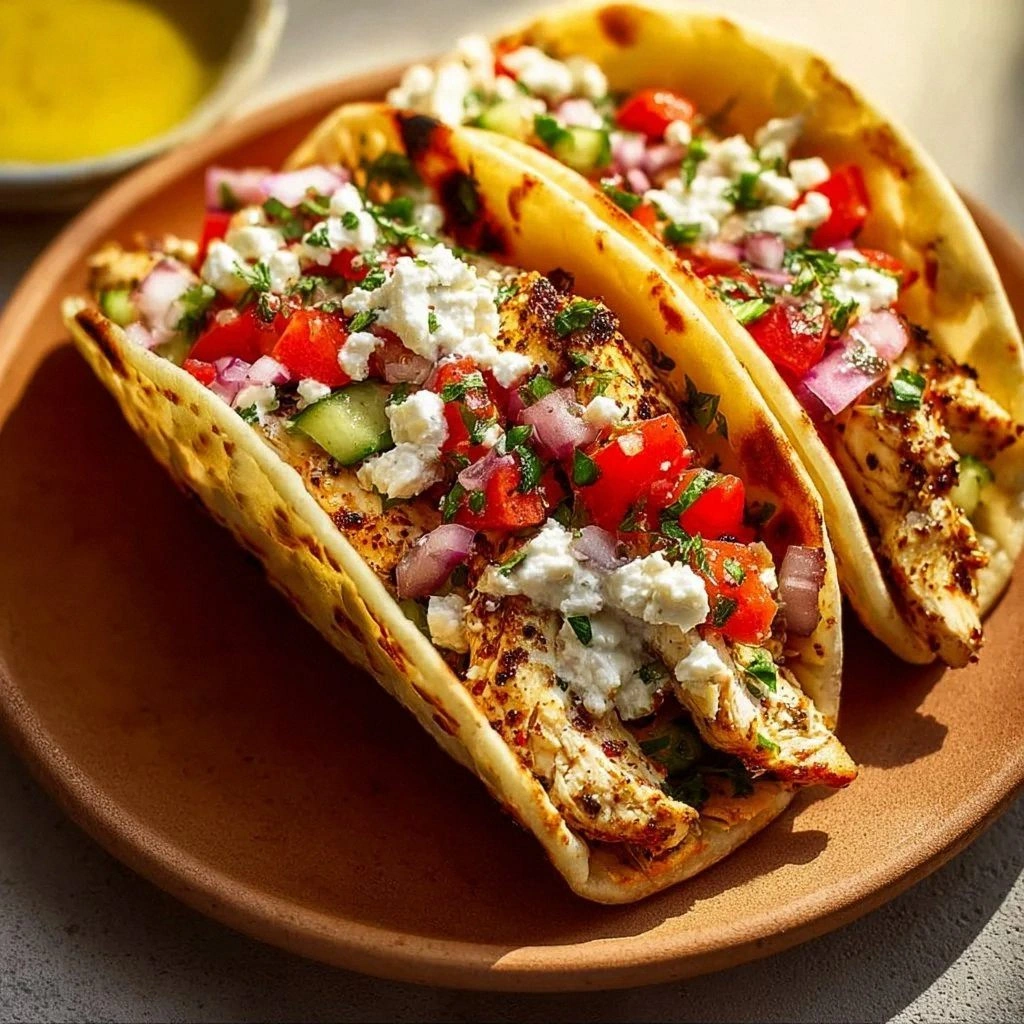
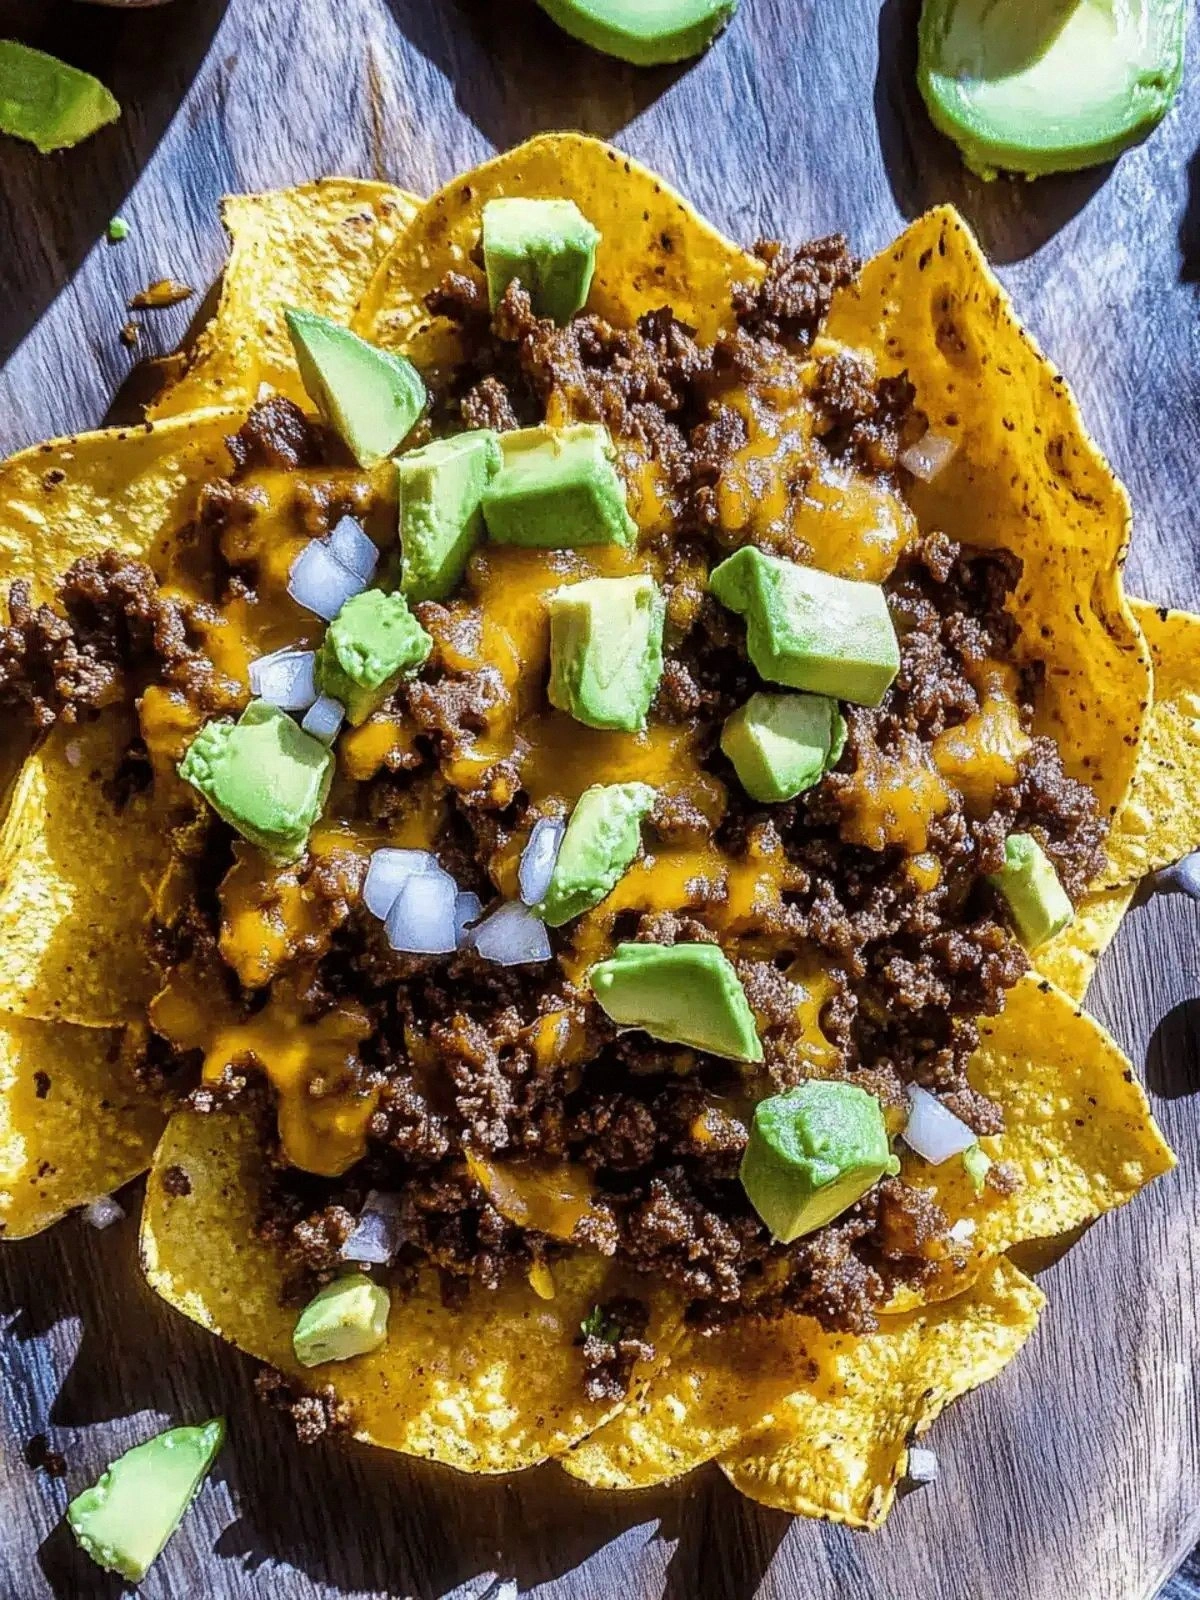
Mexican Street Tacos
Swap the tortilla chips for soft corn tortillas and fold them into taco shapes. Add diced avocado and a squeeze of lime for a fresh, creamy contrast. The result is a handheld nacho that’s perfect for a quick snack. The texture shifts from crunchy to soft, offering a new dimension.
BBQ Beef Nachos
Replace the soy sauce with a smoky BBQ sauce and add a pinch of smoked paprika. The beef takes on a deep, caramelized flavor that pairs beautifully with the cheese. Serve with a side of coleslaw for a Southern twist. The sweet and smoky notes elevate the dish.
Veggie‑Loaded Version
Omit the beef and add roasted bell peppers, corn, and black beans. Sprinkle a handful of chopped cilantro and a dollop of sour cream on top. This vegetarian take is still hearty and packed with protein. The veggies add a colorful crunch that brightens the plate.
Cheesy Beef Chili
Simmer the beef with canned tomatoes, kidney beans, and a splash of beer for a hearty chili base. Layer the chili over the chips and top with cheese before baking. The result is a thick, comforting casserole that’s great for chilly evenings. The flavors meld into a rich, comforting bowl.
Greek‑Inspired Nachos
Replace the cheddar with feta and add diced cucumber, kalamata olives, and a drizzle of tzatziki. The tangy feta cuts through the richness of the beef, while the cucumber adds a fresh bite. This version is a Mediterranean twist that’s surprisingly satisfying. The flavors dance across your palate.
Breakfast Nachos
Swap the beef for scrambled eggs and add a sprinkle of shredded cheddar. Top with diced tomatoes, green onions, and a dash of hot sauce. Serve with a side of hash browns for a breakfast‑themed snack. The eggs bring protein, while the cheese adds a comforting melt.
Spicy Peanut Nachos
Drizzle a peanut sauce over the assembled nachos before baking. The creamy, nutty flavor contrasts with the heat from the jalapeños. Finish with a sprinkle of crushed peanuts and a squeeze of lime. This Asian fusion twist adds a new layer of complexity.
Storing and Bringing It Back to Life
Fridge Storage
Store any leftover nachos in an airtight container in the refrigerator for up to 2 days. The chips may soften slightly, but the flavors remain vibrant. When ready to eat, reheat in a skillet over medium heat until the cheese is melted again. This quick reheating restores the original texture. Avoid the microwave, as it can make the chips soggy.
Freezer Friendly
Freeze assembled nachos in a freezer‑safe bag or container for up to 3 months. Thaw overnight in the refrigerator before reheating. Bake at 375°F for 12–15 minutes until the cheese is bubbly. Freezing preserves the flavor, but the chips will become a bit softer. Add a splash of water before reheating to keep them from drying out.
Best Reheating Method
Reheat in a preheated oven at 350°F for 5–7 minutes, or until the cheese is melted and the chips are crisp. The oven’s dry heat restores the crunch without overcooking the cheese. If you’re in a hurry, a toaster oven works great for small portions. The key is to avoid the microwave unless you’re okay with a soggy texture.
And remember, adding a tiny splash of water before reheating steams the nachos back to perfection, keeping the cheese silky and the chips crisp. This simple trick ensures that every bite feels freshly baked, even after storage.
And that’s the full journey from raw ingredients to a plate that will have your friends shouting for seconds. I’ve walked you through every step, every hack, and every tweak. The result is a nacho that’s not just a snack, but an experience. Now go, impress your guests, and enjoy the applause from your taste buds.