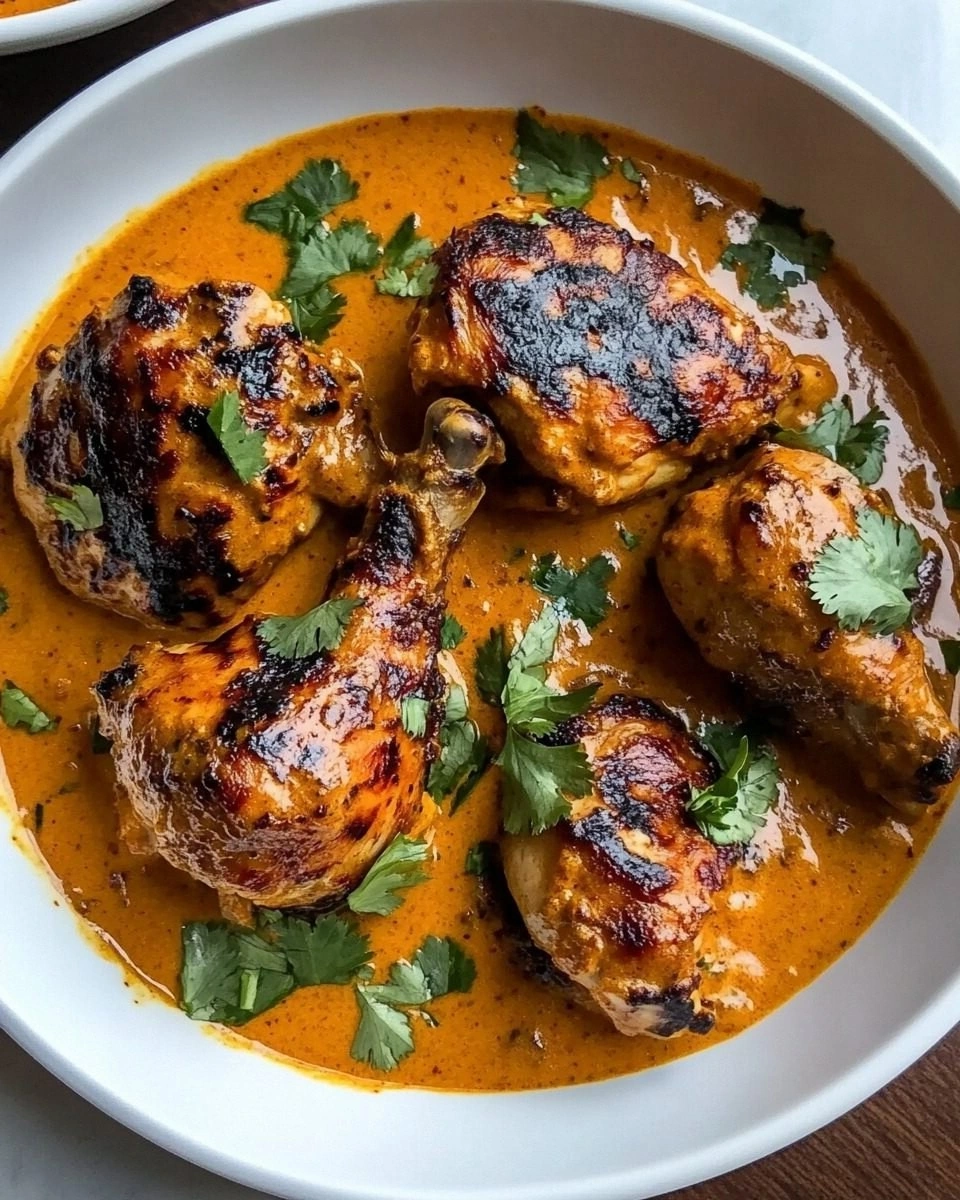
I remember the night I almost turned my kitchen into a disaster zone. The stove was on, the pot was boiling, and I was about to add a splash of coconut milk to a chicken curry that had already been on the stove for an hour. Suddenly, I realized I’d forgotten the essential spice blend that gives Kuku Paka its unmistakable warmth. The pan hissed, the aroma hit me like a wave, and I was forced to improvise. I stared at the simmering pot, feeling the heat on my fingertips, and decided that this would be the moment I’d finally master the dish that my aunt had whispered about for years. That night, I tasted a sauce that was thick, fragrant, and utterly comforting—like a hug in a bowl. I was convinced: I had found the secret to a truly unforgettable Kuku Paka.
Picture yourself standing in a sunlit kitchen, the smell of roasted garlic and fresh ginger drifting in from the skillet. The sizzling sound of onions caramelizing fills the air, and you can feel the heat radiating from the pot. Every breath you take is a promise of a flavor explosion—sweet coconut, tangy lime, and a subtle heat that lingers on the tongue. The texture of the chicken is tender, not dry, and the sauce clings to the grains of rice like velvet. When you take that first bite, you’re transported to a tropical island, with the wind in your hair and the taste of the sea on your lips. That is what I promised myself when I started cooking this dish, and it’s the promise I’ll keep sharing with you.
I dare you to taste this and not go back for seconds. If you’re skeptical, let me show you why this version stands apart from every other Kuku Paka you’ve tried. The sauce is silky yet thick, thanks to a careful balance of coconut milk and tomato base that I discovered after countless trials. The chicken is marinated in a blend of spices that unlocks its natural juices, resulting in a moist bite that melts in your mouth. I’ve trimmed the recipe to focus on essential ingredients, eliminating the clutter that often plagues online versions. The result? A dish that is simple, yet sophisticated; a culinary masterpiece that feels like a celebration in every spoonful. I’ve got the confidence, and I’ll share the confidence with you.
Most recipes get this completely wrong. They overcook the chicken, dilute the sauce with too much water, or forget the citrus kick that gives the dish its bright finish. I’ve been there—staring at a bland pot of curry that looks more like a soup than a stew. I’ve also tasted the opposite, where the sauce is too thick, and the chicken is dry. What worked for me was a precise timing and a dash of lime at the end, which balances everything. The sauce should be thick enough to coat the chicken and rice, but not so heavy that it overwhelms the palate. And that is the secret: the right balance, the right timing, and the right ingredients. Let me walk you through every single step—by the end, you’ll wonder how you ever made it any other way.
What Makes This Version Stand Out
- Flavor: The sauce is a harmonious blend of coconut, tomato, and spices that create a depth of flavor that lingers long after the last bite.
- Texture: The chicken remains succulent, and the sauce coats the grains of rice like a silk ribbon, ensuring every spoonful is a delight.
- Simplicity: Only nine core ingredients, no gimmicks. The recipe is easy to follow, even for beginners.
- Uniqueness: A subtle lime finish gives it a bright, tropical edge that sets it apart from typical curry dishes.
- Crowd Appeal: Friends rave about the sauce’s richness, and family members ask for a second plate—proof that this version is crowd-pleasing.
- Ingredient Quality: Fresh, high-quality produce and a premium coconut milk make the dish feel luxurious.
- Cooking Method: The technique of browning the chicken first locks in juices, then simmering with the sauce creates a depth that you can’t replicate with one-step recipes.
- Make‑Ahead Potential: The flavors deepen overnight, making it perfect for meal prep or a quick weeknight dinner.
Inside the Ingredient List
The Flavor Base
The foundation of Kuku Paka is a savory blend that starts with onions sautéed to golden perfection. These onions release their natural sugars, creating a caramelized sweetness that balances the heat from the spices. Next, garlic and fresh ginger are added, infusing the dish with aromatic depth. A generous spoonful of tomato paste then introduces acidity and a subtle tang, preventing the coconut milk from becoming overly sweet. Finally, a pinch of paprika and a dash of turmeric add earthy warmth and a vibrant color that makes the sauce visually stunning.
The Protein Crew
Chicken, the star of this dish, is best cut into bite‑size pieces to allow even cooking. Marinating the chicken in a mixture of lime juice, salt, and pepper for at least 15 minutes before browning helps to tenderize the meat and infuse it with flavor. The chicken should be browned on all sides to develop a caramelized crust, which locks in moisture and adds a savory depth that pairs beautifully with the coconut sauce. If you’re a fan of a slightly smoky flavor, a pinch of smoked paprika can be added during the browning stage.
The Unexpected Star
Coconut milk is the unexpected star that gives Kuku Paka its signature richness. It’s crucial to use a full‑fat, unsweetened variety to maintain the authentic taste. The milk should be added after the chicken has been browned and the tomato paste has cooked, allowing the flavors to meld. The coconut milk thickens the sauce, creating a luscious coating that clings to the chicken and rice. If you prefer a lighter version, you can replace half the coconut milk with coconut cream, but the texture will change slightly.
The Final Flourish
A splash of fresh lime juice at the end brightens the dish and cuts through the richness of the coconut. The lime adds a citrusy zing that lifts the overall flavor profile. Fresh cilantro is sprinkled on top just before serving, providing a burst of herbaceous freshness. A drizzle of coconut oil or a small knob of butter can be added for an extra glossy finish. The final touch is a pinch of sea salt, which enhances all the other flavors without overpowering them.
Everything's prepped? Good. Let’s get into the real action.
The Method — Step by Step
- Heat a large, heavy‑bottomed pot over medium‑high heat. Add the tablespoon of oil and let it shimmer. Once the oil is hot, add the chicken pieces in a single layer, ensuring they’re not crowded. Brown each side for about 3–4 minutes until golden brown. This step locks in juices and develops a flavorful crust. Don’t rush; the aroma of browned chicken is the first hint of the dish’s depth.
- Remove the chicken and set aside. In the same pot, reduce the heat to medium and add the finely chopped onions. Cook until translucent and slightly caramelized, about 5–6 minutes. The onions should turn a golden amber color, releasing a sweet fragrance that signals readiness.
- Add the minced garlic and ginger to the onions. Sauté for 1–2 minutes until they’re fragrant, but watch closely to prevent burning. This brief sauté releases their essential oils, which form the aromatic base of the sauce.
- Stir in the tomato paste and a pinch of paprika. Cook for 2 minutes, allowing the tomato paste to darken slightly and the spices to bloom. The mixture should become thick and glossy, a sign that the flavors are intensifying.
- Return the browned chicken to the pot and pour in the coconut milk. Stir to coat the chicken evenly. Bring the mixture to a gentle simmer, then reduce the heat to low. Cover and let it cook for 15 minutes, allowing the chicken to absorb the sauce’s richness.
- After 15 minutes, add the diced tomatoes and a splash of water if the sauce feels too thick. Simmer uncovered for another 10 minutes, or until the tomatoes soften and the sauce thickens to a velvety consistency. The chicken should be tender and the sauce should cling to each piece.
- Season with salt, pepper, and a dash of lime juice. Taste and adjust the seasoning—if you want a brighter profile, add more lime. This step is crucial; it balances sweetness, acidity, and heat.
- Stir in the chopped cilantro, and let the dish rest for 5 minutes off the heat. This resting period allows the flavors to meld, giving the sauce a smoother finish. When you’re ready to serve, drizzle a little coconut oil or a dab of butter for that glossy sheen.
That’s it— you did it. But hold on, I’ve got a few more tricks that will take this to another level.
Insider Tricks for Flawless Results
The Temperature Rule Nobody Follows
Many people start the sauce on high heat, which can cause the coconut milk to scorch. I’ve found that a low, steady simmer is essential for a silky sauce. Keep the heat low once the coconut milk is added, and let it gently bubble. This slow cooking allows the flavors to meld without compromising the sauce’s texture.
Why Your Nose Knows Best
The aroma of the dish is the ultimate indicator of progress. When the sauce starts to thicken, you’ll smell a sweet, nutty fragrance that signals the coconut is absorbing the spices. Trust your nose—if the smell is too strong or metallic, it’s a sign you’re overcooking.
The 5‑Minute Rest That Changes Everything
After turning off the heat, let the dish rest for 5 minutes. This brief pause allows the sauce to thicken further and the flavors to settle. The chicken will absorb the sauce more fully, resulting in a richer bite. It’s a simple step that dramatically improves the final product.
Use Fresh Herbs, Not Dried
Fresh cilantro and parsley add brightness that dried herbs can’t match. If you’re short on time, use a handful of frozen herbs—just add them in the last minute of cooking. The key is to preserve the vibrant green color and the fresh, peppery flavor.
Add a Splash of Water to Reheat
When reheating leftovers, add a tablespoon of water to the pot before turning on the heat. This simple trick prevents the sauce from drying out and keeps the dish silky. It also helps to re‑warm the chicken evenly.
Creative Twists and Variations
This recipe is a playground. Here are some of my favorite ways to switch things up:
Coconut‑Rice Twist
Cook the rice in coconut milk instead of water for a richer accompaniment. The rice will absorb the coconut flavor, creating a cohesive dish that feels indulgent. Pair it with a side of sautéed spinach for balance.
Spicy Saffron Variant
Add a pinch of saffron threads to the sauce during the simmering stage. The saffron will give the dish a subtle floral note and a beautiful golden hue. This version is perfect for a special occasion.
Mango‑Ginger Surprise
Fold in diced ripe mango during the last 5 minutes of cooking. The mango adds a sweet, tropical contrast to the savory sauce. It’s a fun way to make the dish feel even more exotic.
Vegetarian Version
Swap the chicken for firm tofu or paneer, seasoned with the same spice blend. The tofu will soak up the sauce beautifully, making a hearty vegetarian option that still feels indulgent.
Low‑Carb Adaptation
Serve the sauce over cauliflower rice instead of regular rice. This keeps the dish low in carbs while retaining all the flavor. The cauliflower absorbs the sauce just as well, creating a satisfying bite.
Storing and Bringing It Back to Life
Fridge Storage
Store leftovers in an airtight container for up to 3 days. The sauce will thicken as it cools, but it will remain creamy and flavorful. When you’re ready to reheat, do so gently over low heat, adding a splash of water if it seems dry.
Freezer Friendly
The dish freezes well for up to 2 months. Portion into individual servings and wrap tightly in freezer paper or a silicone bag. Thaw overnight in the fridge before reheating.
Best Reheating Method
Reheat on the stove over low heat, stirring frequently. Add a tablespoon of water or coconut milk to restore moisture. The key is to avoid high heat, which can separate the sauce.