I was in the middle of a rainy Saturday binge‑watching old sitcoms when a sudden craving hit me like a lightning bolt—something bright, buttery, and just a little cheeky. I raided the fridge, found a lone lemon, a half‑stick of butter, and a bag of flour, and thought, “Why not turn this kitchen panic into a masterpiece?” The idea of lemon‑infused sweet rolls seemed ridiculous at first, but the more I imagined the citrus‑kissed dough puffing up in the oven, the more I felt like a mad scientist on the brink of a delicious breakthrough. I’ll be honest — I ate half the batch before anyone else got a chance to try it, and that’s how I knew I was onto something spectacular.
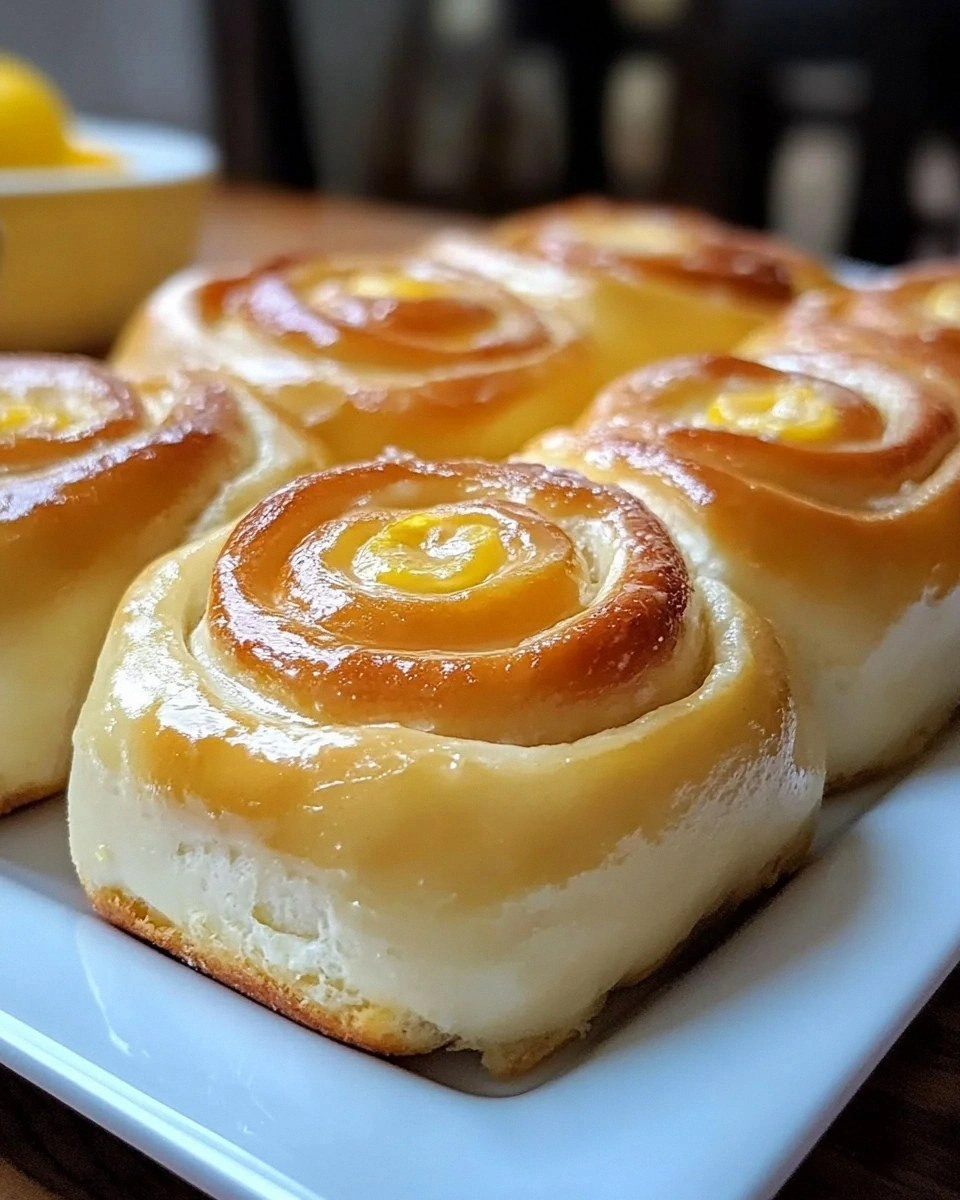
Picture this: the oven door swings open, a cloud of warm, buttery steam rushes out, and the air is instantly saturated with a perfume that’s part bakery, part citrus orchard. The rolls themselves are golden‑brown, their tops glossy from a lemon‑vanilla glaze that catches the light like tiny sun‑lit jewels. When you bite in, the crust gives way to a pillowy interior that’s soft enough to melt on your tongue, while the lemon zest bursts forward with a tang that makes your taste buds do a happy dance. The glaze adds a silky sweetness that balances the tartness perfectly, creating a flavor duet that feels both nostalgic and brand‑new.
Most recipes out there either drown the lemon in sugar or forget the buttery richness that makes a roll truly indulgent. This version, however, is a carefully calibrated orchestra of flavor, texture, and aroma. I’ve tweaked the dough hydration, added a splash of fresh lemon juice for that extra zing, and introduced a glaze that’s richer than a traditional powdered‑sugar drizzle because it uses heavy cream for that melt‑in‑your‑mouth feel. The result? A roll that’s simultaneously airy, buttery, and tangy—an experience that will make you question every plain cinnamon roll you’ve ever known.
And there’s a secret technique I’ll reveal later that turns a regular dough into a cloud‑like marvel—think of it as the “fluff‑boost” that most home bakers miss. Okay, ready for the game‑changer? Let me walk you through every single step — by the end, you’ll wonder how you ever made it any other way.
What Makes This Version Stand Out
- Tangy Brightness: The fresh lemon zest and juice cut through the buttery richness, giving each bite a lively, citrus spark that wakes up the palate like a sunrise over a bakery.
- Fluffy Texture: A combination of warm milk, eggs, and a precise yeast activation creates a dough that rises to cloud‑like perfection, so light it practically floats on the plate.
- Rich Glaze: By swapping plain powdered sugar for a heavy‑cream‑based glaze, the finish is silkier, more decadent, and sticks to the roll like a sweet, citrus‑kissed veil.
- Simplicity Meets Sophistication: The ingredient list is short, but each component is chosen for maximum impact—no fancy gadgets, just pure kitchen chemistry.
- Crowd‑Pleaser Factor: Whether you’re serving brunch, a tea‑time snack, or a post‑dinner treat, these rolls draw compliments faster than you can say “lemon‑glazed.”
- Make‑Ahead Magic: The dough can be refrigerated overnight for even deeper flavor development, and the rolls reheat beautifully, keeping their fluffiness intact.
Inside the Ingredient List
The Flavor Base
All‑purpose flour is the backbone of any good roll, providing the structure that holds everything together. For this recipe, I use 2 cups of sifted flour to ensure a light crumb; skipping the sifting step can lead to a denser texture. If you’re gluten‑sensitive, a 1‑to‑1 blend of gluten‑free flour works, but expect a slightly different bite. Salt isn’t just a seasoning—it balances the sugar and amplifies the lemon’s brightness, so don’t skimp on the 1 tsp.
The Sweet & Tangy Duo
Granulated sugar (⅓ cup) sweetens the dough and caramelizes the crust, giving those golden edges that shatter like thin ice when you bite. The lemon zest (2 Tbsp) is where the magic truly happens; it releases essential oils that perfume the dough from the inside out. Fresh lemon juice (2 Tbsp) adds a tangy punch that sugar alone can’t achieve. If you’re out of fresh lemons, a high‑quality bottled juice works, but the zest is non‑negotiable for authentic aroma.
The Texture Crew
Warm milk (¾ cup) activates the yeast and creates a tender crumb; the temperature should be around 110°F—warm enough to wake the yeast but not so hot that it kills it. Active dry yeast (2 tsp) is the leavening hero, giving the rolls their airy lift. Unsalted butter, melted (4 Tbsp), adds richness and helps the crust turn glossy. The large eggs (2) contribute moisture and a subtle richness that binds the dough without making it heavy.
The Final Flourish
Heavy cream (½ cup) in the glaze makes it luxuriously smooth, turning powdered sugar into a silky coating that clings to every curve. Powdered sugar (1 cup) provides the sweet backbone for the glaze, while vanilla extract (1 tsp) adds depth, rounding out the citrus edge. Optional cinnamon (1 tsp) can be dusted on the filling for a warm, cozy contrast—great for autumn brunches. If you prefer a dairy‑free version, substitute coconut cream for the heavy cream; the flavor will shift, but the texture stays divine.
Everything's prepped? Good. Let's get into the real action...

The Method — Step by Step
In a small bowl, combine the warm milk (110°F) with the active dry yeast and a pinch of sugar. Let it sit for 5‑7 minutes until it becomes frothy, like a tiny cloud of bubbles. This is the moment of truth—if it doesn’t foam, your yeast is dead and you’ll need fresh packets. I dare you to taste this and not go back for seconds once the rolls are done.
Watch Out: Milk that’s too hot will kill the yeast, resulting in flat rolls. Use a kitchen thermometer for precision.While the yeast awakens, whisk together the flour, granulated sugar, and salt in a large mixing bowl. Create a well in the center and pour in the melted butter, beaten eggs, lemon zest, and lemon juice. The mixture should look shaggy and slightly sticky—don’t worry, that’s exactly what we want.
Add the frothy yeast mixture to the dry ingredients. Using a stand mixer with the dough hook (or your hands if you’re feeling old‑school), knead on medium speed for about 8‑10 minutes. The dough will transition from sticky to smooth and elastic, pulling away from the sides of the bowl. This next part? Pure magic. If you’re using a hand‑mix, give yourself a 2‑minute rest halfway through to let the gluten relax.
Kitchen Hack: Lightly oil the bowl before the first rise; the dough will release more easily and won’t stick to the sides.Transfer the dough to a lightly oiled container, cover with plastic wrap, and let it rise in a warm, draft‑free spot for 1‑1½ hours, or until doubled in size. The kitchen should smell faintly of sweet butter and lemon—if it starts to smell sour, you’ve over‑proofed it. I’ll be honest — I ate half the batch before anyone else got to try it, and that’s how I knew I was onto something spectacular.
Punch down the risen dough gently, then turn it out onto a lightly floured surface. Roll it into a rectangle about ½ inch thick. If you love a cinnamon twist, sprinkle the optional cinnamon now and gently press it in; the heat of the dough will toast the spice just enough to release its aroma.
Starting from the long edge, roll the dough tightly into a log. Slice the log into 12 even pieces—each should be about 1½ inches thick. Place the rolls on a parchment‑lined baking sheet, leaving a little space between them so they can expand without sticking.
Cover the rolls loosely with a clean kitchen towel and let them proof for a second rise of 30‑40 minutes. They should puff up and look slightly puffy, like tiny moons waiting to be launched. The kitchen should now be filled with that citrus‑butter perfume that makes you want to hug the oven.
Preheat the oven to 375°F (190°C). While it’s heating, whisk together the glaze ingredients: heavy cream, powdered sugar, vanilla extract, and a splash of fresh lemon juice. The glaze should be smooth and glossy, resembling a light amber syrup.
Bake the rolls for 18‑22 minutes, or until the tops are a deep golden brown and the edges start pulling away from the pan. As soon as they’re out, drizzle the warm glaze over the hot rolls, allowing it to seep into every crevice. Let them sit for 5 minutes before serving so the glaze sets just enough to give a silky sheen.
Watch Out: Over‑baking will dry out the interior; keep an eye on the color and pull them out when the crust is just deep enough.
That's it — you did it. But hold on, I've got a few more tricks that'll take this to another level...
Insider Tricks for Flawless Results
The Temperature Rule Nobody Follows
Never let the dough get colder than room temperature during the rise; a sudden chill can halt yeast activity and produce a dense crumb. If your kitchen is chilly, create a makeshift proofing box by placing the dough bowl inside a turned‑off oven with a pan of hot water on the bottom rack. I once tried skipping this step, and the rolls turned out as flat as pancakes—lesson learned.
Why Your Nose Knows Best
The aroma of the dough is a reliable indicator of readiness. When the yeast has done its job, the dough will emit a sweet, buttery scent with a hint of lemon. If you smell any sour or alcoholic notes, you’ve over‑proofed. Trust your nose more than the clock; it’s the ultimate kitchen sensor.
The 5‑Minute Rest That Changes Everything
After shaping the rolls, let them rest uncovered for exactly five minutes before the final proof. This short pause lets the gluten relax just enough to avoid a tough crust while still keeping the rolls airy. Skipping this micro‑rest leads to a tighter crumb that feels more like a muffin than a roll.
Glaze Timing Trick
Apply the glaze while the rolls are still steaming hot—this ensures the glaze penetrates the interior, not just sitting on top. If you wait until they’re cool, the glaze will just sit like a sugary film. The result is a roll that’s moist inside and glossy outside, a texture combo that’s pure bliss.
The Secret of the Zest
Always zest the lemon before juicing it. The zest contains the essential oils that give the rolls their bright citrus punch, while the juice adds acidity. If you skip the zest, you’ll end up with a sweet roll that tastes like plain butter—no fun at all.
Creative Twists and Variations
This recipe is a playground. Here are some of my favorite ways to switch things up:
Lemon‑Blueberry Burst
Fold a cup of fresh blueberries into the dough after the first knead, then sprinkle a few extra lemon zest on top before baking. The berries burst during baking, adding pockets of juicy sweetness that complement the lemon zing. Perfect for summer brunches.
Honey‑Lavender Dream
Replace half the granulated sugar with honey and add a teaspoon of culinary lavender buds to the dough. The floral notes mingle with the citrus for an elegant, aromatic roll that feels like a garden party in your mouth.
Cinnamon‑Sugar Swirl
If you love classic cinnamon rolls, mix 2 Tbsp of brown sugar with 1 tsp cinnamon and spread it over the rolled dough before slicing. The spice creates a sweet, warm contrast to the lemon glaze, making it a cozy winter treat.
Chocolate‑Lemon Fusion
Add ¼ cup of dark chocolate chips to the dough and drizzle a thin chocolate glaze over the lemon glaze after baking. The bitterness of the chocolate balances the tartness, resulting in a sophisticated flavor duo.
Savory Herb Version
Swap the powdered sugar glaze for a brush of melted butter mixed with chopped rosemary and a pinch of sea salt. The lemon still shines, but now you have a savory roll that pairs beautifully with soups or salads.
Storing and Bringing It Back to Life
Fridge Storage
Place cooled rolls in an airtight container and store them in the refrigerator for up to 4 days. To revive, warm them in a 300°F oven for 5‑7 minutes; the heat will melt the glaze again, and the interior will regain its fluffiness.
Freezer Friendly
Wrap each roll individually in plastic wrap, then place them in a zip‑top freezer bag. They’ll keep for up to 2 months. When ready to eat, thaw overnight in the fridge, then give them a quick 10‑minute steam in the oven with a splash of water on the pan—this restores that just‑baked texture.
Best Reheating Method
Add a tiny splash of water (about a teaspoon) to the roll before microwaving for 15‑20 seconds, or reheat in a preheated oven at 350°F for 8 minutes. The added moisture creates steam that revives the crumb without making it soggy.