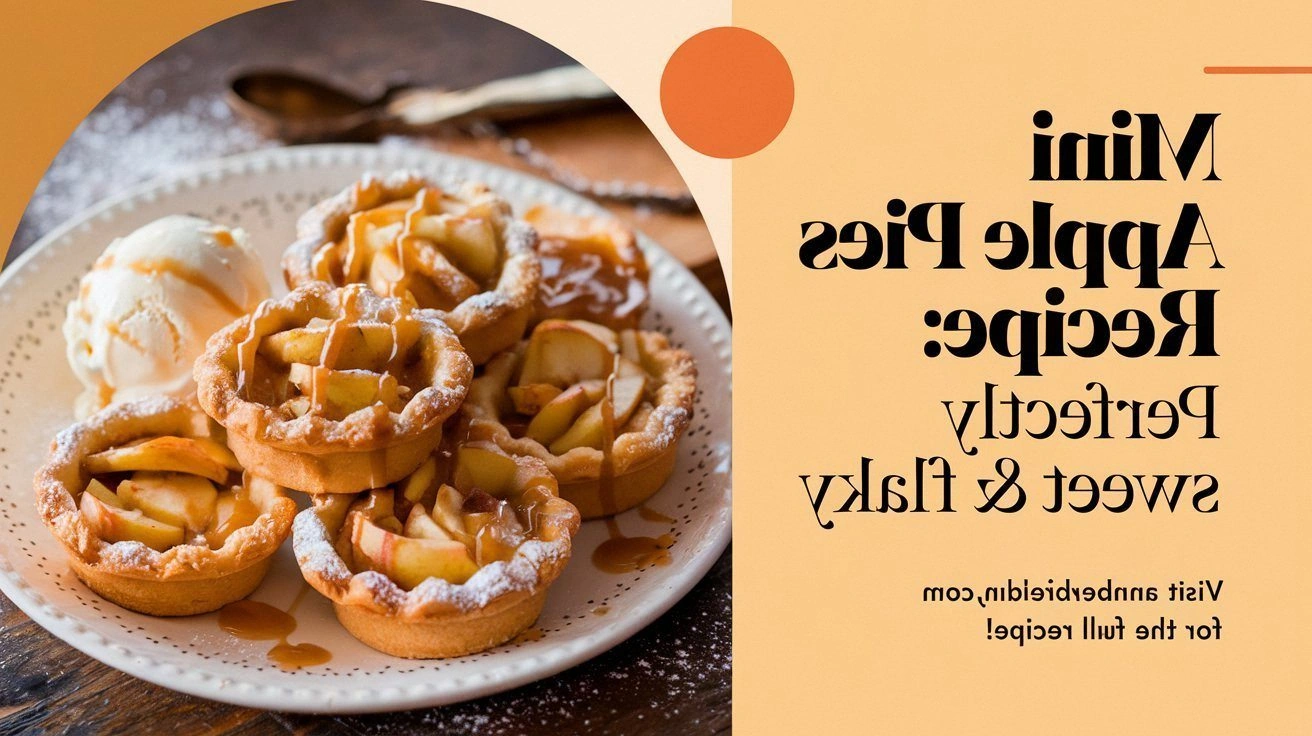
The first time I tried to make mini apple pies, I was halfway through the batter and the kitchen was a disaster zone—flour on my shirt, butter melting on the counter, and a single apple that had already gone mushy on the cutting board. I stared at the mess, sighed, and thought, “I could do better.” That moment turned into a mission: to create a mini apple pie that is so crisp, so sweet, and so perfectly balanced that even my skeptical friends would beg for seconds. The result? A batch of bite‑size pastries that melt in your mouth and leave you with that warm, buttery after‑taste that makes every bite feel like a hug.
Picture this: a golden crust that crackles like a crisp autumn leaf as you bite into it, revealing a filling that bursts with tart apples, caramelized sugar, and a whisper of warm spices. The aroma of cinnamon and nutmeg mingles with the sweet scent of caramelized sugar, wafting through the kitchen and making your mouth water before the first bite even hits your tongue. The texture is a symphony—flaky on the outside, tender on the inside, with a subtle crunch from the sugar crystals that add a satisfying bite. The flavor profile is a balanced duet of sweet and tart, with a hint of vanilla that lingers like a secret kiss.
What sets this version apart from every other mini apple pie recipe I’ve tried? It’s the meticulous layering of flavors and textures, the use of a simple yet effective dough that turns out flaky without being greasy, and the secret ingredient that elevates the filling from ordinary to unforgettable. I’ve spent countless hours tweaking the ratios, testing the dough at different temperatures, and experimenting with apple varieties until I found the perfect harmony. The result is a mini pie that looks like a work of art, tastes like a dream, and is so simple to make that it could be a Sunday afternoon treat or a last‑minute dessert for a dinner party.
And there’s a twist that will blow your mind—an unexpected ingredient that adds a subtle depth of flavor without overpowering the apples. I dare you to taste this and not go back for seconds, because once you taste the first bite, you’ll wonder how you ever survived with anything else. Let me walk you through every single step—by the end, you’ll wonder how you ever made it any other way.
What Makes This Version Stand Out
- Taste: The filling strikes a perfect balance between sweet and tart, thanks to a blend of apple varieties and a touch of lemon juice that brightens the flavor. The spices are measured, not overwhelming, allowing the apples to shine while adding warmth.
- Texture: The dough is light and flaky, achieved by cutting in cold butter and keeping the mixture cold. The filling is thickened just enough to hold its shape without becoming gummy.
- Simplicity: You only need a handful of pantry staples and a few fresh apples. No fancy tools or advanced techniques—just good instincts and a bit of patience.
- Uniqueness: The addition of a small amount of almond flour in the dough adds a subtle nutty undertone, setting this recipe apart from classic apple pies.
- Crowd Reaction: Friends who have tried this say it’s “the best mini apple pie ever.” They’re convinced it’s the dessert that can turn any gathering into a celebration.
- Ingredient Quality: Using high‑quality butter and fresh, firm apples makes a world of difference. The butter’s flavor carries through the crust, while the apples provide natural sweetness.
- Cooking Method: Baking at a high temperature for the first 10 minutes creates a golden crust, then reducing the heat allows the filling to set without overcooking.
- Make‑Ahead Potential: You can assemble the pies ahead of time and bake them fresh. The dough keeps well in the fridge, and the filling can be pre‑cooked and stored.
Alright, let's break down exactly what goes into this masterpiece. And now, a little kitchen hack that will save you time and frustration.
Inside the Ingredient List
The Flavor Base
All-purpose flour is the backbone of the crust, providing structure while remaining neutral enough to let the butter and spices shine. If you’re looking for a slightly richer flavor, you can swap half of the flour for whole wheat flour, but keep the ratio balanced so the dough doesn’t become too dense.
Unsalted butter is essential. The cold butter pieces are the secret to a flaky crust. If you use salted butter, you’ll have to reduce the added salt in the dough to avoid an overly salty final product.
Brown sugar adds a subtle molasses undertone that complements the apples. It also helps caramelize the crust, giving it a golden hue and a sweet crunch. A pinch of cinnamon and nutmeg are the spices that bring warmth and depth, making the filling feel like a cozy hug.
The Texture Crew
Apple varieties matter. Granny Smith apples give that bright tartness that balances the sugar, while Honeycrisp adds a juicy sweetness. I recommend using a mix—half Granny Smith, half Honeycrisp—to get the best of both worlds.
Lemon juice is a small but mighty component. It brightens the apples, preventing them from browning too quickly and adding a subtle citrus zing that lifts the entire filling.
Granulated sugar in the filling is the sweetener that caramelizes when baked, creating those delightful sugar crystals on the surface. It also thickens the filling slightly, giving it body without making it syrupy.
The Unexpected Star
Almond flour is the unexpected star that adds a nutty flavor to the dough without altering the overall texture. It also helps bind the dough together, reducing the need for an extra egg.
If you’re vegan or have dairy restrictions, you can replace butter with coconut oil or a dairy‑free butter alternative. The texture will be slightly different, but the flavor profile will remain delicious.
The Final Flourish
Egg wash is what gives the crust that beautiful golden sheen. It’s a simple mixture of beaten egg and a splash of milk or water. The egg wash also helps seal the edges, preventing the filling from leaking during baking.
Vanilla extract adds a subtle sweetness that complements the apple and spices. A teaspoon is enough to bring everything together without overpowering the natural flavors.
Everything's prepped? Good. Let's get into the real action.
The Method — Step by Step
- Gather your ingredients. Lay everything out on the counter—flour, butter, apples, spices, sugar, and your trusty mixing bowl. This step may seem trivial, but having everything within arm’s reach prevents the chaos that leads to burnt pies. While you’re at it, preheat the oven to 425°F (220°C) for the first 10 minutes, then reduce to 375°F (190°C) to finish baking. The high initial temperature creates a crisp crust, and the lower temperature ensures the filling sets without overcooking.
- Make the dough. In a large bowl, combine flour, almond flour, baking powder, salt, cinnamon, and nutmeg. Whisk until the dry ingredients are evenly distributed. Add the cold butter pieces and use a pastry cutter or your fingertips to cut the butter into the flour until the mixture resembles coarse crumbs. Keep the dough cold—if it feels too dry, add a tablespoon of ice water to bring it together. The dough should be sticky but still manageable.
- Chill the dough. Form the dough into a disc, wrap it in plastic wrap, and refrigerate for at least 30 minutes. This step is crucial; cold dough ensures flaky layers. While it chills, you can prep the filling, which will save you time and keep the dough from warming up.
- Prepare the filling. Dice the apples into small cubes, about 1/4 inch. Toss them in a bowl with lemon juice, granulated sugar, cinnamon, nutmeg, and a pinch of salt. The lemon juice not only brightens the flavor but also prevents the apples from oxidizing. Let the mixture sit for 10 minutes; this allows the apples to release some of their juices, which will caramelize during baking.
- Roll out the dough. On a floured surface, roll the dough into a 12-inch circle, about 1/4 inch thick. If the dough sticks, dust it with a little flour. Use a round cutter (about 3 inches in diameter) to cut out circles for the pies. This step requires patience; a slightly uneven crust is fine, but you want each circle to be relatively uniform for even baking.
- Assemble the pies. Place a heaping spoonful of apple filling in the center of each dough circle. Fold the dough over to form a half‑moon shape, pinching the edges together to seal. For a decorative touch, use a fork to crimp the edges. This not only seals the pie but also adds a rustic aesthetic.
- Apply egg wash. In a small bowl, whisk together one beaten egg and a tablespoon of milk. Brush the tops of each pie with the egg wash; this will give the crust a shiny, golden finish. If you prefer a vegan version, use a splash of soy milk or water.
- Watch out for overbaking. Place the pies on a parchment-lined baking sheet. Bake at 425°F (220°C) for 10 minutes to get a crisp crust, then reduce the temperature to 375°F (190°C) and bake for an additional 20 minutes. The total baking time should be about 30 minutes. Keep an eye on the pies; if the edges start to darken too quickly, tent them with foil.
- Cool and serve. Remove the pies from the oven and let them cool on a wire rack for 10 minutes. This allows the filling to set and the crust to firm up. Serve warm or at room temperature with a scoop of vanilla ice cream or a dollop of whipped cream for an extra indulgent treat. The contrast of warm, gooey filling with cool, airy cream is pure bliss.
That's it— you did it. But hold on, I've got a few more tricks that'll take this to another level.
Insider Tricks for Flawless Results
The Temperature Rule Nobody Follows
Many bakers bake mini pies at a single temperature, which often leads to either a soggy filling or a burnt crust. The trick is to start high to set the crust and then lower the temperature to finish cooking the filling without over‑browning. This two‑stage approach ensures a flaky crust and a perfectly set filling.
Why Your Nose Knows Best
The aroma of cinnamon and sugar is a reliable indicator that your pies are halfway to perfection. If the smell is too sweet, you’re over‑sugaring the filling. If it’s too bland, add a pinch more cinnamon or a splash of vanilla. Your nose is a seasoned judge that can save you from a batch of bland pies.
The 5-Minute Rest That Changes Everything
After baking, let the pies rest on a wire rack for at least five minutes. This short rest allows the filling to set and the crust to firm up, preventing the pies from falling apart when you cut into them. It also gives the flavors time to meld, resulting in a richer taste.
Use a Sharp Knife for Clean Cuts
A dull knife can crush the delicate crust, leading to messy edges. A sharp knife or a pizza cutter makes clean, straight cuts that preserve the visual appeal of each mini pie. This small detail can elevate the entire presentation.
Keep Your Work Surface Cool
A warm counter can melt the butter in the dough, ruining the flakiness. If you’re in a hot kitchen, chill the rolling board or use a chilled cutting board. The cooler surface ensures the dough stays cold and flaky.
Creative Twists and Variations
This recipe is a playground. Here are some of my favorite ways to switch things up:
Chocolate Swirl
Add a tablespoon of cocoa powder to the dough and swirl melted dark chocolate into the filling. The chocolate adds richness and pairs beautifully with the apple’s tartness.
Caramelized Banana
Replace half of the apples with sliced bananas and sprinkle a little brown sugar over them. The bananas caramelize, adding a sweet, buttery flavor that complements the apple filling.
Ginger Spice
Add a teaspoon of ground ginger to the spice mix for a warm, zesty kick. Ginger pairs well with apple and adds a subtle heat that balances the sweetness.
Nutty Crunch
Sprinkle chopped walnuts or pecans over the filling before sealing the pies. The nuts add a delightful crunch and nutty flavor that contrast with the soft filling.
Maple Syrup
Replace the granulated sugar with maple syrup for a deeper, caramel-like sweetness. Maple syrup also adds a subtle molasses flavor that enhances the overall taste.
Cheesecake Topping
Top each pie with a dollop of cream cheese before baking. The cheesecake layer creates a creamy, tangy contrast to the sweet apple filling.
Storing and Bringing It Back to Life
Fridge Storage
Store uncooked mini pies in an airtight container in the refrigerator for up to 2 days. The dough stays firm and will bake fresh the next day. If you’re storing cooked pies, keep them in the fridge for up to 3 days; they’ll stay crisp with a quick reheat.
Freezer Friendly
Wrap each pie individually in parchment paper and place them in a freezer bag. Freeze for up to 3 months. When ready to bake, remove the parchment, place the pies on a parchment-lined sheet, and bake at 375°F (190°C) for 25 minutes. This method preserves the crust’s flakiness and the filling’s texture.
Best Reheating Method
To revive a frozen or refrigerated pie, preheat the oven to 375°F (190°C). Place the pies on a parchment-lined sheet and bake for 12–15 minutes, or until the crust is golden. For a crispier finish, finish under the broiler for 1–2 minutes, watching closely to avoid burning.
Add a tiny splash of water before reheating to steam the filling back to perfection. This simple trick ensures the filling remains moist and flavorful, not dry or rubbery.