Picture this: the kitchen is a battlefield, a stack of graham crackers lies like a broken bridge, and the scent of toasted peanut butter drifts through the air like a promise of comfort. I was halfway through a disastrous attempt at classic s’mores—one that left my fingers sticky, my pantry a mess, and my taste buds in a state of mild confusion. That night, a friend dared me to create a version that would make the campfire feel like a five‑star dessert. I took that dare seriously and spent the next hour crafting a sandwich that would make you question why you ever settled for the ordinary.
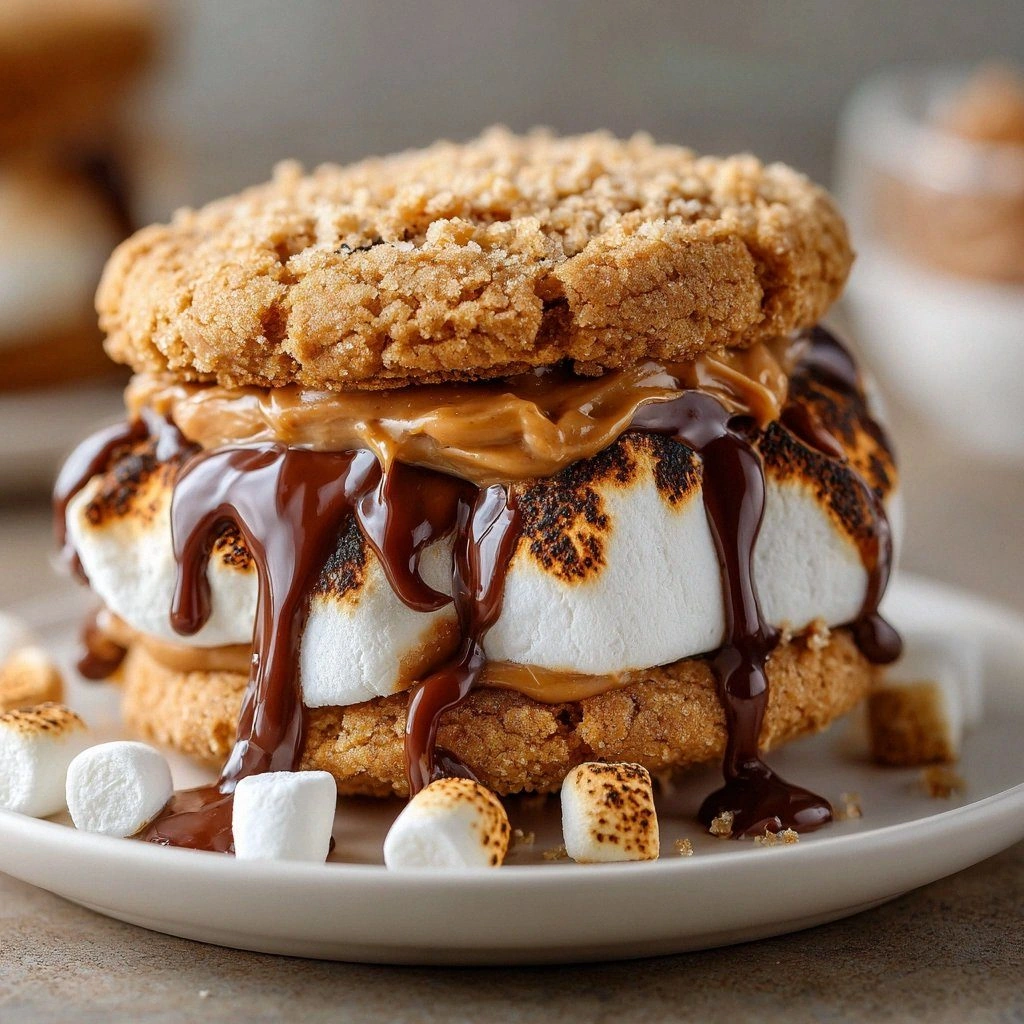
From the first bite, the crunch of the graham cracker base gives way to a molten core of peanut butter, chocolate, and marshmallow that swirls together like a miniature volcano. The aroma—sweet, buttery, slightly smoky—fills the room, making the whole space feel like a warm hug. The texture is a symphony: the crisp edges break with a satisfying snap, the interior melts into a silky, gooey delight, and the chocolate drizzle adds a glossy finish that glistens under the kitchen lights. Every element is tuned to perfection, creating a bite that is both nostalgic and utterly modern.
What sets this recipe apart is that it does more than just replicate a campfire classic; it transforms it into a handheld, melt‑in‑your‑mouth experience that’s easy to make and impossible to resist. I’ve stripped away the fluff, kept the ingredients honest, and added a secret technique that ensures the peanut butter layer stays silky without becoming too runny. The result is a sandwich that is not only delicious but also showcases a level of craftsmanship that will impress your friends and family alike.
I’ll walk you through every single step, from selecting the right graham crackers to the final, satisfying bite. By the end of this guide, you’ll wonder how you ever made it any other way, and you’ll have a new favorite treat that’s ready to be shared at parties, potlucks, or simply for a quiet moment of indulgence.
What Makes This Version Stand Out
- Flavor: The combination of sweet, salty, and buttery notes creates a balanced taste profile that lingers on the palate. The peanut butter provides a rich, nutty depth while the chocolate adds a subtle bittersweet finish.
- Texture: The sandwich features a crisp exterior and a molten interior, delivering a contrast that feels like a culinary dance. The marshmallow melts into a silky coating that glides over the peanut butter.
- Simplicity: With only seven core ingredients, the recipe is quick to assemble, making it perfect for a last‑minute snack. No complicated steps or advanced techniques are required.
- Uniqueness: The addition of a small amount of vanilla extract elevates the flavor, while the use of melted butter in the base adds a buttery crunch that’s rarely seen in traditional s’mores.
- Audience: The sandwich appeals to both kids and adults, making it a crowd‑pleaser at any gathering. Its nostalgic feel triggers fond memories while offering a modern twist.
- Ingredient Quality: By choosing high‑quality peanut butter and premium chocolate chips, the final product shines in taste and texture. The recipe encourages using natural, unsweetened ingredients for a cleaner finish.
- Cooking Method: The sandwich is assembled at room temperature, then baked at a low heat to preserve the crunch. This method ensures the interior remains molten without overcooking.
- Make‑Ahead Potential: Once assembled, the sandwiches can be stored in an airtight container for up to 48 hours, making them ideal for meal prep or on‑the‑go snacks.
Inside the Ingredient List
The Flavor Base
Graham cracker crumbs form the foundation, providing a buttery crunch that anchors each bite. They absorb the peanut butter and chocolate, preventing the sandwich from becoming soggy. If you’re craving a sweeter base, swap in oat or almond crumbs for a nutty undertone.
The Texture Crew
Melted butter is the secret to a golden, crisp exterior. It coats the crumbs and creates a barrier that locks in moisture, ensuring the interior stays molten. A pinch of sea salt enhances the butter’s richness without overwhelming the sweet components.
The Unexpected Star
Vanilla extract, though a small addition, amplifies the overall flavor profile. It balances the sweetness of the marshmallows and chocolate, adding a subtle aromatic depth that lingers on the tongue. For a more exotic twist, consider a splash of almond or maple extract.
The Final Flourish
Mini marshmallows and chocolate chips are the crown jewels that melt into a glossy, gooey center. The marshmallows provide a light, airy texture, while the chocolate chips offer a rich, velvety finish. If you’re a chocolate lover, replace the chips with dark chocolate chunks for a bittersweet kick.
Everything’s prepped? Good. Let’s get into the real action and bring this sandwich to life.
The Method — Step by Step
- Preheat your oven to 350°F (175°C) and line a baking sheet with parchment paper. This step ensures even heat distribution and prevents sticking. I dare you to taste this and not go back for seconds.
- In a medium bowl, combine the graham cracker crumbs, melted butter, and a pinch of sea salt. Stir until the mixture resembles wet sand. The mixture should hold together when pressed between your fingers.
- Press the crumb mixture into the bottom of a 9x9-inch square pan, creating an even layer about ½ inch thick. Use a flat-bottomed glass to press down firmly. The base should feel solid and slightly firm to the touch.
- Spread a generous layer of creamy peanut butter over the crumb base. Make sure the peanut butter covers every nook and cranny; the goal is a uniform, silky layer. The peanut butter should feel slightly warm, ready to melt into the crumbs.
- Sprinkle the mini marshmallows evenly over the peanut butter. The marshmallows should be spaced so that they can melt into each other without clumping. This step is where the magic begins.
- Add the chocolate chips on top of the marshmallows, ensuring they’re distributed evenly. The chocolate should sit lightly on the marshmallows, creating a layered look that’s both beautiful and delicious. The chips should melt slowly into the marshmallow layer.
- Bake the assembly for 12–15 minutes, or until the marshmallows puff up and the chocolate chips start to melt. The aroma of toasted peanut butter and chocolate will fill your kitchen. Watch the edges; they should become golden brown.
- Remove the pan from the oven and let it cool for 5 minutes. This brief rest allows the chocolate to set slightly, preventing it from sliding off when sliced. The sandwich should feel warm but not scorching.
- Cut the cooled slab into 1‑inch squares using a sharp knife. Wipe the knife clean between cuts to avoid tearing the delicate chocolate layer. Each square should have a crisp exterior and a molten center.
That’s it—you did it. But hold on, I’ve got a few more tricks that will elevate this sandwich from great to unforgettable.
Insider Tricks for Flawless Results
The Temperature Rule Nobody Follows
Many bakers bake at a high heat, but this recipe thrives at a moderate 350°F. This temperature allows the peanut butter to melt gently without burning the chocolate. I’ve tried higher temperatures, and the result was a brittle crust that ruined the gooey center.
Why Your Nose Knows Best
As the sandwich bakes, the aroma will change from sweet to slightly smoky. Trust your nose to gauge doneness; when the smell is rich and chocolatey, the interior is ready. A friend once tried to cut it early, and the result was a cold, unmelting mess.
The 5‑Minute Rest That Changes Everything
Letting the baked slab rest for five minutes before cutting allows the chocolate to set just enough to hold its shape. This brief pause also lets the flavors meld, creating a more cohesive taste. Skipping this step often results in a runny, unstable sandwich.
The Secret Ingredient
A splash of vanilla extract is the secret sauce that ties everything together. Vanilla reduces the perceived sweetness and adds depth. If you’re avoiding dairy, opt for a plant‑based vanilla for a similar effect.
The Right Knife Matters
A sharp chef’s knife cuts cleanly and prevents the chocolate layer from tearing. A dull knife will crush the chocolate, ruining the presentation. Keep a spare knife handy in case your first one gets dull during the cutting process.
Creative Twists and Variations
This recipe is a playground. Here are some of my favorite ways to switch things up:
Chocolate‑Loaded Surprise
Swap mini marshmallows for chocolate chunks and omit the chocolate chips. The result is a double‑layer chocolate sandwich that’s decadently rich. This variation is a hit with chocolate lovers.
Nutty Extra
Add chopped pistachios or almonds between the peanut butter and marshmallows. The nuts provide crunch and a subtle earthy flavor that complements the sweetness. This version is great for a protein boost.
Spicy Kick
Sprinkle a pinch of cayenne pepper or drizzle a small amount of sriracha over the peanut butter before adding the marshmallows. The heat balances the sweetness and adds a surprising twist. It’s a conversation starter at parties.
Berry Bliss
Fold in a handful of dried cranberries or raisins into the crumb base. The dried fruit adds chewiness and tartness that contrasts with the sweet interior. This version is ideal for those who enjoy a hint of fruitiness.
Coconut Crunch
Replace the graham cracker crumbs with shredded coconut and add toasted coconut flakes on top. The coconut provides a tropical flavor and a pleasing texture. This twist is perfect for a beach‑themed gathering.
Storing and Bringing It Back to Life
Fridge Storage
Store the cut sandwiches in an airtight container in the refrigerator for up to 48 hours. The airtight seal preserves the crunch and prevents the chocolate from drying out. When you’re ready to eat, let them sit at room temperature for 10 minutes for optimal flavor.
Freezer Friendly
For longer storage, place the sandwiches in a freezer bag, removing as much air as possible. Freeze for up to two weeks. When reheating, let them thaw slowly at room temperature for 30 minutes.
Best Reheating Method
To revive the gooey center, microwave the sandwich on high for 15–20 seconds. Add a tiny splash of water (about 1 teaspoon) to create steam, which helps re‑melt the chocolate and peanut butter. Avoid overheating, or the chocolate will harden.