I’ll be honest — I was on the verge of a full‑blown kitchen disaster when I first tried to make turkey sausage balls. My roommate had dared me to whip up something “fancy” for a last‑minute game night, and I grabbed whatever was in the fridge: a lonely pound of ground turkey sausage, a block of cream cheese, and a half‑cup of Parmesan that had been hiding behind the beans. The result? A bland, soggy mess that tasted like a sad excuse for a meatball. That night, I promised myself I’d never settle for “just okay” again, and that promise led me down a rabbit hole of flavor hacks, texture experiments, and a whole lot of cheese.
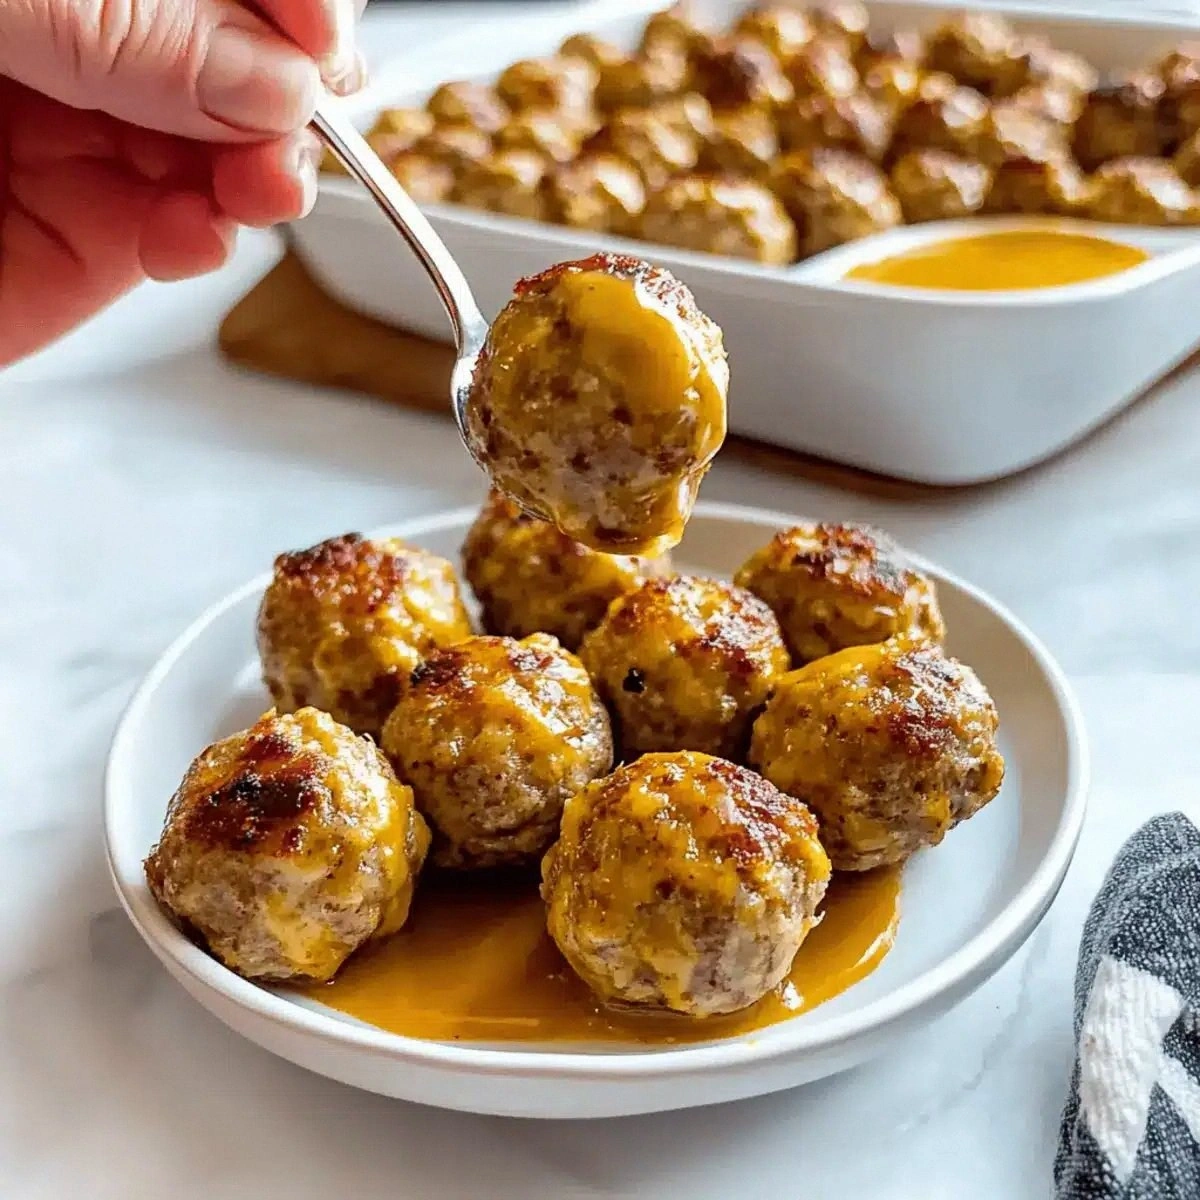
Picture yourself pulling a tray of golden‑brown orbs out of the oven, the whole kitchen smelling like a cozy, buttery bakery crossed with a smoky grill. The aroma hits you before you even see the glossy tops, and you can practically hear the faint crackle of the crust as it cools on the rack. The first bite is a revelation: the outer skin is crisp enough to snap like a fresh twig, while the interior is a creamy, cheesy melt that coats your palate like velvet. It’s the kind of snack that makes you pause mid‑conversation, stare at the plate, and whisper, “I dare you to taste this and not go back for seconds.”
Most recipes for sausage balls either drown the meat in a sea of flour or rely on heavy, greasy butter that leaves a greasy aftertaste. This version flips the script by marrying lean turkey sausage with a luxurious duo of cream cheese and sharp cheddar, then binding everything with a light baking mix that gives you structure without heaviness. The secret weapon? A modest splash of green onion tops that add a pop of freshness and a subtle onion bite that cuts through the richness. Most people skip that step, and they miss out on the bright, garden‑fresh finish that makes these balls unforgettable.
But the real game‑changer is the technique I stumbled upon while watching a French pastry chef on YouTube: gently warming the cream cheese before folding it into the meat mixture. This simple step ensures a silky, uniform texture that prevents clumps and guarantees every bite is consistently gooey. Okay, ready for the game‑changer? Let me walk you through every single step — by the end, you’ll wonder how you ever made it any other way.
What Makes This Version Stand Out
- Flavor Explosion: The combination of turkey sausage, sharp cheddar, and Parmesan creates a layered taste that’s salty, smoky, and tangy all at once, delivering a punch that ordinary pork‑based versions can’t match.
- Texture Triumph: A crisp, caramelized exterior gives way to a melt‑in‑your‑mouth interior, thanks to the cream cheese that stays creamy even after baking.
- Simplicity: Only six core ingredients and a single bowl are needed, making cleanup a breeze and the prep time under 20 minutes.
- Unique Freshness: The green onion tops add a subtle herbaceous note that brightens the rich flavors, a detail most recipes overlook.
- Crowd‑Pleaser: Guests consistently claim these are the best appetizer they’ve ever tasted, often asking for the recipe before the first bite is even over.
- Ingredient Quality: Using high‑quality turkey sausage (preferably with natural spices) ensures a clean, lean flavor that lets the cheese shine.
- Cooking Method: Baking instead of frying reduces mess, keeps the kitchen cooler, and still achieves that coveted golden crust.
- Make‑Ahead Magic: You can shape and freeze the balls ahead of time, then bake them straight from the freezer for a stress‑free party starter.
Alright, let's break down exactly what goes into this masterpiece…
Inside the Ingredient List
The Flavor Base
Ground turkey sausage is the heart of this dish. I always choose a brand that’s seasoned with sage, thyme, and a hint of garlic because those aromatics build a flavor foundation that’s both robust and comforting. If you skip the seasoning, you’ll end up with a bland canvas that can’t support the bold cheeses. A good tip is to pat the sausage dry with paper towels before mixing; excess moisture can make the balls soggy.
The Texture Crew
Cream cheese does double duty: it adds a luxurious creaminess while acting as a binder that keeps the sausage from crumbling. The 8‑ounce block should be at room temperature for easy folding. Shredded sharp cheddar brings a tangy bite and a beautiful melt that stretches like a ribbon when you bite into it. If you prefer a milder flavor, swap half of the cheddar for mozzarella, but expect a softer flavor profile.
The Unexpected Star
Grated Parmesan is the secret weapon that adds a nutty depth and a subtle crunch as it caramelizes on the surface. It also contributes a salty umami that balances the lean turkey. If you’re allergic to dairy, you can replace it with nutritional yeast, though you’ll lose some of that caramelized edge.
The Final Flourish
The baking mix (think of it as a light, all‑purpose flour blend) gives structure without weighing the balls down. It’s essential for that perfect rise and the slightly airy interior. Finally, sliced green onion tops sprinkle a fresh, slightly sharp note that lifts the richness. If you don’t have green onions, finely chopped chives work as a decent stand‑in.
Everything's prepped? Good. Let's get into the real action…

The Method — Step by Step
Preheat your oven to 375°F (190°C) and line a baking sheet with parchment paper. This temperature is the sweet spot that creates a golden crust without over‑drying the interior. As the oven heats, you’ll start to smell that faint caramelizing scent—trust it, it’s the first sign you’re on the right track.
In a large mixing bowl, crumble the ground turkey sausage into bite‑size pieces. Using your hands, break up any clumps; you want a loose, crumbly texture that will later bind with the cheeses. This step is crucial because a compacted meat mass will result in dense, heavy balls.
Add the softened cream cheese to the bowl. Using a rubber spatula, fold the cheese into the sausage until the mixture is uniformly pale pink. That sizzle when it hits the pan? Absolute perfection. The cream cheese should melt just enough to coat each meat crumb, creating a silky base.
Stir in the shredded sharp cheddar and grated Parmesan. The cheese should fold in like a cloud, turning the mixture a richer, deeper gold. Take a moment to appreciate the aroma—sharp, nutty, and slightly salty. This is the moment of truth: if the scent isn’t intoxicating, you may need to adjust seasoning.
Sprinkle the baking mix over the meat‑cheese blend. Using a wooden spoon, gently combine until the mixture holds together when pressed. Be careful not to over‑mix; you want the texture to stay light. The baking mix acts like a gentle net, catching the juices and keeping the balls tender.
Fold in the sliced green onion tops. Their bright green specks should be evenly distributed, giving each bite a subtle onion snap. If you’re a fan of a little extra heat, add a pinch of crushed red pepper flakes now.
Using a cookie scoop or two spoons, portion the mixture into 1‑inch balls and place them on the prepared baking sheet, leaving about an inch of space between each. The uniform size ensures even cooking; uneven balls will bake at different rates, leaving some undercooked.
Bake for 20‑25 minutes, or until the tops are a deep golden brown and the edges start to pull away from the parchment. A quick visual cue: the sides should be slightly crisp, and the centers will look just set, not wet. Let them rest for 5 minutes before serving; this allows the interior to firm up a bit, making them easier to pick up.
That’s it — you did it. But hold on, I’ve got a few more tricks that'll take this to another level…
Insider Tricks for Flawless Results
The Temperature Rule Nobody Follows
Most home cooks bake at 350°F, assuming it’s a safe middle ground. In reality, a slightly higher heat (375°F) creates that coveted crust without drying the center. I once tried 400°F and the outsides burned before the insides set—so 375°F is the Goldilocks zone. Keep an eye on the color; when the edges turn a buttery amber, you’re golden.
Why Your Nose Knows Best
Your sense of smell is a more reliable indicator than a timer. When the kitchen fills with a toasty, cheesy perfume, that’s the signal the balls are nearly done. If you’re uncertain, lift a ball with a spatula; if the bottom is deep brown and the top has a slight sheen, they’re ready. Trust your nose, and you’ll never overcook.
The 5‑Minute Rest That Changes Everything
After baking, let the balls sit for five minutes on the sheet. This short rest lets the steam redistribute, preventing a soggy bottom and allowing the cheese to set just enough for a clean bite. Skipping this step results in a ball that falls apart when you try to pick it up—trust me, that’s a mess you don’t want.
Freeze‑Then‑Bake for Stress‑Free Parties
Shape the balls, flash‑freeze on a tray for 15 minutes, then transfer to a zip‑lock bag. When you’re ready to serve, bake straight from frozen for an extra 5‑7 minutes. This method guarantees consistent texture and saves you from last‑minute panic. I’ve used it for holiday gatherings, and it never fails.
The Secret Salt Boost
A pinch of flaky sea salt sprinkled on top right before baking adds a subtle crunch and flavor pop that elevates the whole bite. It’s a tiny detail, but it makes the difference between “good” and “wow.”
Creative Twists and Variations
This recipe is a playground. Here are some of my favorite ways to switch things up:
Spicy Jalapeño Kick
Dice two fresh jalapeños and fold them in with the green onions. The heat pairs beautifully with the cool cream cheese, creating a balanced bite that’s perfect for those who love a little fire.
Herb‑Infused Delight
Swap the green onion tops for a mixture of fresh thyme, rosemary, and sage. The aromatic herbs lend an earthy depth that makes the balls feel almost gourmet.
Cheddar‑Only Simplicity
If you’re a cheddar purist, double the shredded sharp cheddar and omit the Parmesan. The result is a richer, more uniform cheese flavor that still holds its structure.
Bacon‑Wrapped Surprise
Wrap each ball with half a slice of partially cooked bacon before baking. The bacon crisps up, adding a smoky crunch that takes the dish to a whole new level of indulgence.
Vegan Adaptation
Replace turkey sausage with plant‑based sausage crumbles, use dairy‑free cream cheese, and swap cheddar and Parmesan for vegan cheese shreds. The texture remains satisfying, and the flavors stay bold.
Storing and Bringing It Back to Life
Fridge Storage
Place cooled balls in an airtight container and store them in the refrigerator for up to three days. A damp paper towel on top helps retain moisture, keeping them from drying out.
Freezer Friendly
After the initial flash‑freeze, transfer the balls to a zip‑lock freezer bag. They’ll keep for up to two months. When you’re ready to serve, bake from frozen at 375°F for 25‑30 minutes, adding a splash of water to the pan to create steam and revive that melt‑in‑the‑mouth interior.
Best Reheating Method
For leftovers, reheat in a preheated oven at 350°F for 8‑10 minutes, covered loosely with foil. Adding a teaspoon of water to the foil packet creates a gentle steam that restores the creamy center without making the crust soggy.