The first time I tried to make these Snowball OREO Cookie Balls, I was halfway through the kitchen and a bag of OREO crumbs fell onto the counter like a miniature snowstorm. I laughed, then stared at the mess and thought, “If I could turn this chaos into something edible, I’d be the hero of my own kitchen.” That moment sparked a midnight experiment that would later become the ultimate no‑bake treat I’m about to share with you. I’m not kidding—this is hands down the best version you'll ever make at home, and I’m ready to walk you through every single step. By the end, you’ll wonder how you ever made it any other way.
Picture yourself pulling these bite‑size delights out of the fridge, the whole kitchen smelling of sweet vanilla and chocolate, and your friends’ eyes widening in anticipation. I dare you to taste this and not go back for seconds, because the first bite delivers a creamy, cookie‑crunch explosion that lingers like a sweet echo. The texture is a delicate balance: the cream cheese base is silky, the crushed OREO crunches are unmistakable, and the powdered sugar dusting gives it that classic snowy finish. The moment the ball hits your tongue, you’ll hear a satisfying crackle, a subtle pop that signals the cookie’s crispness against the soft interior. If you’ve ever struggled to make no‑bake cookies that hold together, you’re not alone—I've got the fix.
What makes this version stand out is not just the ingredients but the technique that turns a simple mixture into a decadent treat. The secret is in how the cream cheese is softened just enough to blend without liquefying, how the OREOs are crushed to the right consistency, and how the powdered sugar is folded in to keep everything light yet cohesive. I’ve spent hours experimenting with ratios, textures, and timing until I found the sweet spot where every bite melts in your mouth and the edges stay intact. The result is a cookie ball that feels like a chocolate‑covered snowflake—delicious, airy, and utterly addictive. If you’re ready for a game‑changer, let’s dive into the details.
And now the fun part: I’ll be honest—I ate half the batch before anyone else got to try it. That’s the power of a recipe that’s so easy to make, yet so irresistible. It’s the kind of treat that can transform an ordinary gathering into a memorable event. I’ve taken the time to refine every step, and the final product will have you asking for the recipe again and again. So grab your mixing bowl, and let’s get started.
What Makes This Version Stand Out
Flavor: The combination of rich cream cheese and crunchy OREO delivers a creamy, chocolatey bite that’s both indulgent and refreshing. The powdered sugar finish gives it a subtle sweetness that balances the saltiness of the cookies.
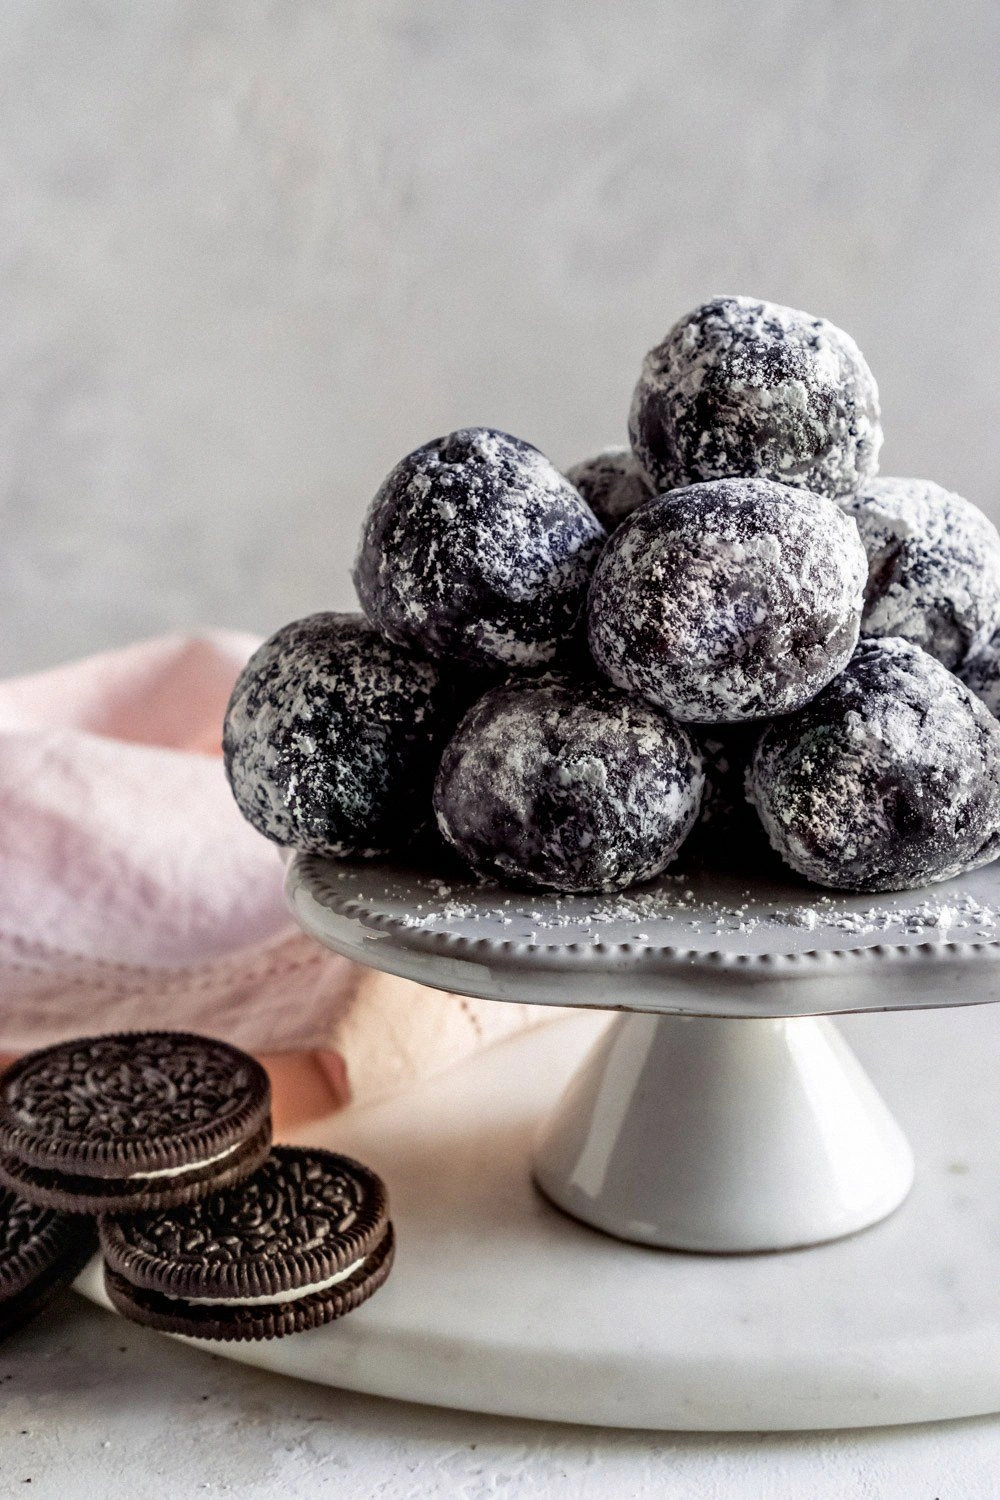
Texture: Each ball is a perfect marriage of silky cream and crisp cookie shards—no clumps, no soggy pockets. The result is a bite that feels like a snowball of flavor, with a satisfying crunch that shatters like thin ice.
Ease: No oven, no baking, no mess—just a few minutes of mixing and chilling. This recipe is a lifesaver for busy nights or when you’re craving something sweet without the hassle.
Uniqueness: While many cookie‑ball recipes rely on chocolate ganache or buttercream, this version uses cream cheese for a tangy twist that sets it apart from the crowd.
Portability: Once formed, the balls stay together on a tray or in a container, making them ideal for parties, potlucks, or a quick snack on the go.
Make‑Ahead: They’re ready to serve after just 10 minutes of chilling, but you can prep them a day ahead and store in the fridge for up to a week.
Ingredient Quality: Using a high‑quality cream cheese and premium OREO cookies elevates the flavor profile and ensures each bite is smooth and consistent.
Alright, let's break down exactly what goes into this masterpiece…
Inside the Ingredient List
The Creamy Core
The 8‑oz brick of cream cheese is the heart of these cookie balls. Its high fat content gives the mixture a silky, velvety texture that holds everything together. If you skip the cream cheese, you’ll end up with a crumbly, dry mixture that won’t form balls. For a dairy‑free version, try a full‑fat coconut cream; it behaves similarly but adds a subtle coconut aroma.
When selecting cream cheese, aim for a brand that’s rich and not overly processed. A fresh, natural cream cheese will deliver a cleaner, less sweet flavor compared to the ultra‑cream variants. If you prefer a slightly tangier profile, choose a low‑fat version and add a teaspoon of lemon zest.
The Cookie Foundation
The 36 OREO cookies are more than just a sweet component—they provide structure. Each cookie contributes a small amount of salt and chocolate flavor that balances the richness of the cream cheese. If you’re looking to reduce sugar, you can substitute half the cookies with sugar‑free chocolate cookies.
Crushing the cookies to the right consistency is crucial. Too fine, and the mixture will be heavy; too chunky, and the texture will feel uneven. A simple trick: place the cookies in a zip‑lock bag and gently tap them with a rolling pin until you achieve a medium crumb.
The Powdered Sugar Finish
The half cup of powdered sugar adds the final snowy coating. It’s not just for aesthetics; it lightly sweetens the mixture and helps the balls set. If you’re watching sugar intake, you can use a sugar‑free alternative like stevia‑sweetened powdered sugar, but keep in mind the flavor will be slightly different.
When dusting the finished balls, use a fine mesh sieve to ensure an even coating. A light dusting keeps the texture airy and prevents the sugar from clumping.
Everything's prepped? Good. Let's get into the real action…
The Method — Step by Step
- First, soften the cream cheese by leaving it at room temperature for about 10 minutes. This step is crucial—if the cheese is too cold, it will clump and the mixture won’t bind. Watch the texture; it should be smooth and spreadable, not runny. This is the moment of truth.
- While the cheese is warming, crush the OREO cookies. Place them in a zip‑lock bag and use a rolling pin or a heavy pan to crush them to a medium crumb. Aim for a texture that feels like fine sand; you don’t want big chunks or a powdery mess. Don’t walk away from the counter—this step sets the foundation.
- In a large mixing bowl, combine the softened cream cheese with the crushed OREOs. Use a wooden spoon or a silicone spatula to blend until fully integrated. The mixture should be thick yet pliable, with the chocolate crumbs evenly dispersed. If you see pockets of cheese, keep mixing until they disappear.
- Gradually fold in the powdered sugar, a handful at a time. This helps the sugar dissolve into the mixture without clumping. Stir gently but thoroughly; the mixture should look uniform and slightly glossy. The sugar also helps the balls set as they chill.
- Once the mixture is smooth, transfer it onto a parchment‑lined tray. Using a tablespoon or a small cookie scoop, portion the mixture into equal-sized balls—about 1.5 inches in diameter. If you want a more uniform size, use a cookie scoop or a small ice‑cream scoop.
- Roll each ball in a small dish of powdered sugar, ensuring an even coat. Tap off any excess sugar and place the balls on the tray. This step not only adds sweetness but also gives the balls that classic snowy appearance.
- Cover the tray with plastic wrap and refrigerate for at least 30 minutes, or until the balls firm up. The chill will set the structure and make them easy to handle. Remember, patience is key—do not rush the chilling step.
- When ready to serve, remove the balls from the fridge and let them sit at room temperature for a few minutes. This brief rest allows the cream cheese to soften slightly, giving each bite a luxuriously creamy center.
That’s it—you did it. But hold on, I've got a few more tricks that'll take this to another level. These insider tips will ensure every batch is flawless and will keep the flavor profile on point.
Insider Tricks for Flawless Results
The Temperature Rule Nobody Follows
The key to a perfect bite is the temperature of the cream cheese. If it’s too cold, the mixture will be stiff; too warm, and the balls will become mushy. The sweet spot is when the cheese is at room temperature, just soft enough to blend but still firm enough to hold shape. I’ve found that waiting 10 minutes after taking it out of the fridge works best. This simple step saves you from a batch that collapses.
Why Your Nose Knows Best
Before you roll the balls, give them a quick sniff. If the aroma is sweet and chocolatey with a hint of dairy, you’re on the right track. A slightly sour or off scent indicates the cream cheese may have gone bad or that the mixture is too watery. Trust your nose—safety first!
The 5‑Minute Rest That Changes Everything
After you’ve rolled the balls, let them rest on the tray for 5 minutes before covering. This short pause allows the edges to set, making them easier to handle. It also gives the powdered sugar a chance to adhere better, preventing it from sliding off.
Use a Light Dusting Technique
Instead of pouring powdered sugar over the balls, use a fine mesh sieve to gently tap the sugar onto the surface. This method ensures an even coating without over‑dosing the sweetness. If you’re aiming for a low‑sugar version, sprinkle only half the amount and let the natural sweetness of the OREOs shine.
The Ideal Storage Container
Store the finished balls in an airtight container with a layer of parchment paper between each layer. This prevents them from sticking together and keeps them fresh longer. I’ve kept mine in the fridge for up to a week with no loss of texture or flavor.
The Reheating Trick
If you need to warm the balls, add a tiny splash of water to the container before reheating. The moisture steams the balls back to perfection, restoring that creamy center without drying them out. A quick 30‑second microwave burst is all you need.
Creative Twists and Variations
This recipe is a playground. Here are some of my favorite ways to switch things up:
Chocolate‑Mint Surprise
Add a teaspoon of peppermint extract to the mixture for a refreshing minty kick. The chocolate OREOs pair beautifully with the cool mint flavor, creating a balanced contrast that’s perfect for spring gatherings.
Nutty Crunch Edition
Mix in 1/4 cup of chopped walnuts or pecans before rolling. The nuts add a delightful crunch and a nutty aroma that complements the creamy base. It’s a great way to elevate the snack for a more sophisticated palate.
Coconut Twist
Replace the powdered sugar with shredded coconut for a tropical flair. The coconut adds a subtle sweetness and a chewy texture that pairs well with the OREO crunch.
Salted Caramel Variation
Drizzle a thin layer of salted caramel over the balls after they’ve chilled. The caramel adds a silky sweetness and a hint of sea salt that enhances the chocolate flavor.
Vegan Version
Swap the cream cheese for a full‑fat coconut cream and use dairy‑free OREOs. This vegan take maintains the creamy texture while keeping the flavor profile intact.
Storing and Bringing It Back to Life
Fridge Storage
Keep the balls in an airtight container at room temperature for up to 3 days. For longer freshness, store them in the fridge, where they’ll stay firm and ready to serve for up to a week. The cold environment helps maintain the creamy center without drying out the exterior.
Freezer Friendly
If you want to make a large batch, freeze the balls for up to 3 months. Wrap each ball individually in parchment paper before placing them in a freezer bag. When ready to enjoy, let them thaw at room temperature for 15 minutes before serving.
Best Reheating Method
To revive the texture, add a tiny splash of water to the container before microwaving on medium for 15 seconds. The steam helps restore the creaminess without drying out the surface. This trick is especially useful if the balls have become slightly stale from storage.