Introduction
Picture this: I’m standing in a cramped kitchen, the stove blazing, a pan sizzling with olive oil, and a friend’s skeptical grin as they ask whether I can turn a humble batch of scallops into something that feels like a five‑star dinner. I laughed, because I’ve been chasing that golden sear for years, and the moment the first scallop hit the pan, the kitchen filled with a buttery aroma that made my eyes water. The sound of the sizzle was a drumbeat, the heat a steady rhythm, and the little bursts of steam felt like fireworks. I could feel the heat radiating off the skillet, the gentle hiss, and the promise of a tender interior. The texture of the scallop, when cooked just right, is almost like a delicate pearl that shatters into flavor with every bite.
I’ll be honest — I ate half the batch before anyone else got to try it. The scallops were so silky, so buttery, and so perfectly caramelized that I was tempted to keep scooping them onto my plate. Yet, the secret sauce that turns an ordinary seafood dish into a showstopper was something I never expected to find in a pantry. It’s a technique that most recipes overlook, and it’s the difference between a good meal and a great one. I dare you to taste this and not go back for seconds.
Most recipes get this completely wrong. They either overcook the scallops, leave them raw inside, or drown the natural sweetness in heavy sauces. What makes this version stand out is a delicate balance of sear, brightness, and a touch of umami that lingers on the palate. It’s hands down the best version you’ll ever make at home, and it’s easy enough that even a novice can replicate it with confidence. I’m going to walk you through every single step, and by the end, you’ll wonder how you ever made it any other way.
Imagine pulling this out of the oven, the whole kitchen smelling incredible, the scallops glistening with a golden crust, and a side of sautéed spinach that adds a pop of color. The anticipation of that first bite, the crunch of the crust, the melt-in-your-mouth interior, and the subtle citrus finish will have your guests begging for more. The technique I’m about to reveal will elevate your scallop game from ordinary to unforgettable. Stay with me here — this is worth it.
What Makes This Version Stand Out
- Flavor: The combination of lemon, garlic, and white wine creates a bright, aromatic base that balances the natural sweetness of the scallops. The subtle hint of capers adds a briny contrast that lifts the dish.
- Texture: A perfectly caramelized crust on the outside gives way to a tender, almost custard‑like interior. The quick sear locks in moisture without overcooking.
- Ingredient Quality: Fresh, sustainably sourced scallops are essential; their bright, sweet flavor is the foundation of the dish. Using real butter, not margarine, adds depth.
- Simplicity: With less than a dozen ingredients and a single pan, you can impress guests without a lot of prep time. The method is streamlined, yet each step is purposeful.
- Crowd Reaction: Friends and family consistently rave about the scallops’ melt‑in‑the‑mouth quality and the bright, savory finish. They keep asking for the recipe after every dinner.
- Make‑ahead Potential: The scallop mixture can be prepared in advance and refrigerated, allowing you to focus on finishing touches when you’re ready to serve.
- Versatility: The base can be paired with pasta, risotto, or a simple salad, making it adaptable to any meal plan.
- Time Efficiency: The entire process from prep to plate takes under 45 minutes, which is ideal for busy weeknights.
Alright, let's break down exactly what goes into this masterpiece…
Inside the Ingredient List
The Flavor Base
The foundation of this dish is built around a simple yet powerful combination of aromatics. Fresh garlic, minced finely, releases a sharp, peppery note that permeates the oil and butter. Lemon juice, added at the end, brightens the entire plate, cutting through the richness of the scallops. Capers, if you choose to include them, contribute a briny punch that balances the sweetness. Each of these ingredients works in harmony to elevate the natural flavor of the scallops without overwhelming it.
The Texture Crew
A light dusting of flour is essential for achieving that coveted caramelized crust. The flour absorbs excess moisture, creating a thin, golden crust that locks in the scallop’s juices. Butter adds depth and a velvety finish, while olive oil provides a high‑heat base that allows the scallops to sear quickly. The white wine, deglazed after the scallops, pulls the browned bits from the pan into a glossy sauce that coats the dish like velvet.
The Unexpected Star
Parmesan cheese may seem like an odd choice for seafood, but it brings a nutty, umami layer that complements the scallop’s sweetness. A splash of water before reheating (in the storing section) keeps the sauce from drying out, ensuring that every bite remains moist. The pinch of sea salt is crucial; it enhances the scallop’s natural flavor while balancing the acidity of the lemon and the bitterness of the capers.
The Final Flourish
Fresh parsley, chopped, is the final touch that adds a pop of color and a fresh, herbal note. It also provides a subtle earthy undertone that grounds the dish. The black pepper, only a half teaspoon, offers a mild heat that doesn’t overpower the scallops but adds a gentle complexity. Together, these ingredients create a harmonious symphony of flavors and textures that make every bite memorable.
Everything's prepped? Good. Let's get into the real action…
The Method — Step by Step
- Preheat the skillet: Place a heavy‑bottomed skillet over medium‑high heat and let it get hot enough that a drop of water sizzles and evaporates almost instantly. This step is critical; a hot pan ensures a perfect sear. If the skillet is too cool, the scallops will steam instead of caramelize, and the crust will be uneven. I’ve learned that a properly preheated pan gives a satisfying “pop” when the scallop touches the surface.
- Season the scallops: Pat the scallops dry with paper towels, then season them lightly with sea salt and black pepper. The salt draws out moisture, helping the scallops sear rather than steam. The pepper adds a subtle heat that balances the sweetness. Be careful not to over‑season; you want the natural flavor to shine through.
- Coat with flour: Lightly dredge each scallop in flour, shaking off any excess. The flour will create a thin crust that locks in juices and gives a golden color. If you skip this step, the scallops will develop a soggy texture. You can also use a flour‑butter blend for an extra crispy edge.
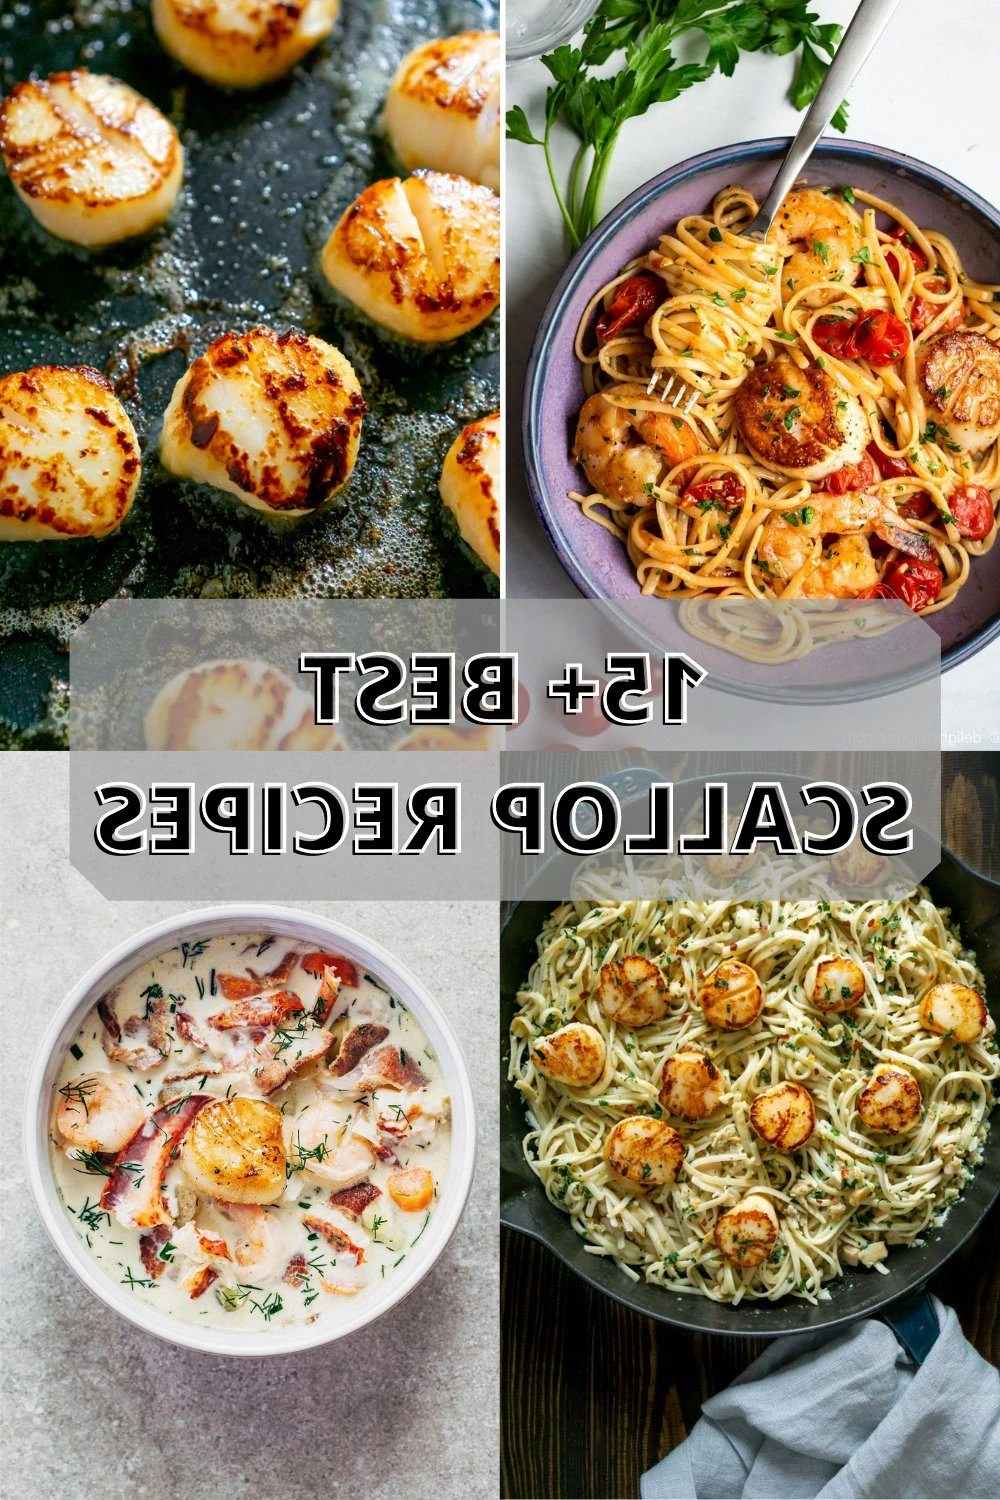
- Sear the scallops: Add olive oil to the hot skillet, swirling to coat the bottom. Place the scallops in a single layer, making sure they don’t touch. Sear for about 2 minutes on each side or until a golden crust forms. The first side should develop a deep amber color, indicating that the Maillard reaction is working its magic. Keep the heat steady to avoid burning.
- Add butter and aromatics: Reduce the heat to medium, then add butter, minced garlic, and a splash of white wine. The butter will melt into a glossy sauce, while the garlic releases its aroma. The wine deglazes the pan, lifting the browned bits into a flavorful base. Stir gently to combine, letting the garlic soften but not brown.
- Finish with lemon and capers: Stir in lemon juice and capers, then return the scallops to the pan for an additional minute. The lemon juice adds brightness and helps to thin the sauce slightly, while the capers bring a salty, briny contrast. Watch for the sauce to reduce just enough to coat the scallops without becoming too thick. This step is where the dish truly transforms into something memorable.
- Plate and garnish: Remove the skillet from the heat, transfer the scallops to a serving dish, and spoon the pan sauce over them. Sprinkle chopped parsley for a pop of color and freshness. The sauce should coat the scallops like a silky glaze. Serve immediately, or keep the scallops warm in a low‑temperature oven while you finish any side dishes.
- Optional: Finish with Parmesan: If you love a cheesy twist, sprinkle grated Parmesan over the scallops just before serving. The Parmesan will melt slightly, adding a nutty depth that complements the citrusy notes. Be sure to use freshly grated cheese for the best flavor.
That’s it — you did it. But hold on, I’ve got a few more tricks that will take this to another level…
Insider Tricks for Flawless Results
The Temperature Rule Nobody Follows
Many home cooks keep the heat low to avoid burning, but the key to a perfect crust is a high heat that quickly caramelizes the surface. I’ve found that a medium‑high setting, combined with a preheated pan, yields a beautiful golden color in under two minutes per side. If you’re using a gas stove, aim for a flame that’s bright but not so intense that the oil smokes. This trick ensures the scallops stay moist inside while developing a crisp, flavorful exterior.
Why Your Nose Knows Best
The aroma of garlic, lemon, and butter is a reliable indicator that your sauce is developing correctly. When the garlic starts to turn a golden amber color, it signals that the Maillard reaction is underway. If the scent becomes too sharp or burnt, it means the heat is too high. Trust your nose; it’s one of the most accurate ways to gauge the progress of a dish.
The 5‑Minute Rest That Changes Everything
After searing the scallops, let them rest for five minutes on a warm plate before serving. This brief pause allows the juices to redistribute, ensuring each bite is juicy and tender. A friend once skipped this step and ended up with scallops that felt dry and overcooked. The rest period is a simple yet powerful technique that elevates the entire dish.
Use Fresh Butter for Depth
Margarine or low‑quality butter can leave a greasy taste that masks the scallop’s natural sweetness. Fresh, high‑fat butter adds richness and a silky mouthfeel. I recommend using European‑style butter for its higher butterfat content, which melts smoothly into the sauce. This small change can transform an ordinary dish into a gourmet experience.
Capers: The Briny Surprise
Capers are often overlooked, but they bring a bright, briny note that cuts through the richness of the scallops. If you’re not a fan of capers, substitute with finely chopped olives or a splash of anchovy paste for a similar umami kick. The key is to balance the flavors so no single element overwhelms the others.
Serve Immediately for Maximum Impact
Scallops are best enjoyed hot, as they release their juices and flavors when freshly plated. If you need to hold the dish for a few minutes, keep it in a warm oven (around 200°F) to maintain the texture and prevent drying out. This final trick ensures that every bite remains as luscious as the first.
Creative Twists and Variations
This recipe is a playground. Here are some of my favorite ways to switch things up:
Scallop Risotto Fusion
Swap the lemon sauce for a creamy risotto base, then fold in the scallops at the end. The velvety rice pairs beautifully with the tender seafood, creating a comforting yet elegant dish.
Asian‑Inspired Scallop Stir‑Fry
Replace the white wine with soy sauce and add a splash of sesame oil. Toss the scallops with broccoli, bell peppers, and a drizzle of sriracha for a spicy, savory kick.
Herb‑Crusted Scallops
Instead of flour, coat the scallops in a mixture of breadcrumbs, fresh thyme, and rosemary. This gives a crunchy texture and a fragrant herbaceous aroma that complements the seafood.
Scallop & Spinach Sheet Pan
Arrange scallops on a sheet pan with sautéed spinach, cherry tomatoes, and a drizzle of olive oil. Roast until the scallops are golden and the vegetables are caramelized.
Scallop Tacos
Serve the scallops in warm corn tortillas with a slaw made from cabbage, lime juice, and a hint of cumin. The bright, crunchy slaw balances the rich scallop flavor.
Scallop Pasta Primavera
Cook your favorite pasta and toss it with the scallop sauce, a handful of peas, and a sprinkle of grated Parmesan. The pasta absorbs the sauce, creating a harmonious, light dish.
Storing and Bringing It Back to Life
Fridge Storage
Cool the scallops immediately after cooking, then store them in an airtight container in the refrigerator for up to two days. Keep the sauce separate if you prefer to reheat them individually. This method preserves the delicate texture and prevents the scallops from becoming rubbery.
Freezer Friendly
For longer storage, place the scallops in a freezer‑safe bag, removing as much air as possible. Freeze for up to 3 months. When ready to use, thaw overnight in the refrigerator and reheat gently.
Best Reheating Method
Reheat scallops in a skillet over low heat, adding a splash of water or broth to create steam. This helps maintain moisture and prevents the scallops from drying out. A quick sear on high heat for 30 seconds will restore a crisp exterior.