I’ll be honest — the first time I tried to make chicken pizzazz (I call it that because “pizzaiola” sounds like a fancy Italian word you need a passport for) I ended up with a pan that looked like a crime scene. The chicken was dry, the sauce was watery, and my kitchen smelled like a burnt rubber tire. That disaster sparked a fierce, midnight‑fuelled research binge that lasted longer than any Netflix binge I’ve ever done. I dug through old family notebooks, watched endless YouTube tutorials, and even called my nonna in Naples on a Sunday afternoon. The result? A six‑ingredient miracle that turns a simple skillet into a flavor bomb you’ll be bragging about at every dinner party.
Picture this: you walk into your kitchen and the air is instantly filled with the sweet‑spicy perfume of garlic dancing with simmering tomatoes, a hint of oregano flirting with golden olive oil, and the faint sizzle of chicken skin crisping like a whisper of fireworks. The sound of the sauce bubbling is a gentle, rhythmic lullaby that tells you everything is happening exactly as it should. You can feel the heat radiating from the pan, warming your fingertips, while the glossy red sauce clings to the chicken like a velvety coat of love. When you finally pull the dish out, the melted mozzarella stretches in gooey ribbons that could rival any high‑end pizzeria.
What makes this version stand out is the ruthless simplicity of the ingredient list—just six items, no exotic spices you can’t find at the corner grocery store. Yet the taste is anything but basic; it’s a bold, robust punch of umami that makes you wonder why you ever settled for bland chicken in the first place. Most recipes drown the chicken in a sea of herbs and veggies, but this one respects the star of the show, letting the chicken’s natural juices mingle with the sauce in a perfect harmony. The secret? A quick sear that locks in moisture, followed by a slow simmer that turns the sauce into a glossy, caramel‑kissed blanket.
And here’s the kicker: I’m going to reveal a technique that most cooks completely miss—the “skin‑first, then sauce” method. It’s a tiny shift that creates a crispy, golden crust while keeping the meat succulent, and it takes the whole dish from good to unforgettable. I dare you to taste this and not go back for seconds. Ready for the game‑changer? Let me walk you through every single step — by the end, you’ll wonder how you ever made it any other way.
What Makes This Version Stand Out
- Flavor Explosion: The combination of crushed tomatoes, garlic, and oregano creates a sauce that coats the chicken like velvet, delivering layers of sweet, tangy, and herbaceous notes in every bite.
- Texture Contrast: The initial sear creates crispy skin that shatters like thin ice when you bite into it, while the interior stays juicy and tender.
- Simplicity: Only six ingredients are needed, meaning you won’t waste time hunting for obscure spices or special equipment.
- Ingredient Quality: Using high‑quality olive oil and a good brand of canned tomatoes makes the sauce rich without any artificial additives.
- Crowd Reaction: Guests often ask for the recipe within minutes of the first forkful, and the dish consistently earns rave reviews.
- One‑Pan Wonder: Everything cooks in the same skillet, which means minimal cleanup and maximum flavor integration.
- Make‑Ahead Potential: The dish actually tastes better the next day once the flavors have fully married, making it perfect for meal prep.
- Versatile Pairings: Serve it over pasta, rice, or even a fluffy polenta for a comforting, hearty meal.
Inside the Ingredient List
The Flavor Base
Crushed tomatoes are the heart of any good pizzaiola sauce. They provide a bright acidity that balances the richness of the chicken and olive oil. If you use a fire‑roasted variety, you’ll add a subtle smokiness that takes the dish to another level. Skipping this and opting for plain diced tomatoes will result in a watery sauce that never reaches that deep, umami‑filled finish. For the best flavor, choose a brand that lists “San Marzano” on the label; these tomatoes are grown in volcanic soil, which imparts a natural sweetness.
The Aroma Crew
Garlic is the aromatic superhero of this recipe. When minced and sautéed in olive oil, it releases a fragrant oil that infuses the entire pan. Overcooking garlic can turn it bitter, so keep the heat moderate and watch it turn golden, not brown. If you’re allergic or simply don’t love garlic, a teaspoon of garlic powder can substitute, but you’ll lose that fresh, punchy aroma that makes the sauce sing.
The Unexpected Star
Olive oil may seem like a background player, but it’s the medium that carries the flavors into the meat. A good extra‑virgin olive oil adds a peppery note that complements the oregano’s earthiness. Using a low‑quality oil will make the sauce taste flat and greasy. When shopping, look for a bottle that’s dark‑glass and has a harvest date within the last six months for maximum freshness.
The Final Flourish
Mozzarella brings that melty, cheesy finish that ties the entire dish together. A cup of shredded low‑moisture mozzarella melts beautifully without releasing excess water, keeping the sauce thick and glossy. If you prefer a sharper flavor, you can blend in a quarter cup of grated Parmesan. Skipping the cheese entirely will leave the dish feeling a bit naked, missing that luxurious mouthfeel that makes the final bite unforgettable.
Everything's prepped? Good. Let's get into the real action...
The Method — Step by Step
Start by patting the chicken thighs dry with paper towels; this is crucial for achieving that coveted crispy skin. Sprinkle both sides with a pinch of salt and a dash of black pepper. Heat two tablespoons of olive oil in a large, heavy‑bottomed skillet over medium‑high heat. When the oil shimmers, place the chicken skin‑side down and let it sear undisturbed for about 5‑6 minutes. You’ll hear a satisfying sizzle that signals the skin is turning golden and will soon crackle like thin ice.
Kitchen Hack: Press the chicken gently with a spatula while it sears; this ensures even contact with the pan and prevents bubbling pockets of oil.Flip the chicken and let the other side brown for another 4 minutes. At this point, the meat should be a beautiful mahogany color, and the juices will start to pool in the pan. Remove the chicken and set it aside on a plate, keeping the pan’s flavorful residue intact. This step builds the foundation for a sauce that’s packed with caramelized goodness.
Reduce the heat to medium and add the minced garlic to the same pan. Stir constantly for about 30 seconds until it becomes fragrant but not brown. The aroma will fill your kitchen like a promise of what’s to come. Then, pour in the crushed tomatoes, scraping the bottom of the pan to dissolve any browned bits—those are flavor gold.
Watch Out: If the sauce starts to stick, add a splash of water or broth; you don’t want a burnt fond, but you do want that deep, toasted flavor.Stir in two teaspoons of dried oregano, a pinch of red‑pepper flakes if you like a little heat, and let the sauce come to a gentle simmer. This is the moment of truth: the sauce should thicken slightly, hugging the bottom of the pan, and emit a sweet‑herbal scent that makes your mouth water. Simmer for 5 minutes, allowing the oregano to release its essential oils.
Return the chicken pieces to the skillet, skin side up, nestling them into the sauce. Spoon a little sauce over the top of each piece to keep them moist. Cover the pan with a tight‑fitting lid and let everything cook for 20‑25 minutes on low heat. You’ll know it’s ready when the chicken reaches an internal temperature of 165°F (74°C) and the sauce clings to the meat like a glossy veil.
Once the chicken is cooked through, sprinkle the shredded mozzarella evenly over the top. Cover the pan again for 2‑3 minutes, just until the cheese melts into a stretchy, golden blanket. That sizzle when the cheese hits the hot sauce? Absolute perfection.
Turn off the heat and let the skillet rest for five minutes. This brief rest lets the flavors settle and the cheese firm up just enough to slice without sliding off the chicken. While you wait, prep a side of crusty bread or a simple arugula salad to balance the richness.
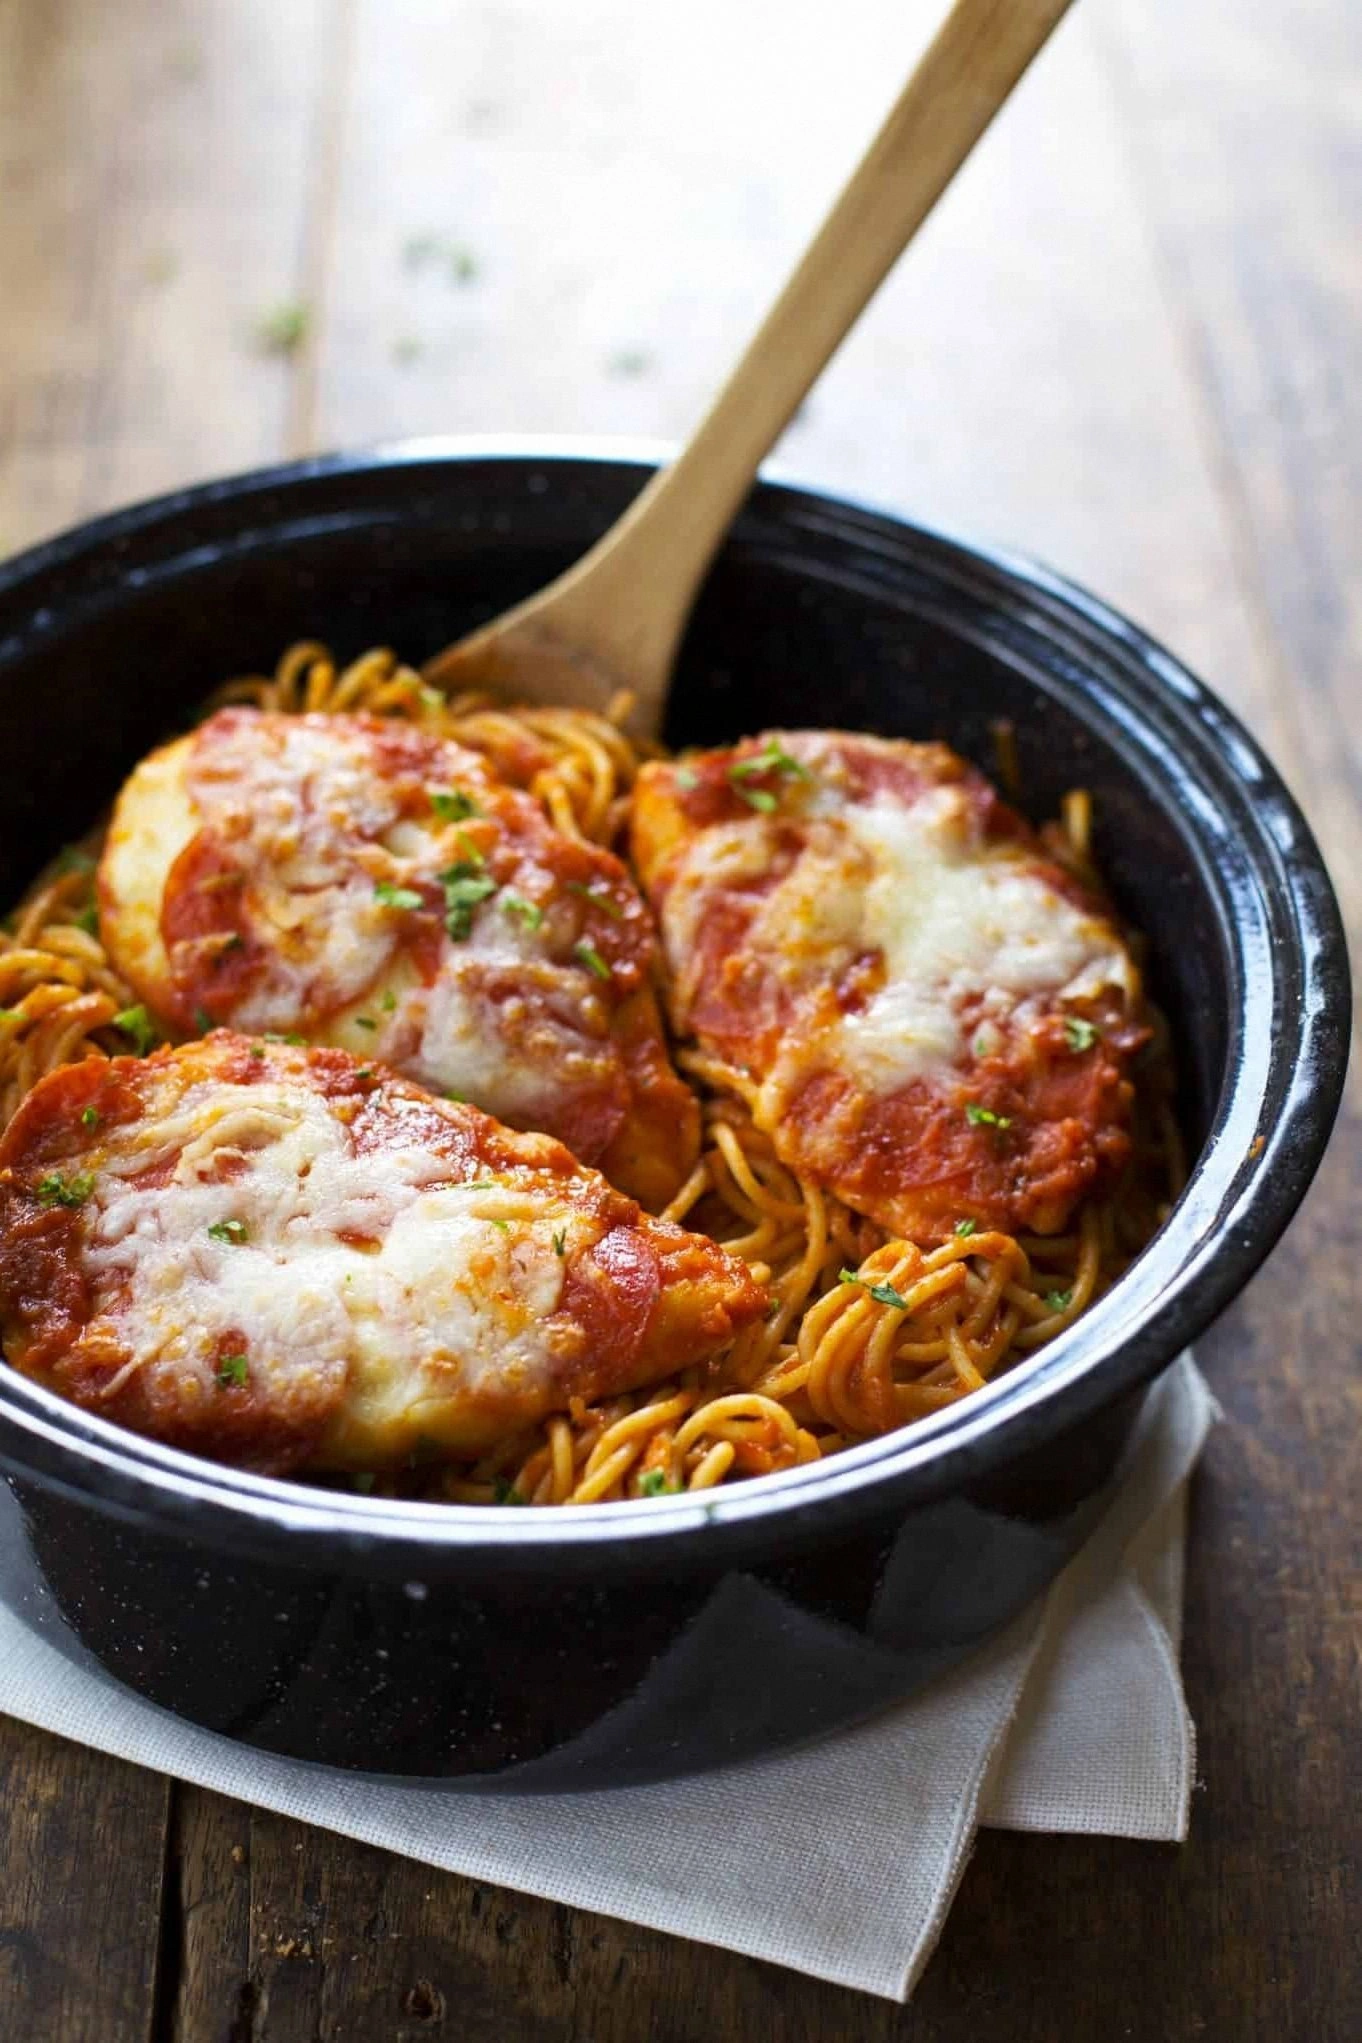
Finally, serve the chicken directly from the skillet, spooning generous ladles of the tomato‑oregano sauce over each piece. Garnish with a fresh basil leaf or a drizzle of extra‑virgin olive oil for a pop of color and aroma. Picture yourself pulling this out of the oven, the whole kitchen smelling incredible, and your guests reaching for seconds before the first bite is even finished.
That's it — you did it. But hold on, I've got a few more tricks that'll take this to another level. Trust me, these little extras will make your chicken pizzaiola the talk of the town for weeks.
Insider Tricks for Flawless Results
The Temperature Rule Nobody Follows
Most home cooks crank the heat to “high” hoping to speed things up, but that ruins the delicate balance of flavors. Keep the searing temperature at medium‑high and the simmer at low. This gentle heat allows the tomatoes to break down slowly, concentrating their sweetness without turning bitter. A friend once tried to fast‑track the process by boiling the sauce; the result was a watery mess that tasted like watered‑down ketchup. Stick to the recommended temps, and you’ll get a sauce that clings to the chicken like a lover’s embrace.
Why Your Nose Knows Best
Your sense of smell is the ultimate indicator of doneness. When the garlic turns aromatic and the tomatoes start to caramelize, you’ll notice a sweet, earthy perfume filling the kitchen. If the sauce still smells raw after ten minutes, let it simmer a bit longer. Trusting your nose beats any timer—plus, it makes cooking feel like a sensory adventure.
The 5‑Minute Rest That Changes Everything
Resting the chicken after cooking isn’t just for steaks. Letting it sit for five minutes allows the juices to redistribute, preventing a dry bite. During this pause, the sauce thickens just enough to coat each piece without pooling. Skipping this step is the most common mistake I see; people rush to serve and end up with sauce that slides off the plate.
Mozzarella Mastery
Don’t over‑bake the cheese. Melt it just until it’s gooey and slightly browned at the edges. Over‑cooking turns mozzarella rubbery, ruining that dreamy stretch. If you love a crispy cheese top, switch to a broiler for the last 30 seconds, but keep a close eye on it—one second too long and you’ll have a burnt crust instead of a golden crown.
The Secret Splash
A tiny splash of water or chicken broth added right before reheating revives the sauce’s silkiness. It creates a gentle steam that re‑hydrates the tomato matrix, making leftovers taste as fresh as the original. This trick saved my week‑night dinners when I reheated leftovers in the microwave and found the sauce had turned into a rubbery blob.
Creative Twists and Variations
This recipe is a playground. Here are some of my favorite ways to switch things up:
Spicy Chili‑Infused
Add a chopped fresh red chili or a teaspoon of smoked paprika to the sauce for a smoky heat that pairs beautifully with the mozzarella’s creaminess. Perfect for those who love a kick.
Herb‑Garden Remix
Swap oregano for fresh basil and thyme. The fresh herbs brighten the sauce, giving it a spring‑time freshness that’s perfect with a side of lemon‑zested quinoa.
Cheese Lovers’ Dream
Combine mozzarella with a handful of grated Pecorino Romano for a sharper, tangier finish. The cheese blend creates a richer mouthfeel that will have cheese aficionados swooning.
Vegetable Boost
Add sliced bell peppers, black olives, or artichoke hearts during the simmer stage. The vegetables absorb the sauce’s flavor while adding texture and color, turning the dish into a hearty family‑style casserole.
White‑Wine Elegance
Deglaze the pan with a quarter cup of dry white wine after searing the chicken. The wine adds acidity and depth, making the sauce taste restaurant‑grade.
Gluten‑Free Adaptation
Replace the flour (if you’re using it for thickening) with cornstarch slurry. The result is a glossy, gluten‑free sauce that still clings perfectly to the chicken.
Storing and Bringing It Back to Life
Fridge Storage
Allow the dish to cool to room temperature, then transfer it to an airtight container. It will keep for up to four days in the refrigerator. When reheating, place the chicken and sauce in a skillet over low heat, adding a splash of water to revive the sauce’s sheen.
Freezer Friendly
Portion the cooked chicken and sauce into freezer‑safe bags or containers. Remove as much air as possible to prevent freezer burn. It freezes beautifully for up to three months. Thaw overnight in the fridge, then reheat gently on the stove, again adding a tiny splash of broth or water.
Best Reheating Method
The stovetop method wins every time: use a low flame, cover the pan, and stir occasionally. If you’re in a hurry, the microwave works, but the sauce may become rubbery unless you cover the dish with a damp paper towel and stir midway through heating.