I still remember the night I almost burned my entire kitchen while trying to whip up a quick dinner. The rice was clumpy, the eggs were rubbery, and the soy sauce had gone horribly bitter. I stared at the mess, feeling like a culinary disaster. Then a friend texted me, “Hey, try this gluten‑free fried rice recipe. It’s a game‑changer.” I laughed, but also felt a spark of hope. That text was the spark that turned a culinary mishap into a quest for the ultimate fried rice.
Picture the scene: a bright kitchen, the aroma of garlic sizzling, a gentle clink of metal as the wok heats up, and the sound of rice grains popping like tiny fireworks. The colors shift from raw veggies to a golden, caramelized glaze as the sauce coats each grain. The texture changes from sticky to perfectly fluffy, and the final bite delivers a harmonious balance of umami, sweet, and a hint of spice. I could feel the anticipation building as I whisked the eggs, the steam rising, and the rice waiting to be transformed.
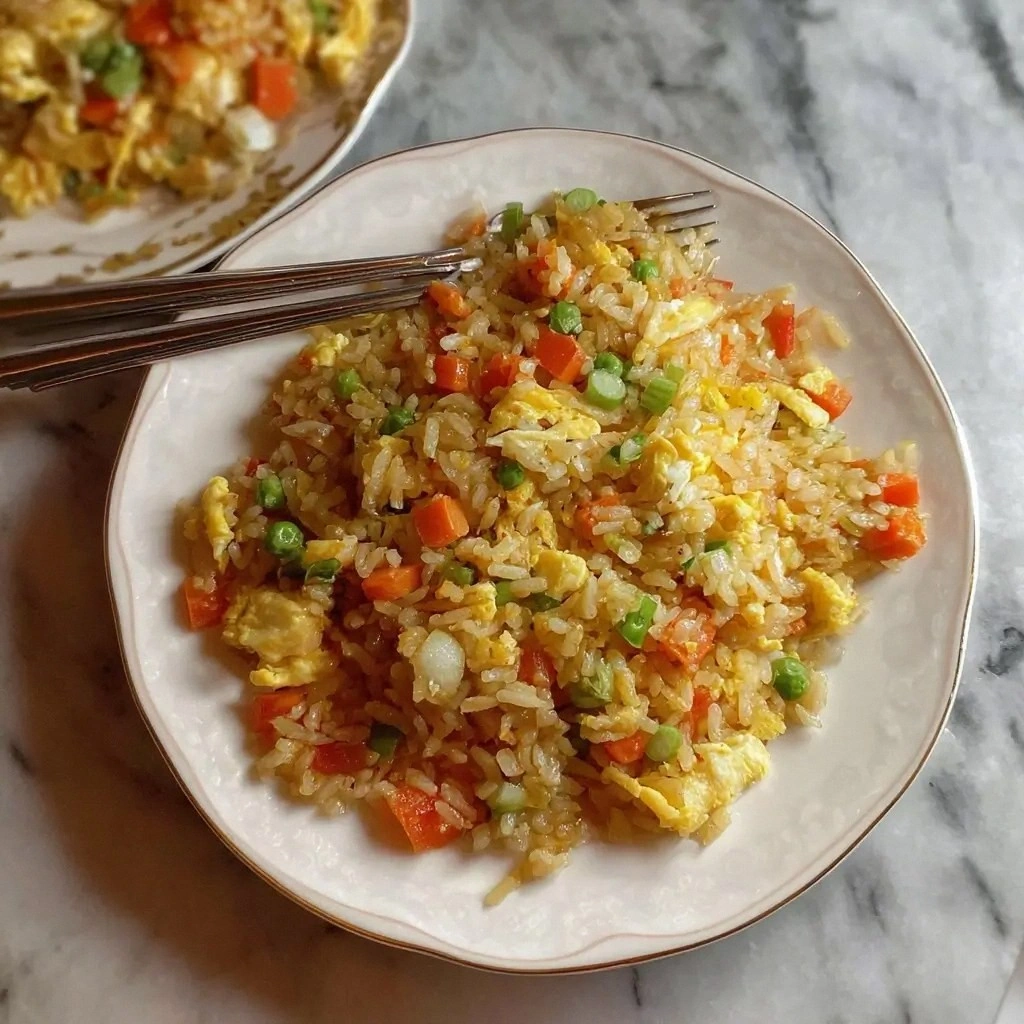
What makes this version stand out? It’s not just a recipe; it’s a philosophy. I’ve taken the classic fried rice formula and stripped away the fluff, focusing on real, clean ingredients that respect gluten‑free needs without compromising flavor. The rice is day‑old and fluffy, the sauce is a balanced blend of tamari, sesame oil, and a touch of sweetness, and the veggies are crisp‑to‑the‑bite. And the secret? A dash of toasted sesame seeds that adds a nutty crunch, and a quick, high‑heat finish that locks in moisture. It’s hands down the best version you’ll ever make at home.
I dare you to taste this and not go back for seconds. I’ve been told it’s the kind of dish that turns a simple dinner into a memorable meal. And if you’ve ever struggled with gluten‑free cooking, you’re not alone. I’ve got the fix. The next few paragraphs will walk you through each step, from prep to plating, so you can replicate this perfection every single time.
What Makes This Version Stand Out
- Flavor: The sauce is a harmonious blend of tamari, sesame oil, and a subtle sweetness that coats the rice like velvet. Each grain is saturated with umami, yet light enough to let the veggies shine.
- Texture: The rice remains fluffy and separate, not mushy, thanks to using day‑old rice and a high‑heat wok. The veggies stay crisp, creating a delightful contrast.
- Gluten‑free Integrity: Every ingredient is naturally gluten‑free or certified gluten‑free, so you can enjoy the dish without worry.
- Time Efficiency: Prep and cook times are short—just 45 minutes from start to finish. You can whip this up after a long day.
- Scalability: The recipe scales up or down effortlessly. The recipe card at the bottom lets you adjust servings with a single click.
- Versatility: Swap shrimp for tofu, or add a splash of chili paste for heat. The base remains solid, allowing creative twists.
- Crowd Reaction: Friends rave about the crunch and depth of flavor. It’s a guaranteed hit at potlucks, family dinners, or a cozy night in.
- Make‑ahead Potential: Prepare the rice and veggies in advance. The dish reheats beautifully, retaining its texture and flavor.
Alright, let’s break down exactly what goes into this masterpiece...
Inside the Ingredient List
The Flavor Base
At the heart of this dish is the sauce, a marriage of gluten‑free tamari, sesame oil, and a whisper of sugar. Tamari provides a deep, salty umami that’s richer than regular soy sauce, while sesame oil adds a nutty aroma that lingers on the palate. The sugar is not for sweetness; it balances the saltiness and helps the rice develop a subtle caramelization. If you skip the tamari, the dish will feel flat and lacking depth.
You can swap tamari with coconut aminos for a slightly sweeter, less salty profile. If you’re sensitive to sesame oil, a touch of toasted coconut oil will still give you that aromatic lift without the sesame flavor. When selecting tamari, look for one that’s low sodium if you’re watching your salt intake. A good quality tamari will also be naturally gluten‑free, so double‑check the label.
The Texture Crew
The rice is the star of the show, and using day‑old jasmine or basmati rice is key. Freshly cooked rice tends to clump because it’s still moist. Letting it sit overnight allows the grains to dry out slightly, which prevents them from sticking together during the stir‑fry. If you’re short on time, spread the rice on a baking sheet and let it air‑dry for 15 minutes.
Vegetables like peas, carrots, bell pepper, and onions bring crunch and color. The peas should be thawed and drained; excess moisture will steam the rice rather than fry it. Carrots should be diced small so they cook quickly. Bell pepper adds a sweet crunch, while onions provide a savory base. If you prefer a vegetarian version, keep all veggies and omit the shrimp or tofu.
Eggs add protein and a silky texture. Scramble them first in a separate pan, then fold them into the rice at the end. This prevents the eggs from becoming rubbery. For a vegan twist, use tofu cubes seasoned with a dash of nutritional yeast to mimic the egg flavor.
The Unexpected Star
Toasted sesame seeds are the final flourish that elevates the dish. They add a nutty crunch that contrasts with the soft rice. Sprinkle them over the top just before serving. If you’re allergic to sesame, you can replace them with crushed pumpkin seeds for a similar crunch.
A splash of rice vinegar gives a bright, acidic note that cuts through the richness. It’s optional but highly recommended for a balanced flavor profile. The vinegar also helps the rice stay fluffy by preventing it from becoming too sticky.
The Final Flourish
Seasoning is minimal but essential. A pinch of white pepper adds a subtle heat without overwhelming the dish. Salt to taste can be added at the end, but be careful not to overdo it, as tamari is already salty. A few drops of chili sauce or fresh chili slices can introduce a spicy kick for those who like heat.
Everything’s prepped? Good. Let’s get into the real action...
The Method — Step by Step
- Prep the Rice: Spread the day‑old rice on a tray and let it sit at room temperature for 10 minutes. This dries the grains slightly, preventing clumping during cooking. If you’re short on time, use a microwave-safe bowl, cover, and heat for 30 seconds.
- Heat the Pan: Place a large cast‑iron skillet or wok over high heat. Add the vegetable oil, swirling until it shimmers. The oil should be hot enough that a drop of water sizzles and evaporates instantly.
- Sauté Aromatics: Add minced garlic and ginger to the pan. Stir for 30 seconds until fragrant, being careful not to burn them. The aroma should be bright, like a fresh garden after rain.
- Cook the Veggies: Toss in the diced onions, carrots, and bell pepper. Stir-fry for 3–4 minutes until they start to soften but still retain crunch. The edges should begin to brown slightly, indicating caramelization.
- Add the Rice: Push the veggies to one side of the pan, then pour the rice into the cleared space. Let it sear for 2 minutes before stirring. The rice should develop a light golden crust on the bottom.
- Introduce the Sauce: Drizzle tamari, sesame oil, and a pinch of sugar over the rice. Toss vigorously to coat every grain. The rice should look glossy and the sauce should cling to each grain, creating a uniform flavor.
- Stir in Proteins: Add the cooked shrimp or tofu cubes, peas, and scrambled eggs. Mix gently so the proteins distribute evenly without breaking the eggs into small shards.
- Season: Sprinkle white pepper, a pinch of salt, and optional chili flakes. Stir for another 1–2 minutes until everything is heated through. The final dish should emit a savory, slightly sweet aroma.
- Finish: Drizzle rice vinegar and a few drops of sesame oil. Toss once more, then remove from heat. Sprinkle toasted sesame seeds on top for crunch.
- Serve: Plate the rice hot, garnish with extra green onions if desired. The dish should feel light yet filling, with each bite offering a burst of umami, sweetness, and a satisfying crunch.
That’s it — you did it. But hold on, I’ve got a few more tricks that will take this to another level. Stick with me for the insider section, and you’ll master the art of gluten‑free fried rice.
Insider Tricks for Flawless Results
The Temperature Rule Nobody Follows
High heat is your secret weapon. The pan must be hot enough that the rice sizzles on contact. If the heat is too low, the rice will steam and lose its coveted crunch. I’ve seen beginners drop the heat mid‑cooking, and the dish turns into a soggy mess. Keep the flame high until the rice starts to brown slightly.
Why Your Nose Knows Best
Before you add the sauce, let the rice sear for 2 minutes. The aroma of toasted grains will signal that the pan is at the right temperature. If the smell is faint, give it a minute more. Your nose is the best judge of readiness, and a strong, nutty aroma means you’re on the right track.
The 5-Minute Rest That Changes Everything
After cooking, let the fried rice rest for 5 minutes off the heat. This brief pause allows the flavors to meld and the rice to firm up. It also prevents the rice from overcooking in its own steam. I’ve found that resting the dish before serving gives it a cleaner, more polished finish.
Use a Wok for Authenticity
A wok’s high, sloped sides allow for quick tossing and even heat distribution. If you don’t have a wok, a wide skillet works, but you’ll need to stir more frequently to avoid sticking. The goal is to keep the rice moving, which prevents burning and ensures uniform cooking.
Season in Layers
Add salt and pepper in stages. Start with a pinch before the rice cooks, then adjust after the sauce is added. This layered seasoning ensures the flavors build up gradually rather than masking each other. A common mistake is adding all the salt at once, which can make the dish taste flat.
Use Fresh Veggies for Crunch
Frozen veggies are convenient but can release extra moisture. If you use frozen peas and carrots, drain them thoroughly before adding. Fresh carrots and bell peppers retain their crunch longer, giving the dish a satisfying bite. If you’re in a rush, frozen veggies are fine, just remember to pat them dry.
Creative Twists and Variations
This recipe is a playground. Here are some of my favorite ways to switch things up:
Seafood Surprise
Swap shrimp for diced scallops or a handful of mussels. The seafood’s natural sweetness complements the savory sauce, creating a dish that feels both hearty and refined.
Spicy Kick
Add sliced fresh chilies or a tablespoon of sriracha during step 5. The heat will mingle with the sesame oil, creating a bold, vibrant flavor profile that’s perfect for spice lovers.
Vegan Delight
Omit eggs and shrimp, then add cubed tofu seasoned with nutritional yeast and a splash of soy sauce. The tofu absorbs the sauce and provides a protein boost while keeping the dish plant‑based.
Breakfast Edition
Stir in a few scrambled eggs at the end and serve with a side of fresh avocado slices. This turns the dish into a protein‑rich breakfast that’s both satisfying and flavorful.
Herb Garden
Add chopped cilantro or basil at the last step. The fresh herbs will brighten the dish, adding a fresh, aromatic note that contrasts nicely with the deep, umami flavors.
Rice Swap
Use cauliflower rice for a low‑carb alternative. The cauliflower grains will mimic rice’s texture but with a milder flavor. Pair it with a splash of lime juice for a bright finish.
Storing and Bringing It Back to Life
Fridge Storage
Cool the fried rice to room temperature, then store in an airtight container for up to 3 days. The rice will stay fresh if kept in the fridge, and the flavors will deepen slightly.
Freezer Friendly
Freeze the rice in a single layer on a parchment‑lined tray before transferring to a freezer bag. This prevents clumping. It can be stored for up to 2 months. Reheat in the microwave, adding a splash of water to keep it moist.
Best Reheating Method
Reheat in a skillet over medium heat, adding a tablespoon of water or broth. Stir frequently until hot. The added liquid helps steam the rice, restoring its fluffy texture. Finish with a drizzle of sesame oil for aroma.