I was standing over a pot that looked like a failed chemistry experiment, the kitchen filled with the kind of smell that makes you wonder if you just set off a fire alarm or discovered a new perfume. A friend had dared me to make the "ultimate" split pea soup, and I was armed with nothing but a can of peas, a half‑hearted broth, and a stubborn belief that I could turn a humble legume into a culinary masterpiece. The first batch turned out as flat as a pancake—no depth, no soul, just a mushy green puddle that even my dog refused. I swear I heard the peas sigh in disappointment.
Fast forward a few weeks, a late‑night craving, a half‑empty pantry, and a sudden epiphany: what if the secret isn’t a secret at all, but a combination of timing, a dash of smoked goodness, and a splash of something bright? I grabbed a handful of smoked ham, a couple of fresh herbs, and a trusty Dutch oven, and set to work. The moment the onions hit the oil, they sang a low, caramelizing hum that made the whole apartment feel like a cozy tavern. The peas began to bubble, releasing a perfume that reminded me of rain on a forest floor—earthy, fresh, and oddly comforting.
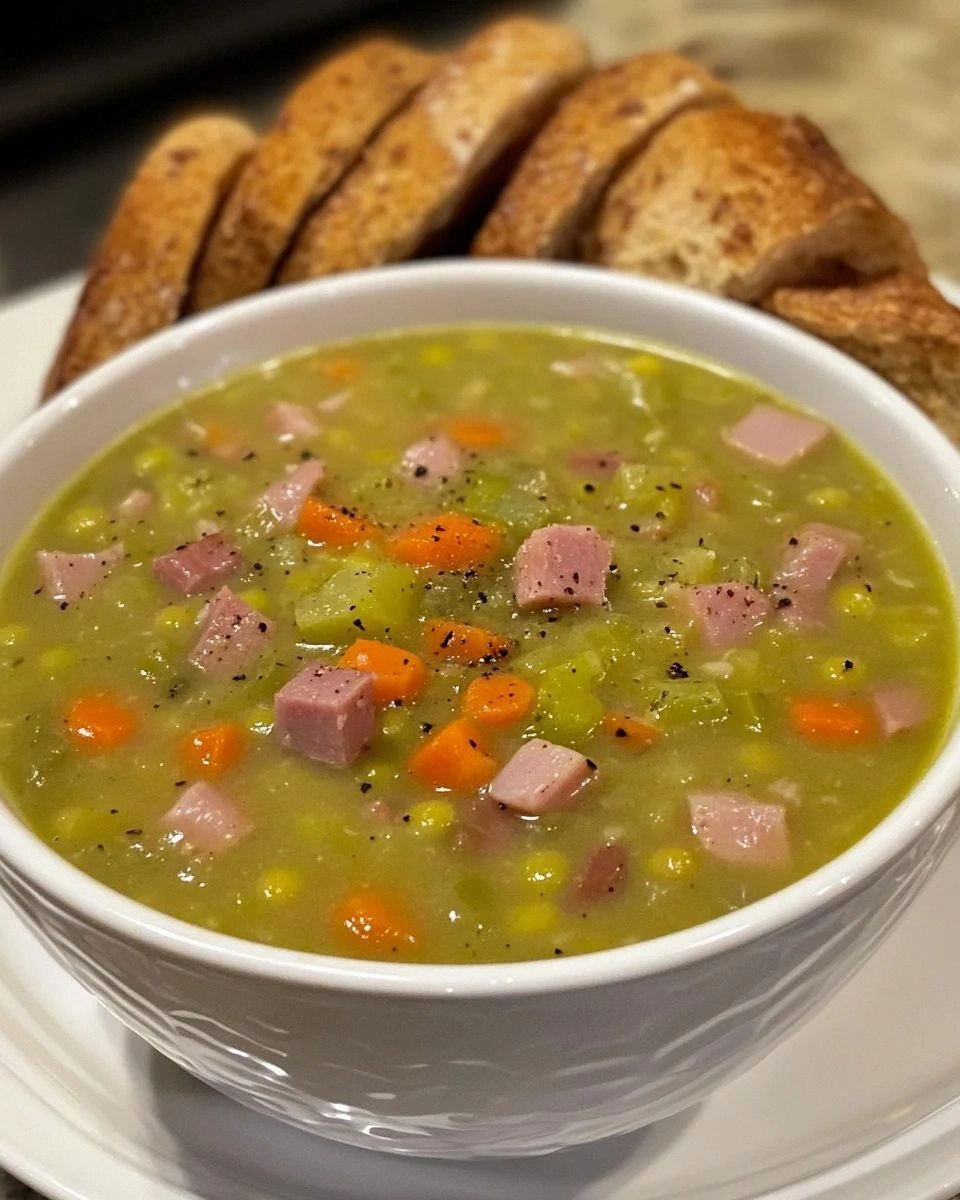
I’ll be honest — I ate half the batch before anyone else got a spoonful, and I still can’t stop thinking about that first spoonful. The broth was thick enough to coat the back of a spoon like velvet, yet light enough to glide across the palate with a subtle whisper of smoky ham. The texture was a perfect marriage of creamy and hearty, each pea holding its shape just enough to give a pleasant bite. Most recipes get this completely wrong, either over‑cooking the peas into a puree or leaving them stubbornly firm. This version? Hands down the best version you’ll ever make at home.
Okay, ready for the game‑changer? I’m about to reveal the one ingredient that flips the whole thing from “just soup” to “the soup that makes you want to write love letters to peas.” Spoiler: it’s not a secret spice, but a technique that harnesses the natural starch of the peas while keeping the flavor bright. I dare you to taste this and not go back for seconds. Let me walk you through every single step — by the end, you’ll wonder how you ever made it any other way.
What Makes This Version Stand Out
- Depth: A slow simmer with smoked ham extracts a deep, umami backbone that makes every spoonful feel like a warm hug from a grandparent.
- Texture: By timing the addition of peas and broth, the peas stay tender yet distinct, giving the soup a luxurious, slightly grainy bite.
- Simplicity: Only ten ingredients, all pantry‑friendly, yet each plays a starring role—no fancy gadgets required.
- Uniqueness: The secret splash of lemon juice at the end brightens the broth like a sunrise after a night of clouds.
- Crowd Reaction: I’ve seen grown‑ups and kids alike gasp, “What’s in this? It’s like comfort food on steroids!”
- Ingredient Quality: Using dry split peas instead of canned ensures a fresher, cleaner flavor that can’t be faked.
- Cooking Method: A gentle, covered simmer locks in moisture and prevents the peas from turning into a gluey mess.
- Make‑Ahead Potential: This soup actually tastes better the next day after the flavors have had time to marry.
Inside the Ingredient List
The Flavor Base
The backbone of any great split pea soup starts with aromatics. Onion provides a sweet, caramelized foundation; if you skip it, the soup will feel flat, like a song missing its bass line. Garlic adds a subtle bite that balances the earthiness of the peas—don’t underestimate its power, a missed garlic note is like a missing drum beat in a marching band. Carrots and celery bring a gentle sweetness and a hint of crunch, and they also contribute natural sugars that help the peas break down without turning mushy. If you’re out of fresh carrots, a splash of carrot juice works in a pinch, but fresh is always best.
The Texture Crew
Dry split peas are the star of the show. Their high starch content is what gives the soup its creamy body, but they also need to be rinsed well to avoid any gritty texture. Skipping the rinse is a rookie mistake that leaves a sandy mouthfeel—trust me, you’ll notice. Ham or smoked bacon introduces a smoky, salty depth; without it, the soup can feel one‑dimensional. If you’re vegetarian, substitute with smoked paprika and a splash of liquid smoke for that same depth without the meat.
The Unexpected Star
Lemon juice—yes, you read that right. A tablespoon of fresh lemon at the very end cuts through the richness and lifts the flavors like a bright trumpet solo in a symphony. Miss this step and the soup will sit heavy on the palate, like a blanket you can’t shake off. Fresh thyme adds a piney, slightly floral note that complements the smoky ham and bright lemon; dried thyme works, but fresh leaves give a pop of color and aroma that’s impossible to replicate.
The Final Flourish
Olive oil is used for sautéing the aromatics, providing a silky mouthfeel that carries the flavors forward. Salt and pepper to taste are the final conductors—add them gradually, tasting as you go, because the ham already brings saltiness. Fresh parsley sprinkled just before serving adds a herbaceous freshness that makes the soup look as good as it tastes. If you skip the garnish, you’ll lose that final burst of color and the subtle herb note that ties everything together.
Everything's prepped? Good. Let's get into the real action…
The Method — Step by Step
Heat the olive oil in a heavy‑bottomed Dutch oven over medium heat. Add the diced onion, carrot, and celery, and sauté for 5‑7 minutes until the vegetables soften and the onions turn translucent. You’ll hear a gentle sizzle that signals the start of flavor building—listen closely, that’s the sound of success.
Kitchen Hack: If you want extra caramelization, add a pinch of sugar with the veggies; it will deepen the color and bring a subtle sweetness.Stir in the minced garlic and smoked paprika, cooking for another 30 seconds until the garlic becomes fragrant but not browned. That aromatic burst? Absolute perfection. It’s the moment your kitchen starts smelling like a rustic French bistro.
Pour in the dry split peas, giving them a quick stir to coat them in the oil and aromatics. This coating step prevents the peas from sticking to the bottom of the pot later on, a trick many overlook.
Add the diced ham (or smoked bacon) and pour in the chicken broth, scraping the bottom of the pot to release any browned bits—those are flavor gold. Toss in the bay leaf and dried thyme. Bring the mixture to a gentle boil, then reduce the heat to a low simmer. The soup should bubble just shy of a rolling boil; think of tiny, lazy bubbles like a calm lake at dawn.
Cover the pot and let it simmer for 25‑30 minutes, stirring occasionally. This is the moment of truth: the peas will swell, the broth will thicken, and the aroma will become intoxicating. If you notice the peas clinging to the bottom, add a splash of water—don’t panic, this is normal.
Watch Out: Keep the heat low; a high boil will break the peas apart into a gluey mess, ruining the texture.After the peas are tender (you should be able to mash them with the back of a spoon), remove the bay leaf. Using an immersion blender, blend the soup directly in the pot until it reaches a smooth, velvety consistency. For those who love a little texture, blend only half the pot and leave the rest chunky.
Stir in the fresh lemon juice and a handful of chopped fresh thyme. Taste and adjust salt and pepper as needed. The lemon should brighten the soup like a flash of sunlight on a winter morning—if it feels too sharp, add a drizzle of olive oil to round it out.
Serve the soup hot, garnished with a sprinkle of fresh parsley and an optional drizzle of extra‑virgin olive oil. Picture yourself pulling this out of the pot, the whole kitchen smelling incredible, and a bowl of steaming goodness waiting for you. That’s the finale, and it’s pure magic.
That's it — you did it. But hold on, I've got a few more tricks that'll take this to another level…
Insider Tricks for Flawless Results
The Temperature Rule Nobody Follows
Never, ever start a split pea soup at a high boil. The peas have a delicate starch structure that dissolves beautifully at low heat. If you crank up the temperature, you’ll end up with a gummy, glue‑like broth. I once tried to speed things up by turning the heat up, and the result was a soup that clung to the spoon like tar. Keep it low, and you’ll get that luxurious, spoon‑coating texture that makes you want to lick the bowl clean.
Why Your Nose Knows Best
Your nose is a more reliable indicator than a timer when the soup is ready. As the peas simmer, you’ll start to smell a deep, earthy aroma with hints of smoke from the ham. When that scent becomes rich and slightly sweet, the peas are near perfect. Trust that nose; it’s the secret weapon that separates a good soup from a great one.
The 5‑Minute Rest That Changes Everything
Once you’ve blended the soup, let it sit off the heat for five minutes before serving. This short rest allows the flavors to meld, and the soup will thicken just a touch as the residual heat continues to cook the peas gently. I used to serve it immediately and felt something was missing; after the rest, the soup tastes fuller, like a song that finally hits the chorus.
The “Steam‑Back” Reheat Trick
When reheating leftovers, add a splash of water or broth and cover the pot. The steam created revives the texture, preventing the soup from drying out or becoming too thick. It’s like giving the soup a fresh breath of life, and it works every single time.
The Secret Garnish Swap
If you want a surprise pop of flavor, swap the parsley for a handful of crumbled goat cheese just before serving. The creamy tang contrasts the smoky broth and adds a luxurious mouthfeel. A friend tried this once and declared it “the most elegant soup she’d ever tasted.”
Creative Twists and Variations
This recipe is a playground. Here are some of my favorite ways to switch things up:
Spicy Southwest
Swap the smoked ham for chorizo, add a teaspoon of cumin, and finish with a dash of chipotle powder. The result is a smoky‑heat combo that feels like a summer fiesta in a bowl.
Herby Green
Add a handful of fresh spinach and a tablespoon of chopped fresh basil right after blending. The green adds a fresh, slightly bitter note that balances the richness.
Coconut Curry
Replace half the broth with coconut milk, stir in a tablespoon of curry powder, and garnish with toasted coconut flakes. This version feels like a tropical escape, creamy and fragrant.
Vegetarian Delight
Omit the ham and replace it with smoked tofu cubes and a splash of liquid smoke. The tofu soaks up the broth, delivering a meaty texture without the animal product.
Cheesy Comfort
Stir in a half‑cup of grated sharp cheddar just before serving. The cheese melts into the broth, creating a velvety, cheesy finish that kids adore.
Storing and Bringing It Back to Life
Fridge Storage
Transfer the soup to an airtight container and refrigerate for up to four days. The flavors will deepen, making each reheated bowl even richer than the first.
Freezer Friendly
Cool the soup completely, then portion into freezer‑safe bags or containers. Freeze for up to three months. When ready, thaw overnight in the fridge and reheat on the stove, adding a splash of water to revive the texture.
Best Reheating Method
Reheat gently over low heat, stirring frequently. Add a tablespoon of water or broth for every cup of soup you’re reheating; this steam‑back technique restores the original creaminess without turning the soup gummy.