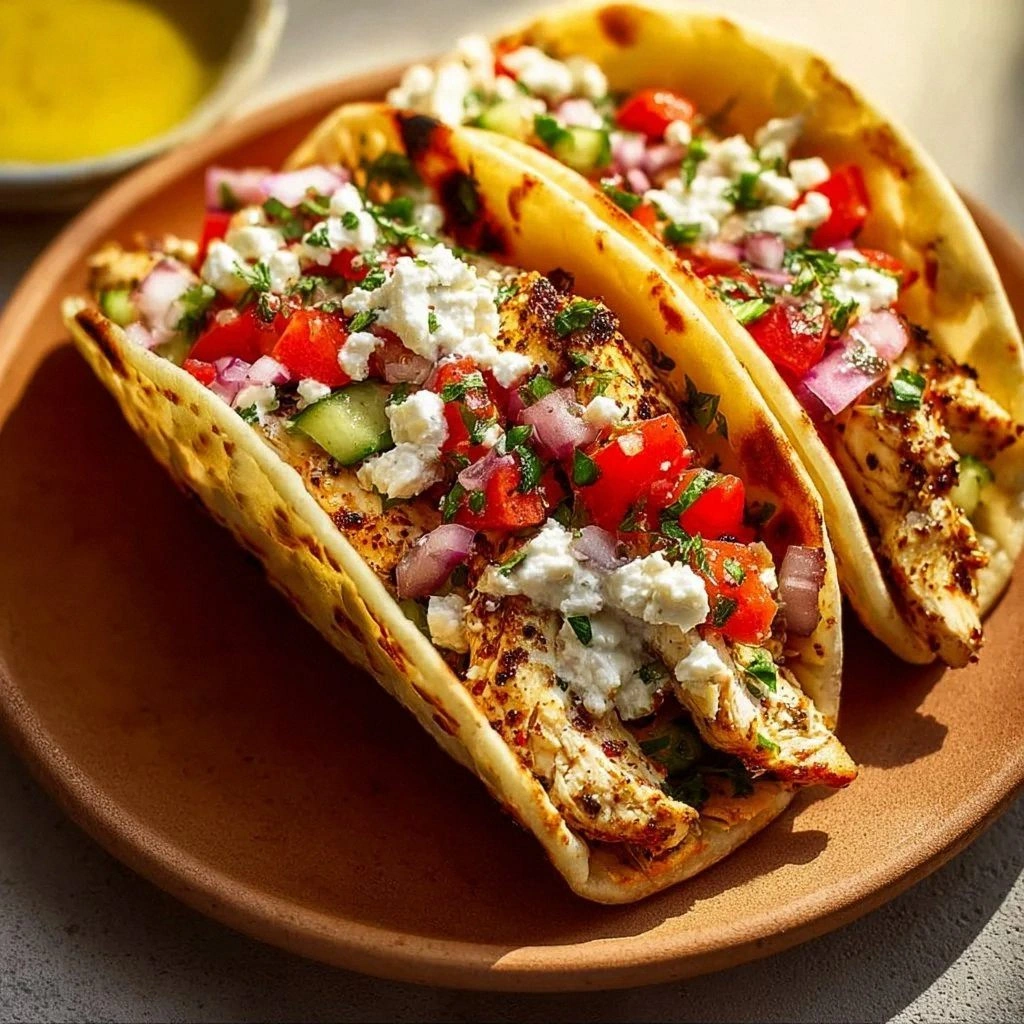
Picture this: a rainy Saturday, the kind that makes you want to stay in your pajamas all day, but your stomach is growling louder than the thunder outside. I had promised my roommates a snack that would make them forget the soggy weather, and after a half‑hour of frantic Googling I ended up with a kitchen disaster—dry, bland chicken strips that could double as a paperweight. The frustration was real, but it sparked a daring experiment: what if I could create a chicken tender that’s both ridiculously crispy on the outside and unbelievably juicy on the inside, with a flavor punch that makes you gasp like you just tasted sunshine?
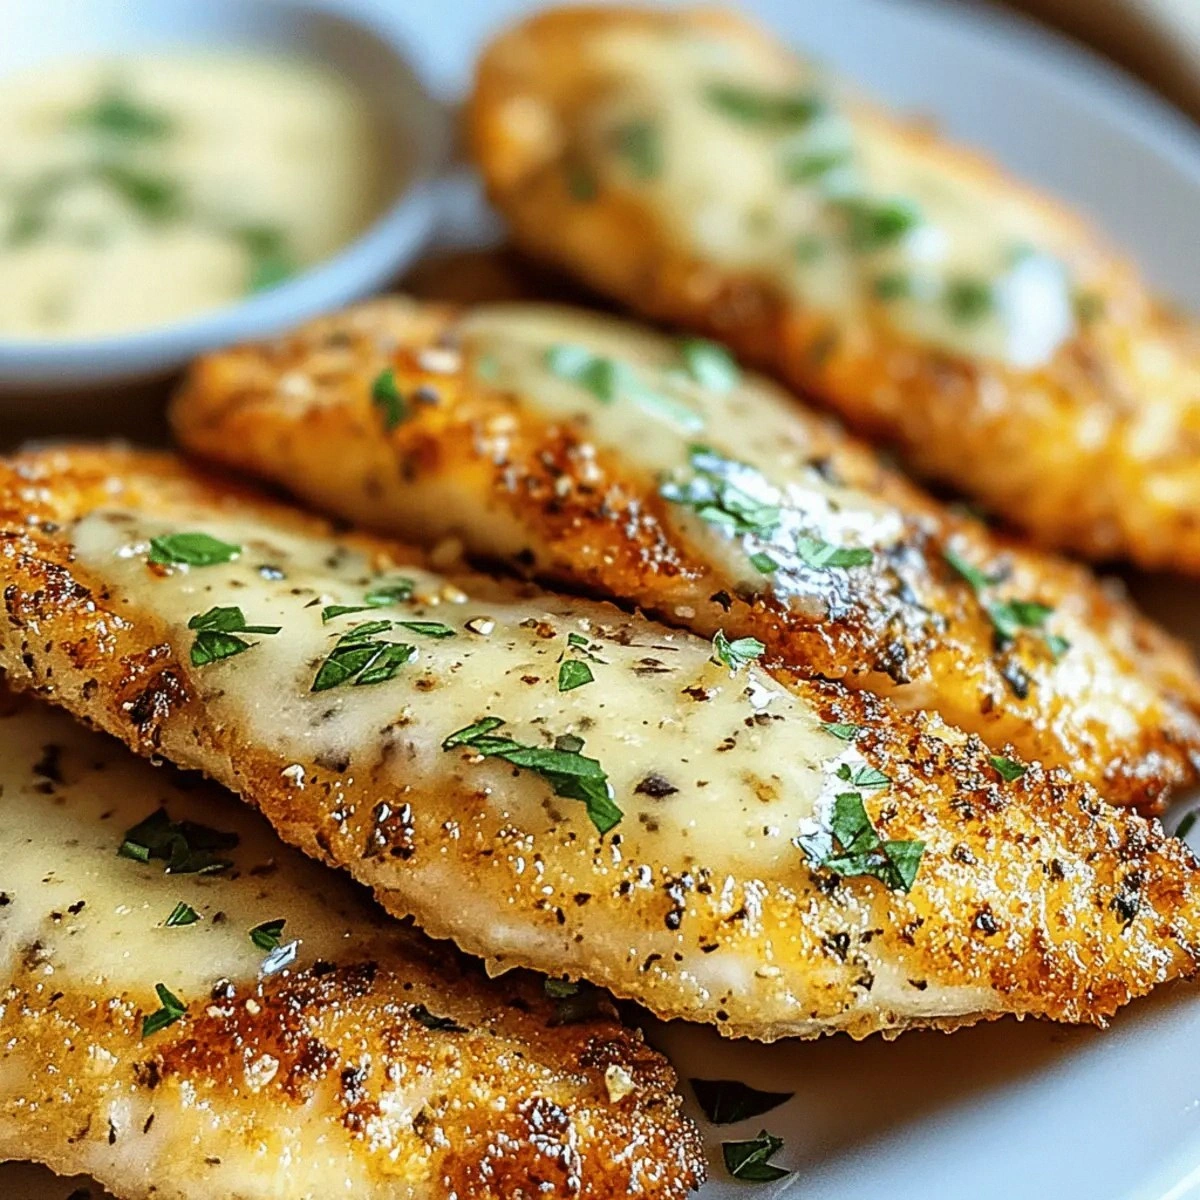
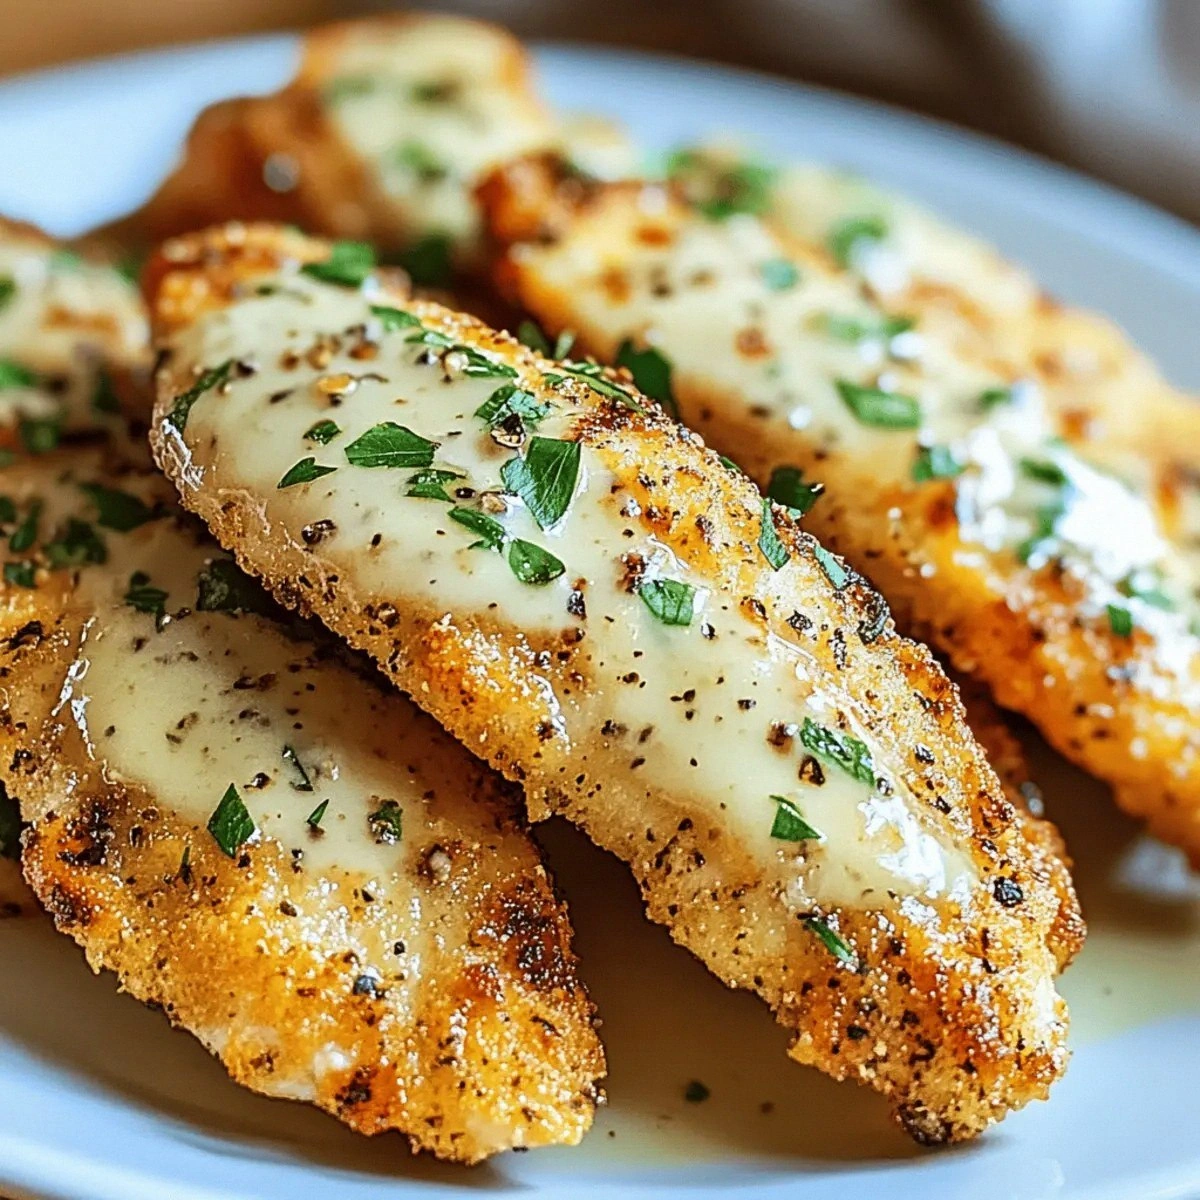
First, I gathered the holy trinity of comfort food—garlic, Parmesan, and a crunchy breadcrumb coat. I remembered a tip from a seasoned fry chef: a double‑dip in flour and panko creates a texture that shatters like thin ice when you bite into it, while the Parmesan melts into a buttery, nutty veil that clings to every crevice. I also tossed in dried basil and paprika, not just for color, but to give the crust a whisper of herbaceous depth that lingers on the palate. The result? A golden‑brown masterpiece that sings “crunch” the moment it hits your teeth, followed by a juicy, garlic‑kissed interior that makes you want to lick the plate clean.
Most recipes get this completely wrong—either they drown the chicken in a soggy batter, or they over‑season the coating until it masks the meat’s natural flavor. Here’s what actually works: a light dusting of flour to lock in moisture, a quick dip in a butter‑or‑oil mixture that adds richness, and a final roll in a Parmesan‑laden panko that fries up to a perfect crunch. The secret weapon? A brief, high‑heat sear that creates that coveted crust without steaming the meat, followed by a short finish in the oven to ensure the interior stays tender and the coating stays crisp.
Okay, ready for the game‑changer? I’m about to walk you through every single step—by the end, you’ll wonder how you ever made chicken tenders any other way. I dare you to taste this and not go back for seconds. Let’s dive in and create a dish that’s hands down the best version you’ll ever make at home.
What Makes This Version Stand Out
- Flavor Explosion: The combination of fresh minced garlic and sharp Parmesan creates a savory depth that’s both aromatic and tangy, turning a simple tender into a flavor bomb.
- Texture Triumph: The double coating—flour then panko—gives a crunchy exterior that shatters like thin ice, while the interior remains juicy and tender.
- Simplicity: With just ten pantry staples you can pull this off, no fancy equipment or exotic spices required.
- Unique Twist: Dried basil adds an unexpected herbaceous note that elevates the dish without overpowering the garlic‑Parmesan core.
- Crowd Magnet: Even the pickiest eaters (yes, even the teen who claims “nothing’s good”) can’t resist the golden crust and the buttery aroma.
- Ingredient Quality: Using real Parmesan instead of a pre‑grated powder makes a massive difference in flavor intensity and melt.
- Cooking Method: A quick pan‑sear followed by a brief oven finish locks in juices and keeps the crust from getting soggy.
- Make‑Ahead Potential: You can prep the coating and even pre‑bread the tenders ahead of time, then fry them fresh when guests arrive.
Inside the Ingredient List
The Flavor Base
Garlic, the star of the flavor base, brings a pungent, slightly sweet aroma that becomes mellow and buttery when cooked. Using two cloves of minced garlic ensures each bite gets that aromatic punch without being overwhelming. If you’re allergic or simply don’t love garlic, try a teaspoon of garlic powder for a milder, yet still recognizable, flavor. Fresh garlic also contains allicin, a compound that adds a subtle heat, making the tenders feel alive on the tongue.
Parmesan cheese is the secret glue that binds the crust together, delivering a salty, umami richness that you can’t replicate with generic cheese powders. The half‑cup amount provides enough cheese to coat each breadcrumb without making the crust gritty. For a sharper bite, opt for aged Parmigiano‑Reggiano; for a milder profile, a younger Parmesan works just as well. If you’re dairy‑free, a finely grated nutritional yeast mixed with a pinch of salt can mimic the cheesy note.
The Texture Crew
White flour is the unsung hero that creates a thin, protective layer, sealing in the chicken’s natural juices. One cup is enough to lightly dust all the tenders without turning them into a doughy mess. The flour also helps the oil adhere, which is crucial for achieving that golden‑brown finish. If you’re looking for a gluten‑free alternative, try rice flour or a 1:1 gluten‑free blend; the texture will stay crisp, though the flavor will be slightly different.
Panko breadcrumbs are the key to that airy crunch. Unlike regular breadcrumbs, panko is larger and flakier, giving the crust a lightness that feels almost melt‑in‑your‑mouth. One cup of panko, combined with the Parmesan, creates a coating that stays crisp even after a brief oven finish. If you’re feeling adventurous, mix in a tablespoon of crushed cornflakes for an extra crunch factor.
The Unexpected Star
Dried basil and paprika add subtle layers of herbaceous and smoky flavor that round out the profile. The basil’s sweet, slightly peppery notes lift the garlic, while paprika contributes a gentle earthiness and a beautiful golden hue. Both are measured at one teaspoon each, enough to be noticeable but not dominate. If you want a spicier kick, swap half the paprika for smoked chipotle powder.
Olive oil or melted butter serves as the medium that helps the coating brown evenly. A quarter‑cup is just right to coat the tenders without making them greasy. Butter adds a richer, almost caramelized flavor, while olive oil brings a fruity undertone. For a healthier spin, use a high‑smoke‑point oil like avocado oil, which also gives a crisp finish.
The Final Flourish
Salt and pepper are the classic duo that brings everything together, enhancing each ingredient’s natural taste. One teaspoon of each ensures the crust is seasoned just right, without being overly salty. If you’re watching sodium, reduce the salt to a half‑teaspoon and add a pinch of garlic powder for extra flavor. Freshly cracked black pepper adds a subtle bite that complements the garlic and basil.
Chicken tenders themselves are the canvas for this masterpiece. One pound of tender, juicy chicken provides the perfect protein base—no need for boneless breasts that can dry out. Look for tenders that are uniform in size so they cook evenly; if they’re uneven, gently pound them to a consistent thickness. The result is a tender bite that stays moist even after the high‑heat sear.
Everything's prepped? Good. Let's get into the real action...
The Method — Step by Step
Start by patting the chicken tenders dry with paper towels; this is crucial because any excess moisture will steam the coating instead of crisping it. Season each tender lightly with the teaspoon of salt and pepper, then set them aside on a plate. I like to let them rest for five minutes—this tiny pause lets the seasoning penetrate the meat, making every bite flavorful.
Kitchen Hack: Sprinkle a pinch of cornstarch on the chicken after seasoning; it creates an extra barrier that helps the crust stay crisp.In a shallow dish, combine the cup of white flour with the dried basil, paprika, and the minced garlic. Whisk together until the garlic is evenly distributed; this prevents clumps that could burn later. Dip each seasoned tender into the flour mixture, turning to coat all sides, then give it a gentle shake to remove excess flour. The flour layer should be thin—think of it as a dusting, not a coating.
Now, prepare a second shallow bowl with the quarter‑cup of olive oil or melted butter. This liquid bath is where the magic of adhesion happens. Quickly dip each flour‑coated tender into the oil, ensuring every nook is brushed with a glossy sheen. Don’t soak them; a quick dip of two seconds is enough to wet the surface without making it soggy.
In a third bowl, mix the cup of panko breadcrumbs with the half‑cup of grated Parmesan. Toss them together so the cheese is evenly distributed; this ensures every bite gets a cheesy crunch. Press each tender into the breadcrumb mixture, using your hands to pack the crumbs firmly. The coating should cling tightly—if it looks loose, give it another gentle press.
Heat a large skillet over medium‑high heat and add just enough oil to coat the bottom—about two tablespoons. The oil should shimmer but not smoke; if it starts to smoke, lower the heat slightly. When the oil is ready, lay the breaded tenders in a single layer, making sure they don’t touch. This spacing is essential; crowded tenders steam instead of sear.
Watch Out: If the oil is too hot, the coating will burn before the chicken cooks through. Aim for a temperature of about 350°F (175°C) for the perfect sear.Let the tenders sizzle undisturbed for about three minutes; you’ll hear a gentle crackle that signals the crust is forming. Flip them carefully with tongs, and sear the other side for another three minutes. The edges should start pulling away from the pan, and the color should be a deep, golden amber. This is the moment of truth—if the crust looks dull, give it another minute on that side.
Preheat your oven to 200°F (95°C) while the tenders finish their pan‑sear. Once both sides are beautifully browned, transfer the skillet (or move the tenders to a baking sheet) into the warm oven for five minutes. This low‑heat finish allows the interior to reach a safe 165°F (74°C) without over‑cooking the crust, preserving that perfect crunch.
Remove the tenders from the oven and let them rest on a wire rack for two minutes. Resting lets the juices redistribute, ensuring each bite stays moist. Serve immediately with a dipping sauce of your choice—maybe a honey‑mustard or a cool ranch. That sizzle when it hits the pan? Absolute perfection.
Kitchen Hack: Place the finished tenders on a paper‑towel‑lined plate for a quick drain; this removes excess oil and keeps the crust crisp.
That's it — you did it. But hold on, I've got a few more tricks that'll take this to another level...
Insider Tricks for Flawless Results
The Temperature Rule Nobody Follows
Most home cooks think “high heat” is always better, but the truth is you need a sweet spot. Aim for a skillet temperature of about 350°F (175°C); anything hotter will scorch the panko before the chicken cooks through. Use a simple drop‑of‑water test: a few droplets should dance and evaporate quickly without exploding. If you’re using an induction stove, you may need to adjust the power setting slightly higher because the heat distribution is different.
Why Your Nose Knows Best
Never underestimate the power of aroma as a cooking cue. When the garlic‑Parmesan crust starts to release a nutty, buttery scent, you’re close to the perfect golden color. If you smell a faint burnt odor, pull the tenders off the heat immediately—overcooked breadcrumbs become bitter and ruin the dish. Trust your nose; it’s a more reliable indicator than a timer.
The 5‑Minute Rest That Changes Everything
Resting isn’t just for steaks. After the final oven finish, let the tenders sit for exactly five minutes on a wire rack. This short rest allows the juices to settle, preventing them from spilling out when you bite in. I once skipped this step and ended up with a soggy bottom; lesson learned, never skip the rest.
Butter vs. Oil Showdown
If you’re debating whether to use butter or olive oil, consider the flavor profile you want. Butter gives a rich, caramelized taste that pairs beautifully with Parmesan, while olive oil adds a subtle fruitiness and a higher smoke point. My personal favorite is a 50/50 blend: half butter, half oil, giving you the best of both worlds.
Double‑Dipping for Extra Crunch
For the ultimate crunch, repeat the flour‑oil‑panko sequence once more. After the first coating, let the tenders rest for two minutes, then dip them again in the flour, a quick oil splash, and a final panko roll. This creates a multi‑layered crust that shatters like a delicate biscuit. Be warned: this adds a few extra minutes, but the texture payoff is worth it.
Creative Twists and Variations
This recipe is a playground. Here are some of my favorite ways to switch things up:
Spicy Sriracha Kick
Mix a tablespoon of sriracha into the melted butter before the oil dip. The heat infuses the crust, giving each bite a gentle burn that balances the cheesy richness. Pair with a cooling cucumber yogurt dip for contrast.
Herb‑Infused Parmesan
Swap dried basil for fresh thyme and rosemary, finely chopped, and stir them into the Parmesan‑panko mix. The fresh herbs add a bright, garden‑fresh note that makes the dish feel spring‑time ready.
Cheesy Jalapeño Burst
Finely dice two jalapeños and fold them into the breadcrumb mixture. The jalapeños melt slightly during frying, creating pockets of mild heat that surprise the palate. Adjust the amount based on your spice tolerance.
Gluten‑Free Crunch
Replace the white flour with a 1:1 gluten‑free blend and use gluten‑free panko or crushed rice crackers. The texture remains crisp, and the flavor stays true, making it safe for those with gluten sensitivities.
Sweet‑And‑Savory Twist
Add a teaspoon of honey to the butter before the oil dip, and sprinkle a pinch of cinnamon into the breadcrumb mix. The subtle sweetness pairs beautifully with the savory Parmesan, creating a unique flavor profile that’s perfect for brunch.
Storing and Bringing It Back to Life
Fridge Storage
Place cooled tenders in an airtight container lined with a paper towel to absorb excess moisture. They’ll stay juicy for up to three days. When you’re ready to eat, reheat in a preheated 375°F (190°C) oven for eight minutes; the crust will revive its crunch.
Freezer Friendly
Lay the fully breaded, uncooked tenders on a parchment‑lined tray and freeze until solid, then transfer to a zip‑top bag. They’ll keep for up to two months. When you’re ready, fry them straight from the freezer—just add an extra minute to the cooking time.
Best Reheating Method
For the ultimate reheating, use a convection oven set to 350°F (175°C) and place the tenders on a wire rack. Add a tiny splash of water (about a tablespoon) to the pan; the steam helps the interior stay moist while the oven restores the crisp exterior. Avoid microwaving—it will make the coating rubbery.