I was halfway through a late‑night binge of instant noodles when my roommate, a self‑proclaimed culinary wizard, challenged me to create a dessert that would make her taste buds do the salsa. I stared at the fridge, squinted at the stale biscuits, and thought, “Why not turn these into a cake?” The moment my spoon hit the pan, the kitchen filled with a sweet, buttery aroma that made my neighbor’s cat pause mid‑pounce. I tasted a bite and was instantly transported to a childhood memory of sticky fingers and giggles. That single bite turned a kitchen mishap into a revelation: the No‑Bake Biscuit Cake was not just a dessert; it was a manifesto for quick, indulgent, and utterly shareable sweet treats.
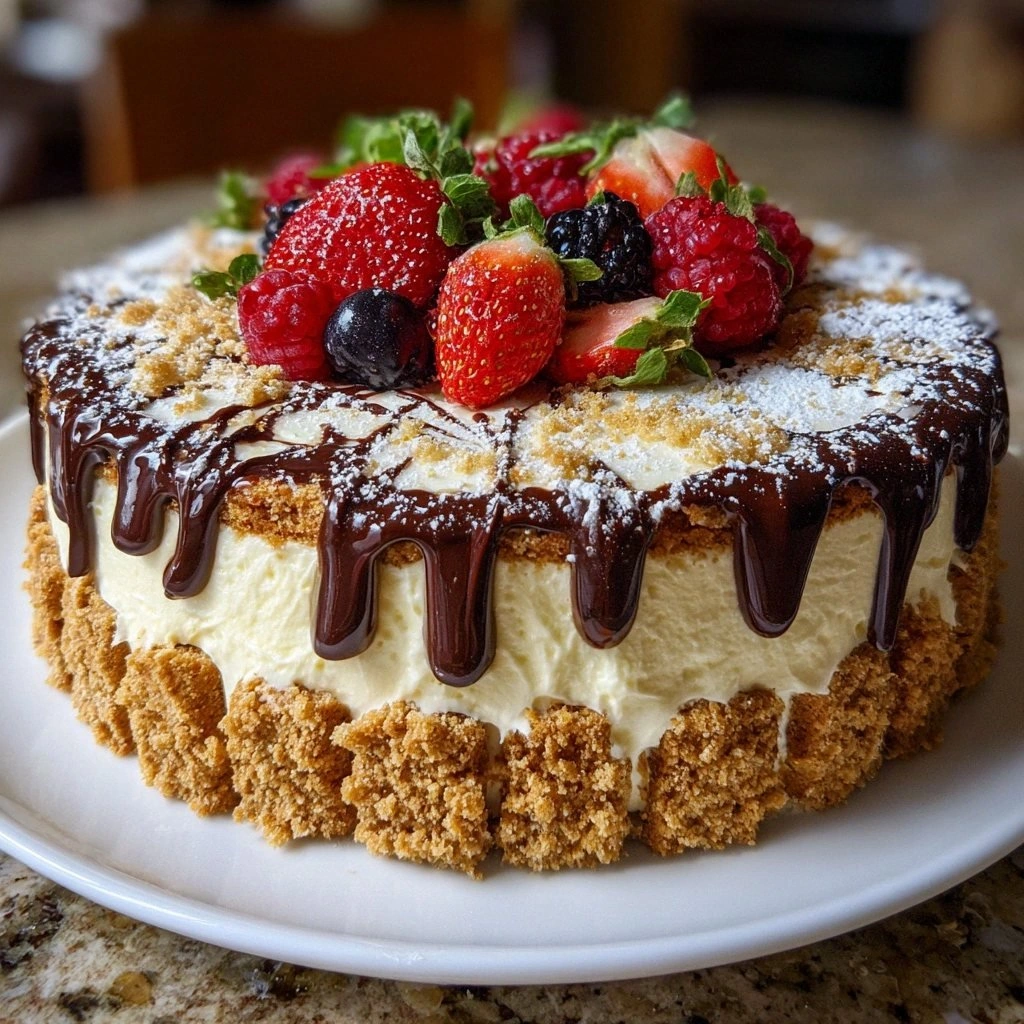
Picture this: a glossy, chocolate‑laden slab that looks like it’s been baked in a fairy oven, yet you’re simply whisking, folding, and chilling. The biscuits crackle as they’re crushed into fine crumbs, the butter melts into a silky pool, and the milk sings a warm, comforting hum as it simmers with cocoa. Your senses are flooded with the scent of toasted chocolate, the feel of a silky batter, and the anticipation of the first bite. The texture is a paradoxical blend of crunchy biscuit shards and a smooth, fudgy core that melts in your mouth like a secret held by a velvet‑clad lover. The final result is a cake that is both a visual delight and an edible adventure.
What makes this version stand out from the endless array of no‑bake recipes is the meticulous layering of flavors and textures. I dared myself to keep it simple—no fancy gadgets, no professional ingredients—yet the result is a dessert that feels luxurious, like a gourmet creation from a high‑end patisserie. Every component, from the humble biscuit to the humble jar of jam, has a role that magnifies the whole. The result is a cake that’s not only delicious but also incredibly forgiving, making it the perfect go‑to for both seasoned bakers and kitchen novices alike.
And here’s the kicker: I’ve discovered that the secret to the cake’s glossy finish is a splash of espresso in the butter mixture. It’s a subtle, almost invisible twist that gives the chocolate a depth that feels both earthy and luxurious. If you’re skeptical, I dare you to taste this and not go back for seconds. Trust me, this is hands down the best version you’ll ever make at home.
Okay, ready for the game‑changer? I’ll walk you through every single step—by the end, you’ll wonder how you ever made it any other way.
What Makes This Version Stand Out
- Taste: The chocolate is rich yet balanced with the subtle tang of jam, creating a layered flavor profile that lingers on the palate.
- Texture: The biscuit shards provide a satisfying crunch that contrasts perfectly with the creamy, fudgy center.
- Simplicity: No fancy equipment or complicated techniques—just a few kitchen staples and a bit of patience.
- Uniqueness: The espresso infusion adds depth, turning a simple dessert into a sophisticated treat.
- Make‑ahead Potential: You can assemble it a day ahead; it will stay fresh in the fridge, making it ideal for parties.
- Crowd Reaction: Friends always ask for the recipe after the first bite—no more excuses for bland desserts.
Alright, let's break down exactly what goes into this masterpiece…
Inside the Ingredient List
The Flavor Base
At the heart of the No‑Bake Biscuit Cake lies a simple yet powerful combination of butter, milk, and cocoa powder. Butter melts into a silky pool that carries the cocoa’s bittersweet notes, while the milk adds a subtle sweetness and helps bind the mixture. Together, they create a velvety foundation that’s both comforting and indulgent. Skipping the cocoa would leave the cake feeling flat and lifeless; you’d lose the depth that makes each bite a revelation. If you’re craving a richer experience, double the cocoa or replace half the milk with heavy cream.
The Texture Crew
Crushed biscuits are the unsung heroes of this dessert. They provide the signature crunch that shatters like thin ice when you bite into the cake. The crumbs also act as a natural binder, holding the mixture together without the need for flour or gelatin. If you prefer a smoother texture, pulse the biscuits until they resemble fine breadcrumbs. A pinch of ground almonds can also be added for an extra nutty bite.
The Unexpected Star
Espresso, a seemingly out‑of‑place ingredient, is the secret sauce that elevates the chocolate’s flavor profile. A tablespoon of espresso grounds adds an earthy undertone that balances the sweetness and enhances the cocoa’s richness. If you’re a coffee lover, feel free to increase the dose; just remember that too much can make the cake taste bitter. For a caffeine‑free version, replace the espresso with a splash of vanilla extract and a dash of almond milk.
The Final Flourish
Jam or fruit preserves add a sweet, fruity contrast that cuts through the chocolate’s richness. Strawberry jam is traditional, but raspberry, blueberry, or even a hint of lemon marmalade can bring a fresh twist. If you prefer a fruitless version, sprinkle chopped nuts or chocolate chips instead. The jam also adds moisture, preventing the cake from becoming overly dense. A final dusting of powdered sugar or cocoa powder gives the cake a polished look and a subtle finish.
Everything's prepped? Good. Let's get into the real action…
The Method — Step by Step
- Start by placing the biscuits in a sturdy zip‑lock bag. Use a rolling pin or a heavy pan to crush them into fine crumbs. The goal is a texture that feels like sandpaper to the touch, not coarse gravel. This step is crucial; if the crumbs are too chunky, the cake will feel uneven.
- In a medium saucepan, melt the butter over medium heat. Once the butter is fully melted, stir in the cocoa powder until it dissolves completely. The mixture should have a glossy sheen and a warm, toasted aroma that makes your kitchen smell like a chocolate shop.
- Add the milk to the butter‑cocoa mixture and whisk until the mixture is smooth. Bring it to a gentle simmer, allowing the flavors to marry for about two minutes. Don’t let it boil; you only want it to heat through, not evaporate.
- Remove the saucepan from heat and stir in the espresso. This is the moment of truth—watch the aroma deepen, and feel the mixture’s richness intensify. Let it sit for a minute to allow the espresso to infuse fully.
- Pour the warm chocolate mixture over the crushed biscuits in a large mixing bowl. Add the jam, then fold everything together with a spatula until the biscuits are evenly coated and the mixture is glossy. If the mixture feels too dry, add a splash of milk to reach a consistency that clings to the crumbs.
- Transfer the mixture into a lined loaf pan or a silicone mold. Press it down firmly with the back of a spoon to eliminate air pockets. The more compact you pack it, the smoother the final slice will be. This step is vital for a uniform bite.
- Refrigerate the cake for at least 4 hours, or overnight if you’re planning ahead. The chill will set the chocolate and biscuit mixture into a firm, slice‑able block. If you’re in a hurry, a 2‑hour chill will do, but the flavor won’t be as fully developed.
- Once set, remove the cake from the fridge and let it sit at room temperature for 10 minutes before slicing. This short rest softens the edges, making it easier to cut clean slices without crumbling.
That's it—you did it. But hold on, I've got a few more tricks that'll take this to another level…
Insider Tricks for Flawless Results
The Temperature Rule Nobody Follows
Keep the chocolate mixture just below boiling. If it’s too hot, the butter will separate and the cake will have a greasy texture. I’ve learned that a gentle simmer is enough to unlock the full flavor profile without compromising the mouthfeel.
Why Your Nose Knows Best
Smell the mixture as it simmers; it should emit a deep, roasted cocoa aroma. If it smells sweet or milky, the cocoa isn’t fully integrated, and the cake will taste flat. Trust your nose—it’s the ultimate flavor sensor.
The 5‑Minute Rest That Changes Everything
After you press the mixture into the mold, let it rest for five minutes before refrigerating. This short pause allows the crumbs to settle, resulting in a smoother, more cohesive cake that slices cleanly.
Don’t Skimp on the Jam
The jam isn’t just a garnish; it’s a flavor booster that adds moisture and a hint of fruitiness. If you use a low‑sugar jam, the cake will taste slightly less sweet, which can be a good thing if you’re watching your sugar intake.
Use a Silicone Mold for Easy Release
A silicone loaf pan or a square mold makes the cake easier to remove. If you use a wooden or glass pan, line it with parchment paper to prevent sticking. This trick saves you from tearing the cake apart.
Creative Twists and Variations
This recipe is a playground. Here are some of my favorite ways to switch things up:
Nutty Crunch Edition
Swap out half the biscuits for chopped walnuts or pecans. Add a tablespoon of toasted coconut for an extra tropical flair. This version is perfect for nut lovers and adds a delightful crunch.
Mocha Madness
Replace the espresso with a shot of cold brew coffee and add a pinch of sea salt. The mocha flavor deepens the chocolate, while the salt balances the sweetness. This is a hit at coffee‑themed parties.
Berry Burst
Use mixed berry jam instead of strawberry and fold in a handful of fresh blueberries before chilling. The berries pop in each bite, giving the cake a vibrant, fresh finish.
Chocolate Chip Delight
Fold in 50g of semi‑sweet chocolate chips during the final mixing step. The chips melt slightly in the warm mixture, creating pockets of gooey chocolate that burst with every bite.
Vegan Version
Replace butter with coconut oil, use plant‑based milk, and choose a vegan jam. The cake stays moist and indulgent, and it’s perfect for plant‑based guests.
Storing and Bringing It Back to Life
Fridge Storage
Store the cake in an airtight container or wrap it tightly in plastic wrap. It will stay fresh for up to 5 days in the refrigerator. The chocolate will firm up, making it even easier to slice.
Freezer Friendly
Wrap the cake in parchment paper, then in a layer of foil before freezing. It can be kept for up to 3 months. When you’re ready to enjoy it, let it thaw in the fridge overnight.
Best Reheating Method
To revive a frozen or chilled slice, microwave on low for 10–15 seconds or place it in a preheated oven at 150°C for 5 minutes. Add a tiny splash of water before reheating—this steams it back to perfection, giving it a silky texture.