I was halfway through a midnight snack binge when the kitchen exploded in a way I never expected. A burnt batch of plain fries, a sigh of disappointment, and a sudden craving for something that would turn that regret into triumph. That's when I decided to throw a handful of garlic, a pinch of chili, and a splash of sesame into the mix. The result? A sizzling, aromatic masterpiece that still makes my taste buds do a happy dance.
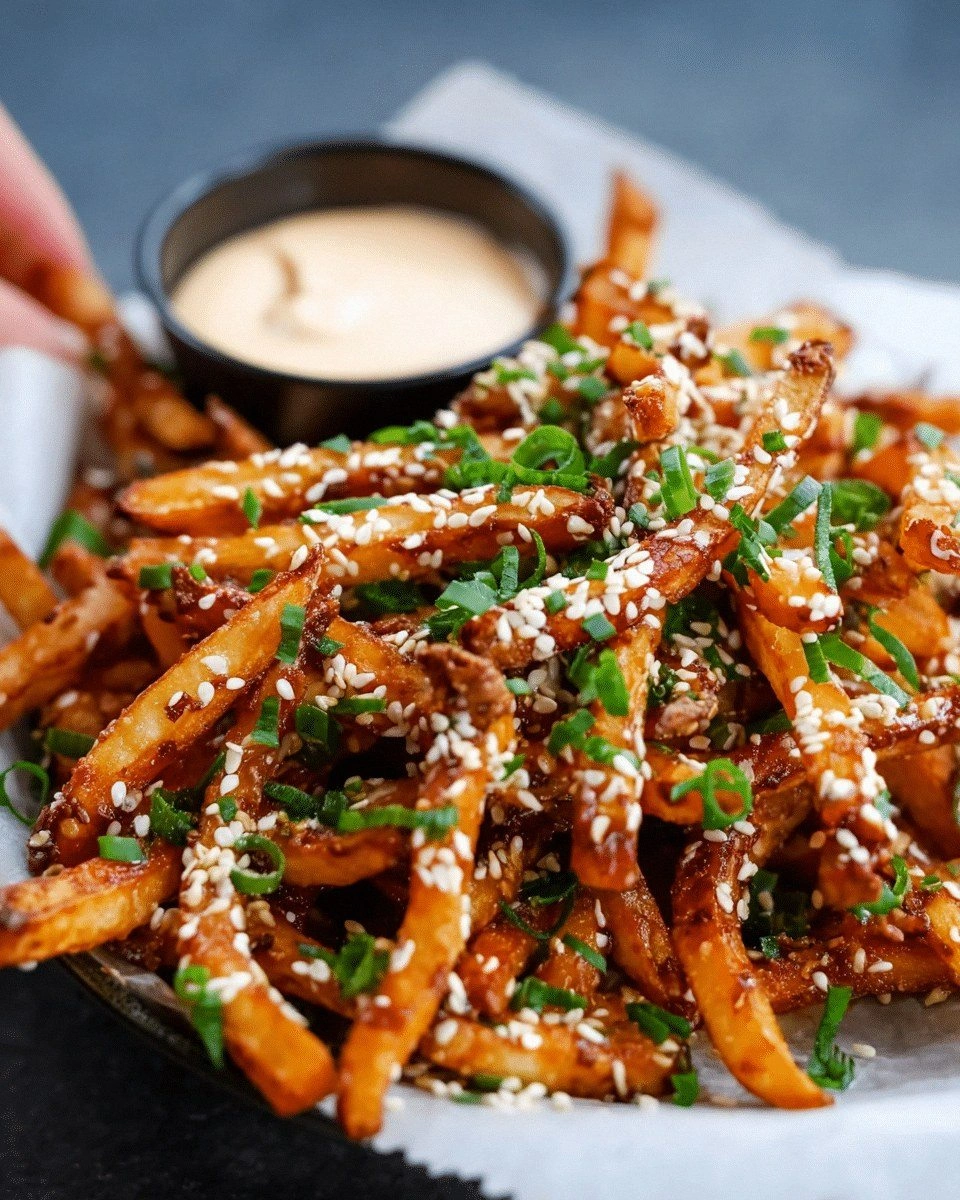
Picture this: the air thick with the scent of fresh garlic, the heat from the oven rising like a promise, and the sound of fries popping in the pan. Each piece is coated in a glossy, peppery glaze that shatters like thin ice when you bite. The crunch is unmistakable, and the heat from the chili flakes lingers on the tongue like a gentle ember. I dare you to taste this and not go back for seconds.
What sets this version apart is that it’s not just another fried snack; it’s a flavor symphony that balances heat, umami, and a subtle nutty finish. The sesame seeds add a crunchy contrast that echoes the crispness of the potato, while the lime brightens the dish and cuts through the richness. The secret sauce is a quick drizzle of soy that locks in moisture and deepens the savory profile. Most recipes get this completely wrong, but here’s what actually works.
I’ve spent nights tweaking the ratios, swapping out ingredients, and testing the timing until every bite hit the mark. If you’ve ever struggled with fries that turn soggy or taste bland, you’re not alone — and I’ve got the fix. This is hands down the best version you’ll ever make at home, and I promise you’ll wonder how you ever made them any other way. Let me walk you through every single step — by the end, you’ll wonder how you ever made it any other way.
What Makes This Version Stand Out
- Flavor: The combination of garlic, chili flakes, and soy creates a depth that feels both familiar and adventurous. The lime juice adds a bright zing that balances the heat.
- Crispness: Double‑baking or double‑frying the fries ensures the exterior is a crackling shell while the interior stays fluffy. The sesame seeds add an extra crunch that never feels overpowering.
- Texture: The glaze coats each piece like velvet, giving a satisfying bite that melts into a savory cloud. The peppery finish leaves a lingering warmth that keeps you coming back.
- Ease: With only a handful of pantry staples, this recipe is quick to assemble. You can prep the potatoes in 10 minutes and have them ready to cook in a few more.
- Versatility: Serve them as a side, a snack, or even a base for a loaded taco bowl. They pair beautifully with a creamy aioli or a tangy yogurt dip.
- Show‑stopper: The glossy sheen and vibrant colors make them Instagram‑ready, while the aroma alone can fill an entire kitchen.
Alright, let's break down exactly what goes into this masterpiece...
Inside the Ingredient List
The Potato Base
Russet potatoes are the star of the show because of their high starch content, which turns into a fluffy interior when cooked. Cutting them into uniform sticks ensures even cooking and a consistent bite. Skipping the potato step would mean no fries, so treat this as the foundation of the dish. If you’re craving a sweeter profile, you can substitute sweet potatoes, but the texture will shift toward a softer bite.
The Flavor Layer
Olive oil, garlic, chili flakes, salt, and black pepper form the aromatic base. Olive oil carries the garlic’s punch and helps the seasoning cling to the surface. The chili flakes add heat that lingers without overwhelming the palate. A pinch of black pepper brightens the overall flavor profile. If you’re vegan, you can replace the soy sauce with a splash of tamari for a richer umami note.
The Crunch Factor
Toasted sesame seeds are the crunchy hero that provides a nutty undertone. They also add a subtle visual pop that makes the fries look as good as they taste. Toasting them until golden enhances their flavor, so don’t skip that step. If you’re allergic to sesame, ground pumpkin seeds or sunflower seeds can be a decent alternative.
The Final Touch
A splash of soy sauce and lime juice finishes the dish, adding depth and brightness. Soy sauce brings umami and a hint of saltiness, while lime juice cuts through the richness and leaves a refreshing aftertaste. If you’re sensitive to sodium, use low‑sodium soy or reduce the amount by half. Fresh cilantro adds a herbaceous finish, but it’s optional and can be omitted for a cleaner flavor.
Everything's prepped? Good. Let's get into the real action...
The Method — Step by Step
- Step 1: Prep the potatoes. Wash and scrub the russet potatoes thoroughly. Cut them into sticks about ¼ inch thick, aiming for uniformity to ensure even cooking. If you prefer extra crispness, rinse the cut potatoes in cold water for 10 minutes and pat them dry with a clean towel. This removes excess starch and helps the fries crisp up beautifully.
- Step 2: Soak for moisture. Place the potato sticks in a large bowl of cold water and let them soak for at least 30 minutes, or overnight if you’re planning ahead. Soaking detaches starch from the surface, which means less sticking and a crisper finish. Drain the water, then dry the fries completely with a clean towel or paper towels; moisture is the enemy of crisp.
- Step 3: Toss with oil and seasonings. In a separate bowl, combine olive oil, minced garlic, chili flakes, salt, and black pepper. Add the dried potatoes and stir until every piece is coated in the flavorful oil mixture. This coating not only delivers taste but also creates a barrier that keeps the fries from becoming soggy. Kitchen Hack: For an extra burst of aroma, add a pinch of smoked paprika to the oil mixture; it gives a subtle smokey undertone that pairs wonderfully with the chili.
- Step 4: First bake. Preheat your oven to 425°F (220°C). Spread the seasoned fries in a single layer on a parchment‑lined baking sheet, ensuring they’re not crowded. Bake for 25 minutes, flipping halfway through, until the edges start to turn golden. This first bake dries the surface and initiates the Maillard reaction, giving the fries their signature crust.
- Step 5: Drizzle the glaze. While the fries are baking, whisk together soy sauce, lime juice, and a splash of water to create a thin glaze. Once the fries are golden, remove the sheet from the oven and pour the glaze over them, tossing gently so every piece is coated. This glaze adds shine, flavor, and a subtle tang that balances the heat. Kitchen Hack: If you like a thicker coating, mix a teaspoon of cornstarch into the glaze; it will set into a glossy, sticky finish.
- Step 6: Final bake. Return the glazed fries to the oven for an additional 10 minutes, or until the glaze has caramelized and the edges are crisp. Keep a close eye on them—overcooking will turn the glaze into a hard crust. This final bake seals in the flavor and ensures that every bite is a perfect balance of crunch and chew. Watch Out: If you use too much soy sauce, the fries can become overly salty and sticky; adjust to taste before baking.
- Step 7: Add sesame seeds. While the fries are still hot, sprinkle toasted sesame seeds over them and toss gently. The heat from the fries will toast the seeds further, releasing their nutty aroma. This step is crucial for that signature crunch and flavor contrast. If you’re using a non‑stick pan, you can add the seeds directly to the pan before the final bake for an even more integrated flavor.
- Step 8: Finish with fresh herbs. Remove the fries from the oven and immediately sprinkle chopped cilantro over them. The residual heat will slightly wilt the herbs, releasing their bright, citrusy notes. If you prefer a milder herb, parsley or basil can be substituted; each brings its own personality to the dish.
- Step 9: Serve immediately. Transfer the fries to a serving platter and let them rest for a minute to allow the glaze to set. Serve hot with a side of tangy yogurt dip or a creamy aioli. The fries are best enjoyed fresh, but you can store leftovers in an airtight container for a short time if needed.
That's it — you did it. But hold on, I've got a few more tricks that'll take this to another level...
Insider Tricks for Flawless Results
The Temperature Rule Nobody Follows
Many cooks bake at 400°F, but that’s too low for the Maillard reaction to kick in fully. Raising the heat to 425°F or even 450°F (if your oven can handle it) ensures a deeper caramelization. Keep the fries spread out to avoid steaming. I once baked at 400°F and the fries were soggy; switching to 425°F changed everything.
Why Your Nose Knows Best
The aroma of garlic and sesame is your best judge of doneness. If the smell is rich and slightly toasty, the fries are ready. If it’s still raw or bland, give them another five minutes. My friend once tried to skip the second bake because the first round seemed done; the result was unevenly crisp. Trust your nose.
The 5-Minute Rest That Changes Everything
After baking, let the fries rest on a wire rack for 5 minutes. This allows steam to escape and keeps the bottom crisp. A quick rest also lets the glaze set into a glossy coating that’s easier to bite into. I’ve seen fries that sit on a sheet for too long become soggy; the rack saves the day.
Use a Light Hand with Salt
Salt can quickly overpower delicate flavors if used too liberally. Season lightly at the start and taste after the glaze has baked. If it needs more, add a pinch now; you can always add more after serving. Over‑salting is a common mistake that ruins the delicate balance of heat and sweetness.
Keep the Oil Fresh
Olive oil degrades quickly when exposed to heat. Use a fresh bottle or a light oil like grapeseed if you’re frying. Stale oil can give the fries a bitter aftertaste. I swapped olive oil for grapeseed last year and the fries tasted cleaner and brighter.
Creative Twists and Variations
This recipe is a playground. Here are some of my favorite ways to switch things up:
Sweet Potato Sizzle
Replace russet potatoes with sweet potato sticks for a naturally sweet counterpoint to the chili. Add a pinch of cinnamon or nutmeg during the oil toss for a warm, aromatic twist. Sweet potatoes bake a bit slower, so extend the first bake by 5 minutes.
Mediterranean Flair
Swap soy sauce for a splash of lemon vinaigrette and add dried oregano to the seasoning mix. Top with crumbled feta and a drizzle of tzatziki after baking. The briny feta balances the heat, creating a Mediterranean‑inspired snack.
BBQ Heat
Replace chili flakes with smoked paprika and drizzle a smoky BBQ sauce during the glaze step. Finish with a sprinkle of smoked cheddar or a dollop of chipotle mayo. This version is perfect for a backyard barbecue.
Korean Kimchi Crunch
Toss the fries in a mixture of gochujang, rice vinegar, and sesame oil before baking. Add a handful of chopped kimchi after baking for a tangy, fermented kick. The kimchi’s texture adds another layer of crunch.
Cheesy Chew
Sprinkle grated Parmesan or sharp cheddar over the fries during the final bake. The cheese melts into gooey pockets that contrast with the crisp exterior. Serve with a side of marinara for a quick pizza‑in‑a‑bowl.
Storing and Bringing It Back to Life
Fridge Storage
Cool the fries completely, then place them in an airtight container. Store in the refrigerator for up to 3 days. When ready to eat, reheat in a 400°F oven for 10 minutes, tossing halfway to regain crispness.
Freezer Friendly
After cooling, spread the fries on a parchment sheet and freeze for 1–2 hours. Transfer to a freezer bag and store up to 1 month. Reheat directly from frozen in a 425°F oven for 15 minutes, stirring halfway.
Best Reheating Method
The secret to revived fries is a quick blast of heat. Add a splash of water to the baking sheet, cover loosely with foil, and heat at 425°F for 5 minutes. The steam will rehydrate the interior while the oven does the crisping.