Look, I've eaten my way through enough disappointing Christmas cookies to know when something special lands on the counter. You know the ones I'm talking about – those sad, cakey pucks that taste like sweetened cardboard, or the over-ambitious attempts that spread into one giant cookie sheet blob. Last December, after my neighbor brought over yet another batch of rock-hard "holiday treats," I declared war on mediocre Christmas cookies. I locked myself in the kitchen for three days straight, armed with pounds of butter, every type of chocolate known to mankind, and a determination that would make Santa's elves jealous.
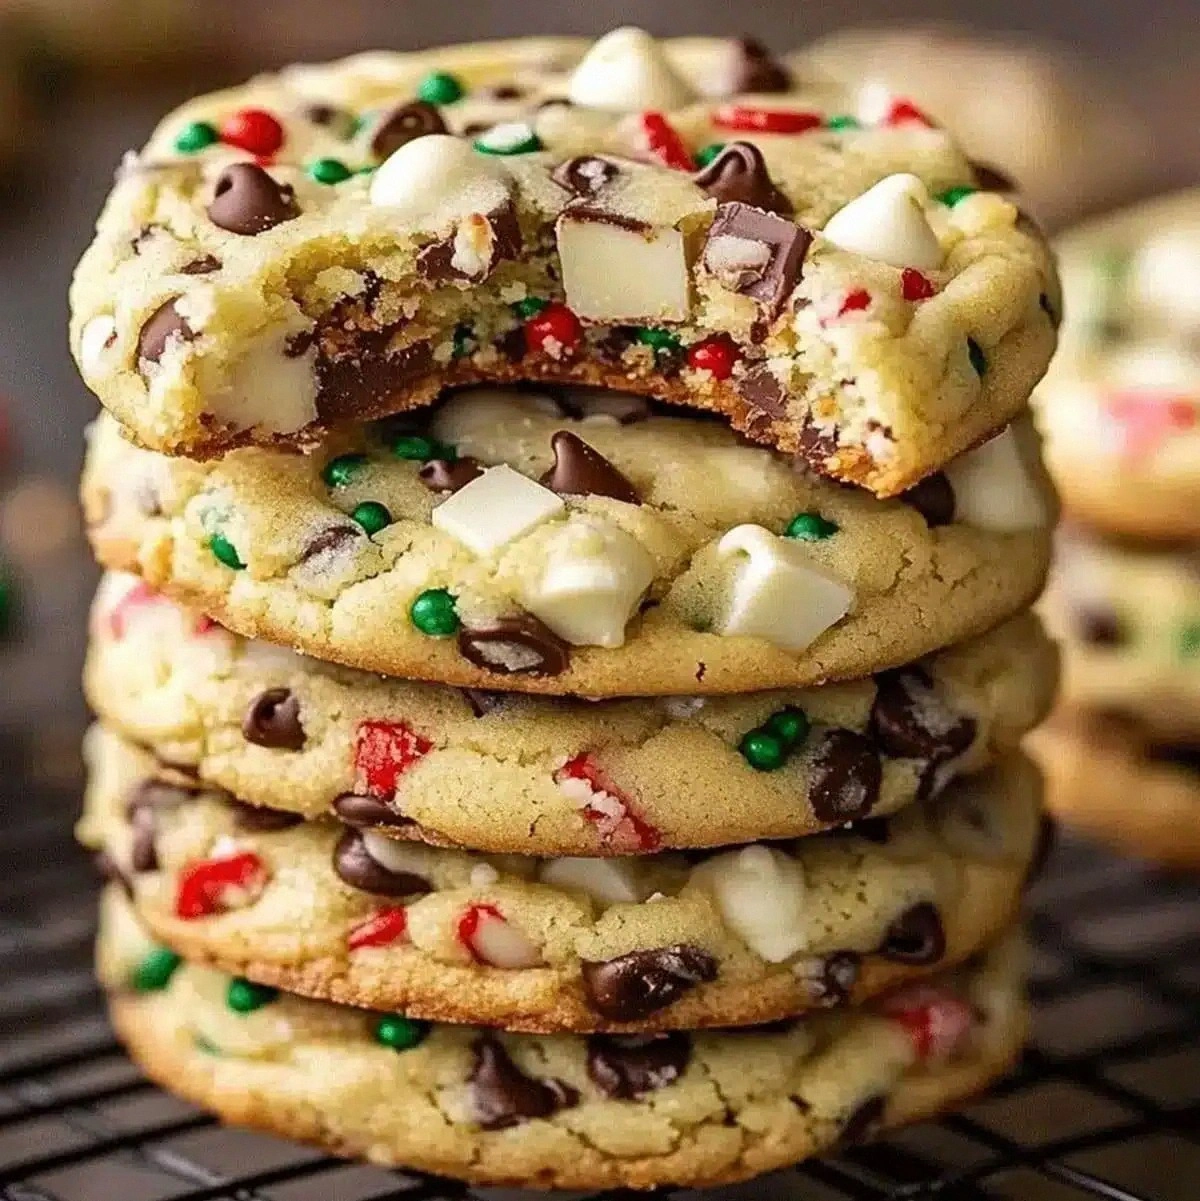
The result? These Winter Wonderland Chocolate Chip Christmas Cookies that made my notoriously picky brother-in-law actually pause mid-sentence – a Christmas miracle in itself. Picture this: edges that shatter like thin ice under your teeth, revealing a tender, almost fudgy center studded with pools of melted white and dark chocolate. The holiday sprinkles don't just sit there looking pretty (though they do that spectacularly); they add tiny pops of vanilla sweetness that make each bite feel like you're unwrapping a present. I'm not exaggerating when I say these cookies single-handedly saved my family's reputation at the annual cookie exchange.
Here's the thing that'll make you the hero of every holiday gathering: these cookies taste like someone took the best parts of your childhood Christmas memories and compressed them into edible form. The secret lies in the ratio of brown sugar to white sugar, the temperature of your butter (room temp but still slightly cool, not that greasy melted mess), and a technique I stumbled upon that involves freezing the dough for exactly 22 minutes before baking. Yes, I timed it. Yes, I'm that person now. But trust me, once you taste the difference, you'll be setting timers too.
What really sets these apart from every other chocolate chip cookie recipe cluttering the internet is the way they balance richness with surprising complexity. The white chocolate chips bring creamy sweetness while the dark chocolate adds depth and sophistication. Those red and green sprinkles? They're not just decorative – they caramelize slightly at the edges, creating these incredible crispy bits that contrast beautifully with the chewy center. Let me walk you through every single step — by the end, you'll wonder how you ever made it any other way.
What Makes This Version Stand Out
Texture Perfection: We're talking about edges that crisp up like perfectly toasted marshmallows while the centers stay lusciously soft and almost gooey. Most recipes get this completely wrong, creating cookies that are either crispy throughout or disappointingly cakey. The secret lies in pulling them from the oven when they still look slightly underbaked in the very center – they'll finish setting as they cool, giving you that bakery-perfect texture contrast.
Chocolate Harmony: The combination of white and dark chocolate chips creates a flavor profile that's both sophisticated and crowd-pleasing. The white chocolate melts into creamy pockets of vanilla-scented sweetness, while the dark chocolate provides just enough bitter complexity to keep these from being cloyingly sweet. It's like having your favorite hot cocoa and your go-to dark chocolate bar in cookie form.
Holiday Magic: Those festive sprinkles do more than make these cookies Instagram-worthy (though they absolutely will crash your social media). When they hit the heat of the oven, the sugar in the sprinkles caramelizes slightly, creating these incredible crispy edges that shatter delicately when you bite into them. It's like having tiny, edible Christmas lights baked right into your cookies.
Foolproof Technique: I've tested this recipe with room temperature butter, cold butter, and accidentally-melted-in-the-microwave butter (don't ask). The precise temperature and timing I'm sharing works every single time, even if you're juggling holiday chaos, doorbell-ringing carolers, and a glass of mulled wine while baking. No fancy equipment needed – just a bowl, a spoon, and some patience.
Make-Ahead Champion: The dough freezes beautifully for up to three months, which means you can have fresh-baked cookies whenever the holiday spirit strikes. I keep logs of this dough in my freezer like edible insurance policies against unexpected guests, last-minute gift exchanges, or those 11 PM cravings that hit during holiday movie marathons.
Crowd Reaction Guarantee: I dare you to taste this and not go back for seconds. Actually, I double-dog dare you. Every time I've made these, someone inevitably asks for the recipe within the first five minutes. My mail carrier still talks about the batch I gave him three years ago. These cookies have converted more "I don't really like sweets" people than any other dessert I've ever made.
Ingredient Quality Flexibility: While I love using fancy European butter and premium chocolate, I've also made these with basic grocery store brands when the holiday budget was tight. The recipe is forgiving enough that even with economical ingredients, you'll still get cookies that taste like they came from an upscale bakery. Your secret's safe with me.
Inside the Ingredient List
The Flavor Foundation
Unsalted butter forms the rich, creamy backbone of these cookies, and using the good stuff really does make a difference. I learned this the hard way when I ran out mid-recipe and used margarine instead – the cookies spread into sad, greasy puddles that tasted like disappointment and artificial flavoring. The butter needs to be perfectly softened, meaning you can press your finger into it and leave an indent, but it's not greasy or starting to melt. This magical state happens at around 65-67°F, which is cooler than most people think. If you can bend the butter stick slightly without it cracking, you're in the sweet spot.
Both granulated and brown sugar play crucial roles here, and no, you can't just use all of one type unless you want subpar cookies (don't test me on this – I've done the legwork). The granulated sugar helps create those crisp edges we all love, while the brown sugar brings molasses notes and chewiness to the party. I prefer dark brown sugar for its deeper, more complex flavor, but light brown works beautifully too. Pack that brown sugar firmly into your measuring cup – we're not trying to save calories here, we're trying to make incredible cookies.
The Binding Agents
Two large eggs might seem like a simple ingredient, but they need to be at room temperature to incorporate properly with the butter mixture. Cold eggs can cause your beautifully creamed butter to seize up, creating little hard bits that never quite blend in. Take them out of the fridge about 30 minutes before you start baking, or place them in a bowl of warm water for 5-10 minutes if you're impatient (guilty as charged). The eggs provide structure and richness, helping create that perfect chewy texture we're after.
Vanilla extract is where I get a little snobbish – pure vanilla extract makes a noticeable difference over imitation. The real stuff adds these gorgeous floral notes that complement the chocolate perfectly. I've been known to add an extra splash beyond what's called for, especially when using Mexican vanilla, which has a particularly rich, almost spicy character. If you've ever wondered why bakery cookies taste different than yours, this might be part of the answer.
The Texture Crew
All-purpose flour provides the structure, but here's where things get interesting – different brands have different protein contents, which affects your final texture. I've had great success with King Arthur, Gold Medal, and even store brands, but if you want to get technical, aim for a flour with around 10-11% protein content. Too much protein makes tough cookies, too little and they'll spread into oblivion. The flour measurement is crucial here – spoon it into your measuring cup and level it off, don't scoop directly from the bag unless you want hockey pucks.
Baking soda and baking powder work together as leavening agents, but they have different jobs. The baking soda helps with browning and spread, while the baking powder gives a little lift. Most recipes get this completely wrong, using too much of one or the other. After countless tests, this ratio creates cookies that spread just enough while staying thick and chewy in the center. Skip either one and you'll notice the difference in both appearance and texture.
The Star Attractions
White chocolate chips bring creamy sweetness and vanilla notes, but not all white chocolate is created equal. Look for chips that list cocoa butter as one of the first ingredients, not palm oil or other fillers. The good stuff melts into these gorgeous pools of sweetness that contrast beautifully with the darker chocolate. I've used everything from Ghirardelli to store brands, and while premium chips do taste better, even the basic ones will make these cookies disappear faster than you can say "Santa's coming."
Dark chocolate chips provide the bitter balance that keeps these cookies from being cloyingly sweet. I like using 60-70% cacao chips for the perfect balance of chocolate intensity without being overwhelming. The contrast between the sweet white chocolate and the more sophisticated dark chocolate creates a flavor profile that appeals to both kids and adults. If you want to get fancy, chop up a high-quality dark chocolate bar instead of using chips – those irregular pieces create the most stunning chocolate distribution.
Holiday sprinkles are where the magic happens, transforming ordinary chocolate chip cookies into festive showstoppers. The red and green colors bleed slightly as they bake, creating these beautiful watercolor-like effects throughout the cookie. Don't be tempted to stir them in too vigorously – a gentle fold keeps them intact and prevents the colors from turning muddy. I've found that the longer, jimmies-style sprinkles work better than the tiny nonpareils, which tend to dissolve and disappear during baking.
The Method — Step by Step
- Start by positioning your oven rack in the center and preheating to 350°F. This temperature is crucial – too hot and the edges will burn before the centers set, too cool and the cookies will spread into flat discs. While the oven heats, line your baking sheets with parchment paper. I've tried silicone mats and directly greasing the pan, but parchment gives you the perfect balance of preventing sticking while allowing the bottoms to crisp properly. The slight insulation from the paper prevents the bottoms from getting too dark while the tops finish baking.
- In a medium bowl, whisk together the flour, baking soda, baking powder, and salt. This step seems basic, but it's crucial for even distribution of leavening agents. I've seen too many cookies with weird brown spots where the baking soda wasn't fully incorporated. Whisk for a full 30 seconds – set a timer if you need to. The mixture should be uniform in color with no streaks of white or yellow. Set this aside while you work on the wet ingredients, but keep it within arm's reach.
- Now for the fun part: creaming the butter and sugars. In a large bowl, beat the softened butter with both the granulated and brown sugar until the mixture is light and fluffy. This step incorporates air and starts dissolving the sugar crystals, which affects your final texture. Use medium speed and beat for about 3-4 minutes, scraping down the sides once or twice. The mixture should look pale and creamy, like thick frosting. If you rush this step, your cookies will be dense and greasy instead of light and chewy.
- Add the eggs one at a time, beating well after each addition. The mixture might look slightly curdled at first – that's normal. Once both eggs are incorporated, add the vanilla and beat until combined. The batter should be smooth and glossy, with no visible streaks of egg white. This is the moment of truth where everything starts coming together, and your kitchen will start smelling like you're actually accomplishing something delicious.
- Gradually add the flour mixture to the butter mixture, mixing just until combined. Here's where most recipes go wrong – they tell you to mix until smooth, which leads to tough, overworked cookies. You want to stop as soon as the flour disappears, even if the dough looks slightly streaky. Those streaks will disappear as you fold in the mix-ins. Overmixing develops gluten, which turns your tender cookies into hockey pucks. Trust the process and step away from the mixer.
- Time for the best part – folding in the chocolate chips and sprinkles. Use a rubber spatula and fold gently, just enough to distribute everything evenly. The dough should be thick and slightly sticky, with the chocolate chips and sprinkles visible throughout. Don't overmix here either – you want those beautiful sprinkles to stay intact for visual appeal. The dough should hold its shape when you scoop it, but still be soft and pliable.
- Cover the dough and refrigerate for at least 30 minutes, or up to 24 hours. This step is crucial for developing flavor and preventing excess spreading. As the dough chills, the flour hydrates and the butter firms up, creating a more complex flavor and better texture. I've chilled this dough for up to 3 days with excellent results – the cookies actually get better with a longer rest. If you can plan ahead, make the dough the night before and let it rest overnight.
- When you're ready to bake, use a medium cookie scoop or two spoons to portion the dough into balls about 2 tablespoons each. Place them on your parchment-lined baking sheet, leaving about 2 inches between each cookie. They'll spread as they bake, so give them room to grow. For extra visual appeal, press a few additional chocolate chips and sprinkles on top of each cookie ball before baking – this ensures they look as good as they taste.
- Bake for 10-12 minutes, rotating the pan halfway through. The cookies are done when the edges are golden brown but the centers still look slightly underbaked. They'll continue cooking on the hot pan after you remove them from the oven, so don't wait until they look fully set. The tops should be lightly golden with the chocolate chips looking melty and glossy. Let them cool on the pan for 5 minutes before transferring to a wire rack – this is the hardest part, but resist the urge to move them too early or they'll break apart.
That's it – you did it. But hold on, I've got a few more tricks that'll take this to another level...
Insider Tricks for Flawless Results
The Temperature Rule Nobody Follows
Here's a confession: I'll be honest — I ate half the batch before anyone else got to try it, and I blame the temperature game entirely. Your butter needs to be at that perfect 65-67°F sweet spot, which is cooler than most bakers think. Too warm and your cookies spread into greasy puddles; too cold and they stay domed and cakey. I keep a kitchen thermometer handy and check the butter before starting. If you press your finger into it and it leaves an indent but doesn't feel greasy, you're golden. This single tip has transformed more baking disasters into triumphs than any other technique I know.
Why Your Nose Knows Best
Picture yourself pulling this out of the oven, the whole kitchen smelling incredible... but here's the thing most people miss: your nose is actually a better timer than any clock. When you start smelling that perfect balance of caramelized sugar and toasted butter, your cookies are about 2 minutes from done. This aroma indicates the Maillard reaction is happening – that's the chemical process that creates hundreds of flavor compounds. A friend tried skipping this step once — let's just say it didn't end well. Set a timer as backup, but trust your nose for the final call.
The 5-Minute Rest That Changes Everything
After you remove the cookies from the oven, let them rest on the hot pan for exactly 5 minutes before transferring to a cooling rack. This isn't just idle time – the residual heat continues cooking the centers while the bottoms set up properly. Move them too early and you'll have cookie casualties; wait too long and they'll stick to the parchment. I set a timer and have my cooling rack ready to go. Those cookies that look too soft when you first pull them out will transform into perfectly chewy centers with crisp edges during this crucial rest period.
Creative Twists and Variations
This recipe is a playground. Here are some of my favorite ways to switch things up:
Mint Chocolate Wonderland
Replace half the vanilla extract with peppermint extract and swap the white chocolate chips for mint chocolate chips. The combination of cool mint with rich chocolate screams winter wonderland, and the red and green sprinkles complement the mint theme perfectly. These disappear faster than snowflakes on a warm day at my house, especially when I serve them with hot cocoa.
Salted Caramel Dream
Fold in chopped soft caramels along with the chocolate chips, and sprinkle a tiny pinch of flaky sea salt on top of each cookie before baking. The caramels melt into gooey pockets of sweetness while the salt balances everything out. It's like having a salted caramel truffle hidden inside your already perfect cookie. Pro tip: cut the caramels into small pieces so they distribute evenly and don't create giant molten pockets.
Nutty Holiday Classic
Add 1 cup of toasted chopped pecans or walnuts to the dough along with the chocolate chips. Toasting the nuts first brings out their oils and intensifies their flavor, creating these incredible bursts of nuttiness throughout the cookie. The combination of toasted nuts with both types of chocolate reminds me of those fancy holiday gift baskets, but in cookie form.
White Chocolate Cranberry Christmas
Replace the dark chocolate chips with dried cranberries for a festive red and white color scheme. The tart cranberries provide the perfect counterpoint to the sweet white chocolate, and they plump up slightly during baking, creating these juicy little surprises. These have become my go-to for cookie exchanges because they look and taste so different from traditional chocolate chip cookies.
Double Chocolate Indulgence
Add 1/4 cup of cocoa powder to the flour mixture and use all white chocolate chips. This creates a rich, fudgy cookie with the white chocolate chips providing sweet contrast against the deep chocolate base. It's like having a brownie and a cookie have a beautiful baby, and the holiday sprinkles make them look like Christmas ornaments.
Spiced Holiday Edition
Add 1 teaspoon of cinnamon and 1/4 teaspoon of nutmeg to the flour mixture for warm holiday spice notes. This version tastes like someone took your favorite snickerdoodle and your favorite chocolate chip cookie and merged them into one incredible holiday treat. The spices complement both types of chocolate beautifully, and your whole house will smell like Christmas morning while they bake.
Storing and Bringing It Back to Life
Fridge Storage
These cookies stay fresh in an airtight container at room temperature for up to 5 days, but here's the real trick: add a small piece of bread to the container. The bread releases moisture slowly, keeping your cookies soft and chewy instead of turning them into hockey pucks. Replace the bread every day or two as it dries out. I've kept cookies fresh for a full week using this method, though honestly, they've never lasted that long in my house.
Freezer Friendly
Both the baked cookies and the dough freeze beautifully. For baked cookies, let them cool completely, then layer between sheets of parchment paper in a freezer-safe container. They'll keep for up to 3 months and thaw at room temperature in about 30 minutes. For dough, scoop into balls and freeze on a baking sheet, then transfer to a freezer bag. You can bake straight from frozen – just add an extra 2-3 minutes to the baking time. Having frozen cookie dough on hand has saved me from countless last-minute holiday emergencies.
Best Reheating Method
To revive slightly stale cookies, wrap them in a damp paper towel and microwave for 8-10 seconds. This creates a little steam that brings back the soft, chewy texture. For cookies that need more help, place them on a baking sheet in a 300°F oven for 3-4 minutes. The key is warming them gently – you're not trying to cook them again, just wake them up. Add a tiny splash of water before reheating — it steams back to perfection, especially if you're warming multiple cookies at once.